Sound from power tools and machinery often makes it hard to concentrate and can disturb family members or neighbors. Fortunately, you can take control of noise in your workspace by tackling soundproofing yourself. This guide on DIY soundproofing home workshop will walk you through choosing the right materials, installing wall and ceiling treatments, sealing gaps around doors and windows, and maintaining your workshop for long-term quiet. For acoustic panels, check out top options here: best acoustic foam panels.
Whether you operate loud power tools like table saws or enjoy tinkering with drills, reducing noise ensures a safer, more comfortable environment. In the sections below, we’ll break down everything from noise source identification to installation tips, giving you a practical route to a quieter workshop. By following these mid-funnel, actionable steps, you’ll achieve significant noise reduction without professional help.
Understanding Noise Sources in Your Home Workshop
Before you begin, it’s essential to identify how noise travels in your workshop. There are two primary types: airborne noise and structure-borne noise. Airborne noise travels through the air, like the roar of a belt sander or air compressor. Structure-borne noise moves through walls, floors, and ceilings when machinery vibrates against the building frame.
Common offenders in a workshop include table saws, routers, planers, and compressors. Each tool has its characteristic decibels and vibration frequency. Measuring these with a smartphone app can help you prioritize which areas need the most attention. Tools placed on unstable surfaces often generate more structure-borne noise, so stabilizing workbenches is a first quick fix.
Understanding your workshop’s layout is also critical. Exterior walls transmit sound to the outside and into adjacent rooms. Shared walls with living spaces can be especially problematic. Mapping noise hotspots will guide your material selection and installation approach, helping you allocate budget toward high-impact treatments first.
Once you recognize the dominant noise sources, you can match solutions to problems. For example, if airborne noise from a compressor is an issue, focus on wall and ceiling absorption. If your bench sander is causing low-frequency thumps throughout the house, prioritize decoupling and mass damping methods to isolate vibrations.
Essential Soundproofing Materials for Workshops
Choosing suitable materials is the backbone of any soundproofing project. Below are the most effective products for workshop noise control:
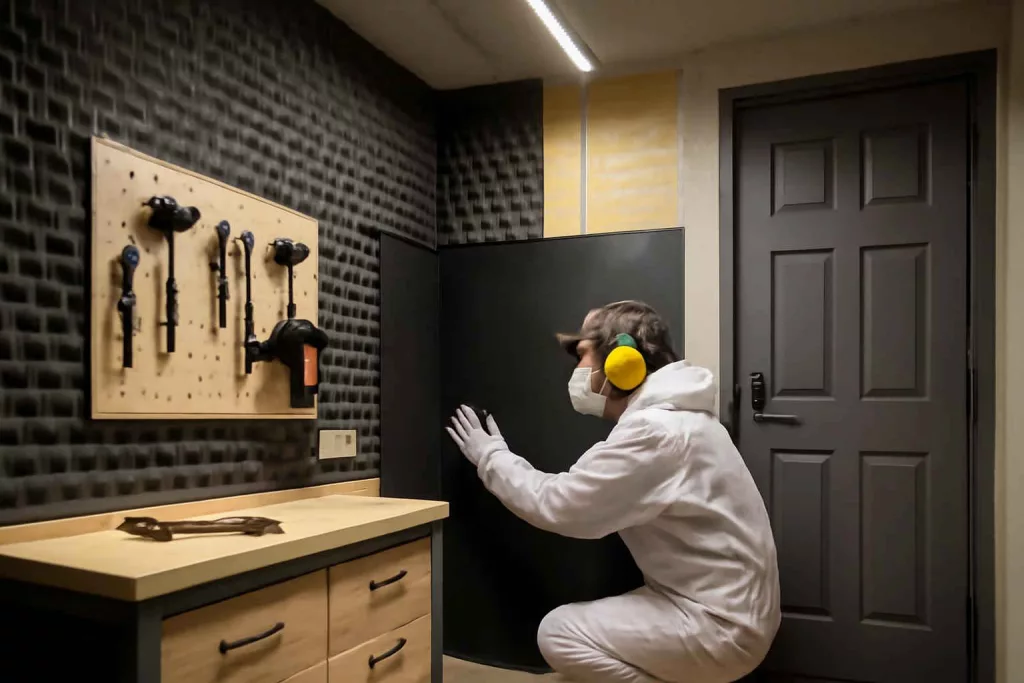
- Acoustic Panels: These foam panels absorb mid to high-frequency noise. They’re affordable and easy to mount. For a broader spectrum, pair them with thicker panels or bass traps at room corners.
- Mass-Loaded Vinyl (MLV): A dense, flexible barrier that adds mass to walls or ceilings. It blocks airborne noise and enhances the effectiveness of drywall layers. You can find quality sheets here: mass-loaded vinyl.
- Soundproof Insulation: Rock wool or mineral wool insulation fits between studs, reducing airborne sound. Its fibrous structure performs better than standard fiberglass in workshops with fluctuating temperatures.
- Acoustic Caulk: Use this sealant to fill gaps and cracks around frames, vents, and outlets. Proper sealing prevents sound leaks. We recommend acoustic caulk for noise reduction for reliable performance.
- Resilient Channels: Metal strips that decouple drywall from framing. They reduce vibration transmission and enhance the performance of drywall assemblies.
Combine these materials strategically—acoustic panels for absorption, MLV for blocking, and resilient channels for decoupling—for a comprehensive approach. Investing in quality products upfront minimizes trial and error and ensures long-lasting benefits.
Wall Soundproofing Methods
Walls are the primary barrier for airborne noise, making them a key focus area. Effective wall treatments often involve layering materials to absorb, block, and decouple sound:
Decoupling with Resilient Channels
Resilient channels create a small air gap between drywall and studs. By fixing channels perpendicular to framing and screwing drywall into channels instead of studs, you interrupt the path of vibration. This simple modification can cut noise transmission by up to 60%.
Layering Drywall and MLV
First, mount a layer of MLV directly onto studs. Then, install one or two layers of 5/8-inch drywall, applied with damping compound between layers. The combination of mass from MLV and stiffness from multiple drywall layers forms a barrier against airborne sound.
Sealing Gaps and Joints
Even small gaps can degrade performance. Use acoustic caulk along edges of drywall, electrical outlets, and door frames. Seal junctions between different materials to maintain a continuous barrier. Proper sealing ensures that blocking and decoupling measures work to their fullest.
Floor and Ceiling Soundproofing Strategies
Floors and ceilings often transmit structure-borne noise between levels. Whether you have a basement workshop or a garage above living space, addressing both surfaces matters.
Floor Underlayment and Mats
Install a thick rubber underlayment beneath plywood or laminate flooring. The material dampens impact noise from dropped tools and reduces vibration. Alternatively, place anti-fatigue mats for workshop in high-use areas to absorb shock and further isolate equipment.
Ceiling Isolation Techniques
Similar to walls, use resilient channels or isolation clips to hang drywall from the ceiling joists. Add MLV above the drywall or fill joist spaces with mineral wool insulation to cut airborne noise traveling upstairs. If you share a ceiling with living areas, double drywall layers can significantly reduce sound transfer.
Sealing Doors and Windows to Reduce Sound Leak
Doors and windows are natural weak points in any sound barrier. Effective sealing is crucial for maintaining workshop privacy and neighborhood harmony.
Weatherstripping and Door Sweeps
Attach adhesive weatherstripping around door frames to seal gaps. Install a door sweep at the bottom to block drafts and sound. For heavy workshop doors, consider upgrading to solid-core or acoustic-rated doors for better performance.
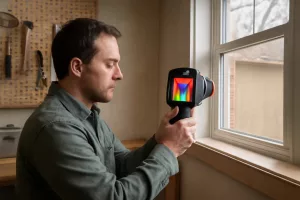
Window Inserts and Seals
Roughly 30% of noise enters through windows. Install removable acoustic window inserts with a clear acrylic panel and rubber gasket. Alternatively, apply acoustic sealant around the frame and hang thick soundproof curtains when not in use.
Step-by-Step DIY Installation Guide
Bringing it all together requires careful planning and execution. Follow these steps for a successful DIY soundproofing project:
1. Planning and Measurement
Map your workshop layout and take precise measurements of walls, ceiling, doors, and windows. Estimate material needs and order extra to account for cuts and mistakes.
2. Surface Preparation
Clean surfaces and remove fixtures. Label stud locations and ensure wiring or plumbing within walls won’t interfere with installation. Lay down protective sheeting on the floor to catch debris.
3. Material Installation
Install resilient channels on walls and ceilings first. Next, apply MLV or insulation between studs and joists. Seal all edges with acoustic caulk. Finally, secure drywall layers, mount acoustic panels, and fit door sweeps.
4. Finishing Touches
Paint drywall if desired. Reinstall trim and window sills, ensuring caulk lines remain sealed. Hang tools and shelving carefully to avoid creating new sound bridges.
Maintenance and Additional Noise Reduction Tips
After soundproofing, maintain your workshop to preserve performance. Regular checks and smart habits can enhance long-term results.
Equipment Placement
Keep heavy machinery on anti-vibration pads. Place compressors and heavy saws away from shared walls if possible. Position tools on solid, stable bases to minimize structure-borne noise.
Regular Inspection
Inspect seals around doors and windows annually. Check for cracks in walls where caulk may have shrunk. Replace worn-out weatherstripping and tighten screws on resilient channels or mounts.
Future Upgrades
Consider adding more acoustic panels or bass traps if you introduce new high-powered machinery. Advanced upgrades include building a room-within-a-room structure or installing active noise cancellation systems for extreme cases.
Conclusion
Soundproofing a home workshop doesn’t require professional expertise when you understand the principles of absorption, blocking, and decoupling. By choosing the right materials—acoustic panels, mass-loaded vinyl, quality insulation, and acoustic caulk—and following systematic installation steps, you can drastically reduce noise levels. Sealing doors and windows, isolating floors and ceilings, and performing regular maintenance ensure lasting results. Enjoy a quieter, more productive workshop while preserving peace for your family and neighbors. For further reading on workshop insulation tips, explore our acoustic caulk guide. If you need supplementary noise reduction solutions, check out top-rated soundproof curtains at Amazon: soundproof curtains.