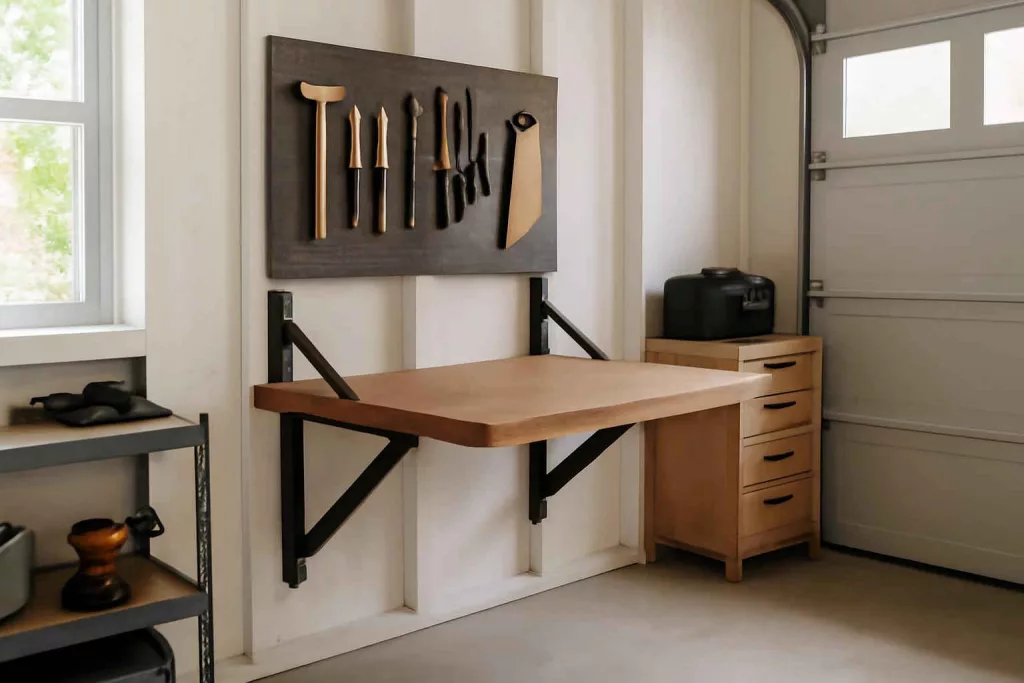
Small workshops and garages often struggle with limited floor space, making a permanent workbench impractical. A DIY fold-down workbench offers the perfect solution, providing a sturdy workspace when you need it and folding away neatly against the wall when you don’t. In this guide, you’ll learn how to design, build, and install a reliable fold-down workbench that supports heavy-duty tasks while preserving precious space. You’ll also find tips for sourcing quality components like heavy-duty folding table hinges and ensuring long-term durability. Whether you’re a weekend DIYer or a serious home improvement enthusiast, this step-by-step tutorial will help you transform any small workshop into an efficient, multi-functional work area.
Planning Your Fold-Down Workbench
Effective planning is the cornerstone of a successful DIY fold-down workbench project. Start by identifying the wall or area where you’ll mount the workbench. Measure the available width, height, and depth to determine the maximum bench size that fits without obstructing doors, windows, or electrical outlets. Consider the typical tasks you perform—woodworking, metalworking, electronics—because weight capacity and surface durability will vary based on usage.
Next, set a target load capacity. For most DIY tasks, a workbench supporting 250–300 pounds is adequate. If you plan to use heavy bench grinders or large power tools, bump the capacity to 400–500 pounds by selecting robust support brackets and hinges. Sketch a scaled diagram of your bench design, including the work surface dimensions, hinge locations, and support arm geometry. This blueprint ensures precise cuts and accurate hardware placement.
Finally, verify that the mounting wall can handle the load. Stud walls will require at least two 2×4 studs spaced 16 inches apart on center. If you have a masonry wall, use appropriate anchors rated for heavy loads. Confirm local building codes for wall-mounted structures, and prepare any necessary reinforcements. Proper planning minimizes surprises during construction and maximizes safety and usability.
Essential Materials and Tools You’ll Need
Gathering the right materials and tools in advance streamlines the build process. For this project, you’ll need:
- Materials:
- 3/4″ hardwood plywood or MDF sheet (24″–36″ deep, custom width)
- Heavy-duty folding hinges or gate hinges rated for 300+ lbs (self-closing heavy-duty hinges)
- Locking support arms or fold-down shelf brackets rated to match hinge capacity
- Lag screws (3/8″ x 3″) and washers for stud mounting
- Wood screws (2″ and 3″) and finishing screws
- Wood glue and edge banding or trim boards
- Paint, stain, or UV-resistant clear coat
- Tools:
- Circular saw or table saw for cutting plywood
- Drill/driver with countersink bit set
- Stud finder, level, and framing square
- Clamps and sawhorses
- Measuring tape and pencil
- Sandpaper (120–220 grit) or random orbital sander
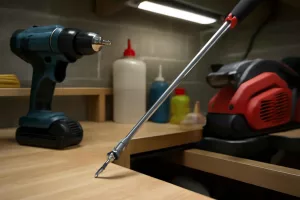
By preparing all necessary components, you’ll avoid work interruptions and maintain momentum from framing to finishing. If you need extra storage or tool organization near your bench, consider mounting a DIY Magnetic Tool Holder above the bench for quick-access tool storage, or integrate a small cyclone dust collection system for cleaner operation by following our DIY Cyclone Dust Collector guide.
Constructing the Workbench Frame
With your measurements and materials ready, begin constructing the workbench frame. Cut the plywood to your desired tabletop dimensions using a circular saw or table saw. Ensure the edges are straight and square by guiding the saw with a straightedge or track system. Sand all cut edges smooth to prevent splinters and improve the finish.
Create a simple apron around the tabletop by attaching 1×4 or 1×3 hardwood strips along the three exposed edges. The apron adds rigidity and hides plywood edges. Apply wood glue along the strip joint, clamp in place, then secure with 2″ wood screws spaced 8″ apart. Countersink the screws and fill with wood filler for a flush finish.
Next, reinforce the underside of the tabletop with cross-supports. Cut 2×2 strips to fit between the apron pieces at 12″–16″ intervals. Position them perpendicular to the bench front, glue them in place, then screw from the underside into the supports. This grid of supports distributes loads evenly and prevents sagging over time. Double-check that everything rests flat; an uneven support network leads to a wobbly bench.
Once the frame is fully assembled, sand the entire surface, including the supports and apron. A smoother surface ensures paint or stain adheres evenly. Wipe away dust with a tack cloth before moving on to hinge installation.
Installing the Folding Mechanism
The folding mechanism is the heart of your space-saving bench. Choose hinges and support arms rated for at least the total bench weight plus a safety margin of 20%. Place the heavy-duty folding hinges along the bench back edge, spacing them evenly—typically three hinges for a bench width under 48″ or four for wider surfaces. Mark the hinge locations on both bench and wall backing board for precise alignment.
If you’re mounting to drywall over studs, install a backing board (3/4″ plywood) across the studs first. Secure the board with 3/8″ lag screws into studs, then attach the hinges to the board. For masonry walls, use wedge anchors or masonry screws rated for the load. Always predrill holes to avoid splitting wood and ensure anchor alignment.
After installing hinges, test the bench movement. It should fold down smoothly and lock securely in the open position with the support arms. If it doesn’t align perfectly, adjust hinge positions slightly. Tighten all fasteners once alignment is confirmed. Regularly inspect hinge and bracket hardware for wear and retighten as needed to maintain stability.
Attaching and Aligning the Work Surface
With the hinge mechanism in place, mount the bench top. Lift the bench to the open position and engage your locking support arms. Verify the surface is level front-to-back and side-to-side using a spirit level. Shim beneath the bench back edge if needed to achieve perfect level—this step prevents tools from rolling off and ensures precision work.
Secure the bench top to the hinge leaves using the screws provided with your hinges. If your hinges require separate mounting plates, follow the manufacturer’s template for drilling. Double-check the position of each screw to ensure they don’t protrude through the working surface. Test folding and unfolding several times to ensure no binding occurs between the bench and wall.
For added flexibility, consider adding a removable vise or clamping block to one corner of the bench. Attach a steel mounting plate beneath the tabletop before finishing, then install a quick-release vise when needed. This modular approach allows you to swap out attachments like a bench grinder, cordless charging station, or small drill press based on current projects.
Reinforcing Structure and Adding Finishes
Once the bench is mechanically sound, reinforce the structure and apply finishes for aesthetics and durability. Add diagonal braces beneath the bench surface if you notice any lateral play. Cut 1×2 strips to fit from the support arms’ base to the underside of the bench and secure with screws and glue. This reinforcement is especially beneficial for benches wider than 36″.
Fill any screw holes and gaps with wood filler. Sand smooth once dry, progressing from 120 to 220 grit. Wipe the surface clean before staining or painting. For a natural wood look, apply a penetrating wood stain followed by two coats of polyurethane or clear coat. For a more industrial or modern workshop, use a durable enamel paint—choose colors that match your workspace lighting and décor.
Apply edge banding around plywood edges to conceal layers and protect against moisture. Iron-on banding is quick to install; trim the excess with a utility knife and sand the edges for a seamless finish. Proper finishing not only enhances the bench’s appearance but also extends its lifespan by protecting it from spills, wear, and humidity.
Mounting to the Wall and Safety Checks
With your bench fully assembled and finished, it’s time for final installation. If you haven’t already, install the plywood backing board across the wall studs. Ensure it’s flush and level using a long level. Mark stud locations and drill pilot holes before driving lag screws to avoid wood splitting.
Attach the bench hinges to the backing board, then test the folding action under full load. Place a heavy object or sandbags on the bench and cycle it open and closed to confirm stability. Check for any movement at the wall connection and tighten fasteners as needed. Ensure support arms engage securely and retract smoothly when folding the bench.
Note: Use locking safety pins or quick-release pins on support arms to prevent accidental collapse. If children or pets use the space, consider adding a safety latch that locks the bench in the folded position when not in use.
Maintenance Tips for Longevity
Proper maintenance keeps your fold-down workbench safe and functional for years. Inspect the hinges and support brackets every 2–3 months. Tighten any loose screws and lubricate hinge pivots with a silicone-based spray to prevent squeaking and wear. Replace any worn washers or pivot pins immediately to avoid sudden failure under load.
Check the tabletop for dings, stains, or warping. Refresh the finish yearly by lightly sanding and reapplying polyurethane or paint. Wipe the surface clean after each project to prevent debris buildup that can scratch your workpieces. For bench-mounted tools, remove and store them separately when not in use to avoid unnecessary strain on the hinges.
To extend the life of your cordless tool batteries and keep power tools at peak performance, follow our guide on how to extend the life of power tool batteries. Properly maintained tools paired with a reliable fold-down workbench will transform your small workshop into a versatile, efficient workspace.
Conclusion
Constructing a DIY fold-down workbench is an excellent way to maximize usable space in small workshops and garages. By carefully planning your design, sourcing quality materials, and following systematic construction steps, you’ll end up with a durable, space-saving work surface tailored to your specific needs. With regular maintenance and reinforcement, your fold-down workbench will provide reliable performance for years to come, supporting everything from light assembly tasks to heavy-duty projects. Embrace this space-efficient solution and reclaim valuable floor area in your workshop without sacrificing functionality.