Keeping your coffee maker in top condition not only ensures better-tasting coffee but also extends the life of your machine. Over time, minerals and oils build up inside the water reservoir, carafe, and brew basket, leading to clogging, inconsistent brewing temperatures, and off-flavors. In this guide, you’ll discover how to clean coffee maker components thoroughly, remove limescale, and use effective DIY and commercial methods to restore peak performance. By incorporating simple maintenance routines and following our step-by-step cleaning process, you can enjoy fresh coffee every day.
Why Cleaning Your Coffee Maker Matters
Regularly cleaning and descaling your coffee maker prevents mineral deposits (limescale) from accumulating. Hard water contains calcium and magnesium, which form scale inside the machine’s heating element, tubing, and reservoir. This buildup reduces water flow and heating efficiency, causing uneven brewing temperatures and weak or bitter coffee. Additionally, residual oils from coffee beans stick to internal parts, promoting mold and bacterial growth that may affect your health and the taste of your brew.
Using a reliable coffee machine descaler can help dissolve stubborn limescale. However, many homeowners prefer natural alternatives like white vinegar or citric acid, which are safe and cost-effective. Whichever method you choose, establishing a cleaning routine every 1–3 months—depending on usage and water hardness—is crucial for preserving your appliance.
Signs Your Coffee Maker Needs Cleaning
Watch for these common warning signs that indicate it’s time for a thorough coffee maker cleaning:
- Slow Brewing: If your machine takes significantly longer to brew than usual, scale buildup may be clogging filtration pathways.
- Unpleasant Taste: Stale, bitter, or metallic flavors often result from accumulated coffee oils or limescale in the brewing chamber.
- Strange Noises: Gurgling, squeaking, or hissing sounds can signal trapped air in clogged tubes or scale on heating elements.
- Visible Deposits: White or chalky residue inside the water reservoir and carafe suggests mineral buildup.
- Water Leaks: Scale deposits can warp seals and gaskets, leading to small leaks during brewing cycles.
Address these issues promptly to avoid more extensive repairs or replacement costs. A clean coffee maker not only performs better but also ensures a hygienic brewing environment free of mold and bacteria.
Types of Coffee Makers and Their Cleaning Requirements
Coffee machines come in various designs, each requiring specific maintenance steps. Understanding your model helps you clean it effectively and avoid damage.
Drip Coffee Makers
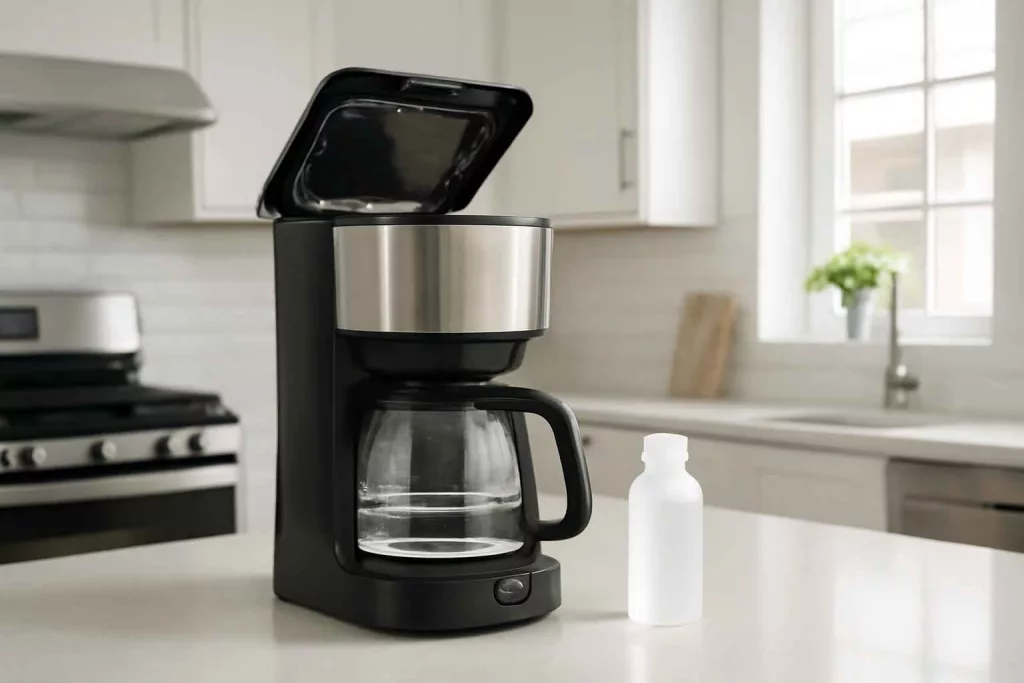
These common machines use a water reservoir, heating element, and drip basket. Clean the carafe, filter basket, and reservoir monthly. Descale the unit with vinegar or a commercial descaler quarterly if you have hard water. Remove and wash removable parts after each use.
Single-Serve Pod Machines
Popular for convenience, these units require descaling every 2–3 months. Run a descale cycle using vinegar or a specialty kit designed for pod machines. Clean the pod holder and drip tray weekly to prevent mold and coffee grounds buildup.
Espresso Machines
Espresso machines have high-pressure boilers and many small components. Backflush with a blind filter and cleaning powder recommended by the manufacturer every 1–2 weeks. Descale monthly with a low-foaming solution. Wipe the steam wand and portafilter after each use to remove milk residue.
French Press and Pour-Over
Although not powered appliances, manual brewers benefit from regular cleaning. Disassemble and wash all parts with warm, soapy water after each use. Soak the filter screen of French presses weekly to remove fine grounds and oils.
Regardless of type, always consult your manufacturer’s instructions for model-specific guidelines. Proper maintenance preserves warranties and ensures safe operation.
DIY Cleaning Methods: Natural vs. Commercial Solutions
Choosing the right cleaning agent depends on convenience, cost, and preference for natural products.
White Vinegar
White vinegar is a popular descaling agent due to its acidity and affordability. Mix equal parts vinegar and water, pour into the reservoir, and run a full brew cycle. Let the solution sit for 30 minutes before completing the cycle. Rinse with two or more cycles of fresh water to eliminate vinegar residue.
Citric Acid
Available as a powder, citric acid is food-safe and leaves no strong odor. Dissolve 2 tablespoons of citric acid in a full reservoir of water. Run a brew cycle, let it rest for 15 minutes, then finish the cycle. Rinse thoroughly with fresh water.
Commercial Descalers
Formulated specifically for coffee machines, commercial descalers offer low-odor formulations and foaming action for deeper cleaning. Follow package instructions for dosage and cycle recommendations. These products are often faster than vinegar but may be more expensive in the long term.
Using a Handheld Steam Cleaner
For stubborn stains on the exterior and tight crevices, a handheld steam cleaner can soften grime and leftover grounds without chemicals. Always allow the machine to cool before using steam around seals and electronics.
Regardless of method, always disassemble removable parts and wash them separately with warm, soapy water. Dry thoroughly before reassembling to prevent mold growth.
Step-by-Step Guide to Cleaning Your Coffee Maker
Follow these detailed steps to perform a complete coffee maker cleaning session that covers every component.
1. Prepare and Disassemble
Unplug the machine and let it cool if recently used. Remove the carafe, filter basket, and any detachable water filters. Empty leftover coffee grounds and rinse the carafe. Remove the filter basket and wash with warm, soapy water. If your machine has a reusable mesh filter, soak it in a vinegar solution for 15 minutes, then rinse well.
2. Clean the Reservoir and Heating Element
Check the manufacturer’s manual to locate the heating element and water reservoir. Fill the reservoir halfway with a cleaning solution of your choice (vinegar, citric acid, or commercial descaler). For vinegar, use a 1:1 ratio with water; for citric acid, dissolve 2 tablespoons in plain water. Avoid overfilling to prevent overflow.
3. Run the Descaling Cycle
Place an empty carafe under the brew basket. Turn on the machine and initiate a full brew cycle. Pause halfway through (if your machine allows) and let the solution soak inside for 30 minutes. This dwell time maximizes scale removal. Resume and complete the cycle.
4. Rinse Thoroughly
Discard the solution and rinse the carafe. Refill the reservoir with clean water and run two to three full cycles to flush out any remaining cleaning agent. Check for vinegar or descaler smells; if present, run additional rinse cycles until odor-free.
5. Clean Exterior and Accessories
Wipe the exterior surfaces, control panel, and warming plate with a damp cloth. Use a mild dish soap if necessary, then dry with a soft towel. Clean the drip tray and any external accessories. For stuck-on spills, apply a small amount of baking soda paste, scrub gently, and wipe clean.
6. Reassemble and Test
After all parts are completely dry, reassemble the filter basket and carafe. Fill the reservoir with fresh water and brew a test pot. Discard this coffee, then brew again to enjoy your first properly cleaned cup.
For more home appliances tips, explore our category page dedicated to maintenance and cleaning guides designed for busy households.
Preventative Maintenance Tips
Implement these simple habits to reduce the frequency of deep cleanings and keep your machine running smoothly:
- Use Filtered Water: Hard water accelerates scale buildup. A water filter pitcher or built-in machine filter helps reduce minerals.
- Empty Grounds Promptly: Used coffee grounds can become moldy if left in the basket. Discard grounds and rinse after each brew.
- Wipe Drip Tray and Exterior: Clean spills immediately to prevent stains and sticky residue.
- Schedule Monthly Descale Cycles: Even if your machine appears clean, a light monthly descaling prevents heavy buildup.
- Replace Filters Regularly: If your machine has charcoal or water filters, adhere to replacement timelines in the manual to maintain water quality.
- Organize Cleaning Supplies: Keep a bottle of commercial descaler or a box of citric acid in your kitchen cleaning area. Pair it with other kitchen organization tools like kitchen organization liners for streamlined maintenance.
By following these recommendations, you’ll minimize scale buildup and enjoy consistent brewing results with minimal effort.
When to Seek Professional Service
While most coffee maker maintenance is DIY-friendly, certain issues warrant professional repair or manufacturer service:
- Electrical Malfunctions: If your machine won’t power on or trips your circuit breaker, stop using it and consult a technician.
- Persistent Leaks: Internal seal failure may cause water to escape. A technician can replace worn gaskets safely.
- Heating Failures: If the machine heats water inconsistently or fails to reach proper brewing temperatures after descaling, a heating element or thermostat may be faulty.
- Unusual Noises: Grinding, continuous gurgling, or rattling noises can indicate internal component wear that requires disassembly and repair by a qualified professional.
For issues under warranty, contact the manufacturer before attempting repairs. Document your cleaning and maintenance routines to support warranty claims if needed.
Conclusion
A well-maintained coffee maker delivers better flavor, consistent performance, and a longer lifespan. By understanding when cleaning is necessary, choosing the right cleaning method, and following our comprehensive step-by-step guide, you can tackle limescale, coffee oil residues, and everyday grime with confidence. Incorporate preventative maintenance tips and schedule regular descaling cycles to keep your machine in peak condition.
Whether you prefer natural solutions like vinegar and citric acid or commercial descalers, dedicating time each month to coffee maker care ensures every cup tastes just as it should. Brew on—and enjoy the perfect cup every time!