A home generator switch gear, often referred to as a transfer switch, is the critical control point that safely toggles your household electrical load between utility power and backup power from your generator. Installing the correct switch gear not only ensures seamless power failover but also complies with electrical codes and protects your family and equipment.
Whether you’re installing a manual transfer switch or an Automatic Transfer Switch (ATS), understanding the components, wiring requirements, and safety protocols is essential. With the right tools and materials—many of which you can find on Amazon by searching transfer switches on Amazon—you can complete a professional-grade installation that meets code requirements. Backing up your generator work with reliable gear enhances your home’s resilience during outages and storms.
Beyond the switch gear itself, consider pairing your generator with portable power stations for home emergency backup to cover sensitive electronics or smaller circuits. In this guide, we’ll cover types of switch gear, installation steps, required tools and materials, maintenance best practices, and top-rated models to help you make an informed choice for lasting performance.
Understanding Home Generator Switch Gear
Home generator switch gear, commonly known as transfer switches, provide a safe and reliable method to disconnect your home from the grid and connect it to generator power during an outage. There are two main types:
Manual Transfer Switches
Manual transfer switches require a qualified user to physically flip a switch or operate a lever to change the power source from utility to generator. These switches are cost-effective and ideal for homeowners comfortable with basic electrical tasks. Manual switches typically support 30A or 50A circuits and are suited for powering essential loads like refrigerators, lights, and small AC units.
Automatic Transfer Switches (ATS)
An ATS senses the loss of utility power and automatically starts the generator and switches loads without human intervention. They are often integrated with standby generators and are required by code for many whole-house generator installations. An ATS improves response time, minimizes downtime, and eliminates the need for manual intervention—ideal for critical systems like heating, sump pumps, or medical equipment.
When selecting switch gear, consider voltage (120V vs 240V), amperage rating, number of circuits, and whether you need indoor or outdoor-rated enclosures. Ensuring that your switch gear is UL listed and meets NEC requirements is crucial for safety and insurance compliance.
Why Proper Switch Gear is Essential
Improper or undersized switch gear can lead to dangerous backfeeding, which can injure utility workers, damage equipment, or start fires. A professionally installed transfer switch isolates your home from the grid, ensuring generator output flows only through your home circuits. This isolation prevents synchronization issues and protects both the utility network and your generator.
Local electrical codes and the National Electrical Code (NEC) mandate specific installation practices for switch gear. For instance, an ATS installation may require a dedicated disconnect, proper grounding, and labeled load circuits. Failing to meet these standards can void warranties, violate insurance policies, or result in fines.
For homeowners looking to enhance resilience, combining a generator and switch gear with a portable station or UPS system creates layered protection. While a generator and ATS will handle heavy loads like HVAC, a UPS or smart home safety devices keep essential electronics safe during voltage fluctuations.
Partnering with a licensed electrician for switch gear installation ensures the work is up to code and inspected. Whether you opt for a DIY-friendly manual switch or a professional-grade ATS, proper switch gear is the backbone of a reliable standby power system.
Tools & Materials Needed for Switch Gear Installation
Completing a home generator switch gear installation requires precision tools, quality materials, and safety gear. Below is a comprehensive list to ensure you’re prepared:
- Transfer Switch Kit: Manual or Automatic Transfer Switch rated for your generator size.
- Electrical Panel Wiring: Copper conductors sized per NEC, often #4 AWG or #6 AWG for 50A circuits.
- Circuit Breakers: Compatible breakers for the switch slots and load circuits.
- Conduit & Fittings: PVC or metallic conduit to protect wiring between generator, switch, and panel.
- Disconnect Switch: If required by code for outdoor installations.
- Grounding Rod & Clamp: To properly earth your transfer switch enclosure.
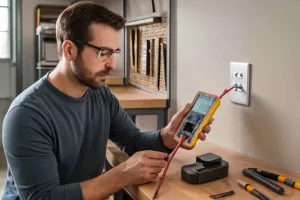
- Voltage Tester & Multimeter: Verify live circuits and ensure correct wiring.
- Wire Strippers & Cable Cutters: For clean conductor termination.
- Screwdrivers & Nut Drivers: Insulated handles preferred.
- Drill & Hole Saws: To mount enclosures and run conduit.
- Personal Protective Equipment (PPE): Safety glasses, gloves, and insulated mats.
Many of these tools are commonly used in other home electrical projects. For example, installing under-cabinet lighting also benefits from using the same conduit and wiring techniques. For more on that, see our detailed guide on how to install motion sensor under-cabinet LED lights, which covers safe wiring and conduit practices.
Step-by-Step Installation Guide
Step 1: Plan & Label Circuits
Determine which circuits you want to power during an outage. Common choices include refrigeration, lighting, HVAC, and well pumps. Label each circuit in your main panel, so you know where to install breakers on the transfer switch.
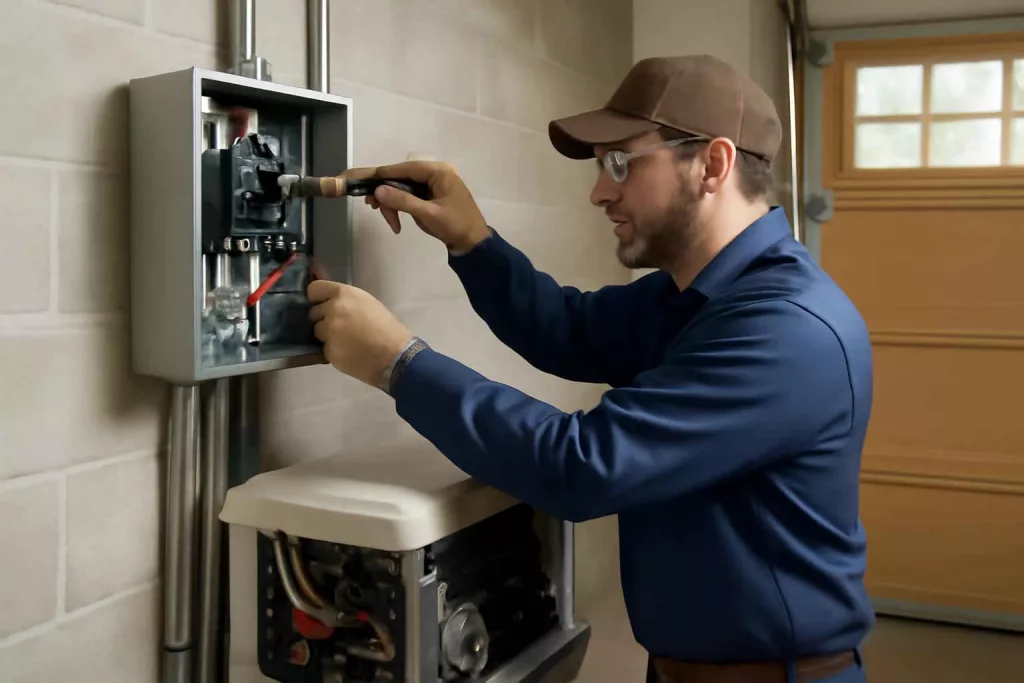
Step 2: Mount the Transfer Switch
Choose an accessible, code-approved location near your main panel. Secure the enclosure to the wall, ensuring it’s level. Leave enough space to open the cover and access breakers.
Step 3: Run Conduit & Wiring
Install conduit between the generator, the transfer switch, and the main service panel. Pull appropriately sized copper conductors. Ensure conductors are color-coded—hot, neutral, and ground—and secured with cable grips.
Step 4: Connect to Generator
Follow the manufacturer’s generator wiring diagram. Typically, you’ll connect generator output leads to the input terminals of the transfer switch. Install a generator inlet box if not pre-wired.
Step 5: Wire to Main Panel
Turn off the main breaker. Remove the panel cover and install new breakers onto the labeled circuits. Connect switch output leads to corresponding breaker terminals, maintaining correct amperage ratings.
Step 6: Grounding & Bonding
Install a grounding rod and bond the switch enclosure to the rod. Verify proper ground path between generator, switch, and panel to prevent shock hazards.
Step 7: Testing & Commissioning
With the main breaker off, start the generator and operate the transfer switch. Confirm that each circuit powers up correctly and that sensitive electronics run smoothly. Use a multimeter to check voltages under load.
Maintenance and Safety Tips
Regular maintenance of your switch gear maximizes reliability and safety. Follow these best practices at least twice a year, ideally before storm season:
Visual Inspection
Open the switch enclosure and look for signs of corrosion, loose connections, or burn marks. Tighten any loose terminals per torque specifications in the manufacturer’s manual.
Electrical Testing
Use a multimeter to verify voltage consistency between utility and generator inputs. Test mechanical operation of a manual switch by switching under no-load conditions.
Generator Exercises
Run your generator under load periodically to ensure fuel, oil, and cooling systems are in good condition. This exercise also lubricates mechanical parts and charges the battery.
Professional Inspection
Hire a licensed electrician every 2–3 years to conduct infrared thermography of connections and verify that all components meet local code requirements.
Proper care of switch gear parallels other workshop tool maintenance. For example, cleaning and checking circular saw blades improves performance and safety. See our guide on how to clean and maintain circular saw blades for best practices on blade care and storage.
Recommended Transfer Switch Models
Choosing a trusted brand ensures long-term reliability. Here are top picks for home generator switch gear:
- Generac RTS Pro Series Automatic Transfer Switch: A rugged ATS available in 50A and 100A configurations. Rated for whole-house standby generators. Find it on Amazon.
- Reliance Controls 30A Manual Transfer Switch: A compact 6-circuit manual switch that’s perfect for small homes and RVs. Easy to install and budget-friendly. View details on Amazon.
- Briggs & Stratton 100A Automatic Transfer Switch: Designed for standby generators up to 20 kW, featuring remote monitoring compatibility and corrosion-resistant wiring terminals. Check availability.
- Generac 6-Circuit Non-Transfer Switch Kit: Ideal for lightweight manual operations when only a handful of circuits need backup. Paired with a portable generator inlet box. Shop on Amazon.
When selecting your model, match the amperage rating to your generator and panel capacity, and always verify UL and NEC compliance. Consult your generator’s manual for compatible switch gear recommendations.
Conclusion
Investing in proper home generator switch gear is the cornerstone of a reliable backup power solution. From understanding the differences between manual and automatic transfer switches to gathering the correct tools, following code requirements, and performing routine maintenance, each step ensures safe and uninterrupted power for your household. Pairing your switch gear with quality models—such as those from Generac or Reliance Controls—gives you peace of mind when the lights go out.
Whether you tackle the installation yourself or hire a licensed electrician, use this guide to plan your project, choose the right equipment, and maintain your switch gear for years of reliable service. With proper setup and care, your home will remain powered through storms, outages, and unexpected events.