Creating an immersive home theater gear setup requires more than just a high-end projector or surround-sound system. To achieve a professional, clutter-free installation, you need reliable power tools for mounting equipment, manufacturer-grade cable management solutions, and cleaning tools to maintain a dust-free environment. This guide dives into every detail, from selecting a cordless drill driver for speaker brackets to choosing the best vacuum cleaner for tight carpeted rooms, ensuring your home theater looks and performs its best.
Essential Power Tools for Installing Home Theater Gear
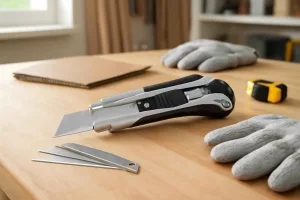
Installing wall-mounted speakers, projector mounts, and AV racks demands the right power tools. A quality cordless drill driver with adjustable clutch settings and drill bits suitable for drywall and wood studs is indispensable. Look for a model with at least 18-volt lithium-ion batteries for extended runtime and faster charging.
1.1 Drill Drivers for Mounting Speakers and Projectors
A robust cordless drill driver offers precise torque control and an ergonomic grip, making repetitive screwdriving comfortable. Search for a cordless drill driver with brushless motors for higher efficiency and longer lifespan. Pair it with a stud finder to locate safe anchor points, preventing costly drywall damage.
1.2 Stud Finders, Levels, and Screwgun Accessories
Before drilling, a multi-sensor stud finder reduces guesswork by detecting wood and metal studs behind walls. Complement it with a digital level to keep projector mounts perfectly horizontal. For rapid installations, invest in screwgun attachments that make screw insertion faster without manual bit changes.
Choosing the Right Cable Management and Organizers
Once your speakers and screens are in place, managing cables becomes critical to maintain a clean aesthetic and prevent signal interference. From cable raceways to rack-mount shelves, selecting the appropriate organizers can streamline your setup and save time during future upgrades.
2.1 Cable Raceway Solutions for Walls and Floors
Plastic or metal cable raceways hide wires in plain sight, creating a sleek look. Use recessed floor raceways for high-traffic areas to avoid tripping hazards. Opt for paintable raceways that match your wall color and snap-on covers for easy maintenance.
2.2 Rack Shelves, Cable Ties, and Storage Bins
An AV gear rack keeps components like receivers, amplifiers, and streaming devices neatly stacked. Combine adjustable rack shelves with steel pegboard kits behind your rack to hang small tools and extra cables. Heavy-duty cable ties and labeled storage bins simplify cable organization, making troubleshooting a breeze.
Maintaining a Dust-Free Environment: Vacuum Cleaners and Air Purifiers
Dust accumulation can degrade audio quality and cause equipment overheating. Selecting a vacuum cleaner with specialized attachments and an efficient HEPA filter ensures your home theater remains pristine without disturbing delicate electronics.
3.1 Best Vacuum Cleaners for Home Theater Rooms
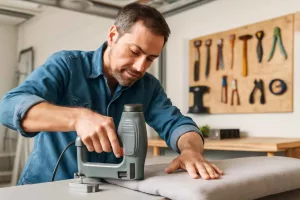
Choose an upright vacuum with a low-vibration motor and motorized brush head, ideal for carpets under seating areas. For tight spaces around racks and behind walls, a handheld vacuum with crevice tools excels. Try a compact cordless vacuum cleaner for quick spot cleaning before movie nights.
3.2 Air Purifiers and Dust Prevention Techniques
High-quality air purifiers equipped with activated carbon and HEPA filters capture airborne particles before they settle. Place one near intake vents to reduce dust buildup inside AV receivers. Regularly replace filters and vacuum air purifier grills to maintain airflow.
Rack and Furniture Setup: DIY AV Rack Assembly and Organization
Solid AV racks and furniture not only enhance your home theater’s look but also protect gear from vibrations and ensure proper ventilation. A DIY approach lets you customize shelf heights and widths based on your component sizes.
4.1 DIY AV Rack Assembly Steps
Start with a sturdy frame made of plywood or metal rails. Pre-drill shelf holes for adjustable brackets using your cordless drill. Ensure shelves are level with a carpenter’s level, and reinforce corners with metal L-brackets for added stability.
4.2 Cooling and Cable Access Considerations
A well-ventilated rack prevents gear from overheating. Drill ventilation holes or incorporate mesh paneling. Leave reservation space at the back for cable routing, and use rubber grommets to protect cables from sharp edges.
Enhancing Your Home Theater Experience with Smart Gadgets
Integrating smart devices like universal remote hubs and voice assistants transforms your setup into an intuitive, one-click experience. Automate lighting, projector lowers, and audio presets for movie nights or game days.
5.1 Smart Remote Systems and Hubs
Invest in an IR-and-Wi-Fi universal remote hub that works with mobile apps and popular voice assistants. These hubs learn IR codes from legacy remotes, consolidating control of projectors, soundbars, and streaming devices into a single interface.
5.2 Voice Control Integration and Automation
Voice assistants like Alexa or Google Assistant can power on your projector, dim lights, and select input sources with simple commands. Pair smart plugs with your amplifier and media console to automate power cycling and energy savings.
Pro Tips for Cable Labeling and Long-Term Maintenance
Cable labeling prevents confusion during upgrades or troubleshooting. Consistent maintenance extends your gear’s life and preserves peak performance.
6.1 Label Makers and Identification Strategies
Use thermal-transfer label makers to create water- and fade-resistant tags. Label both ends of HDMI, speaker, and power cables with codes that match a master list or spreadsheet for quick reference.
6.2 Routine Cleaning and Inspection Checklist
Every three months, power down equipment and vacuum rack interiors with a soft brush attachment. Check cable sheathing for wear, tighten loose connectors, and wipe down projector lenses with a microfiber cloth.
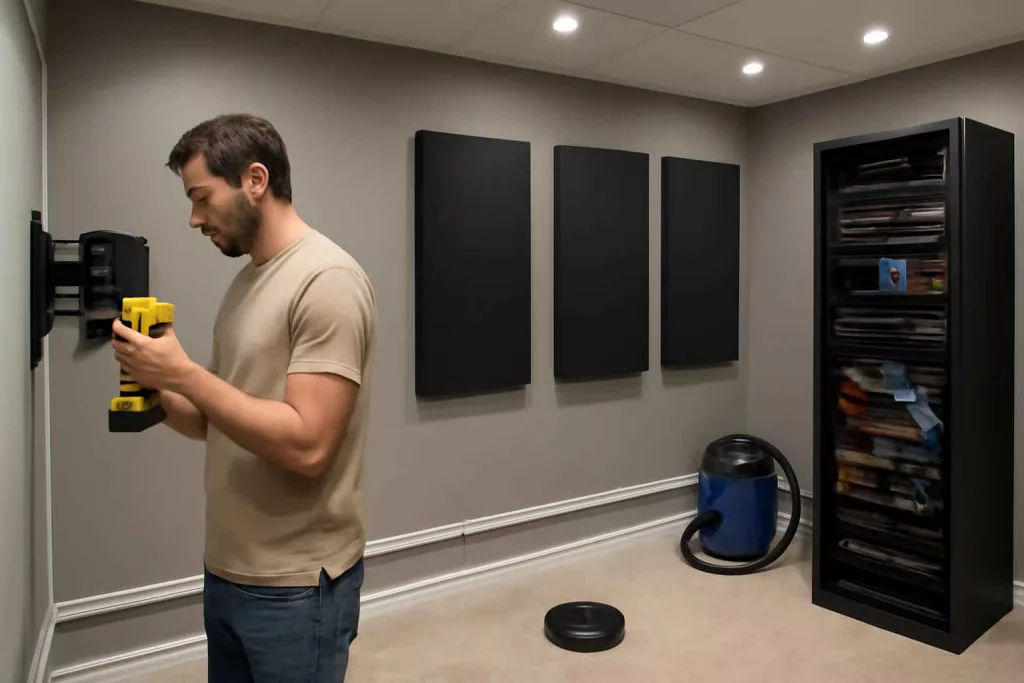
Enhancing Room Acoustics with DIY Treatments
Your home theater’s sound quality depends on room acoustics. Simple DIY acoustic treatments can minimize echoes and standing waves without professional installation.
7.1 Building Acoustic Panels and Bass Traps
Construct acoustic panels using wooden frames filled with rigid mineral wool or Owens Corning panels. Cover them with breathable fabric and mount at first reflection points on walls. Fabric-wrapped corner traps absorb low-frequency resonance, improving bass clarity.
7.2 Carpet, Curtains, and Furniture Placement
Thick rugs and heavy curtains reduce reverberation. Place seating away from walls to avoid bass buildup. Strategic placement of bookshelves and upholstered furniture scatters sound waves naturally, creating a balanced listening environment. For advanced projects, consult our DIY soundproofing guide to adapt workshop acoustic tips to your theater room.
Conclusion
An effective home theater gear setup goes beyond premium electronics. By leveraging the right power tools for installation, implementing robust cable management, maintaining a dust-free environment with quality vacuum cleaners and air purifiers, and applying DIY acoustic treatments, you can create a cinematic experience in your living room. Incorporating smart devices and routine maintenance practices ensures long-term performance and convenience. With these practical tips and trusted gear, your home theater will deliver immersive sound and stunning visuals for years to come.
Ready to streamline your home theater installation? Grab your drill driver and cable organizers, and bring your favorite movies to life in a clean, professional setup!