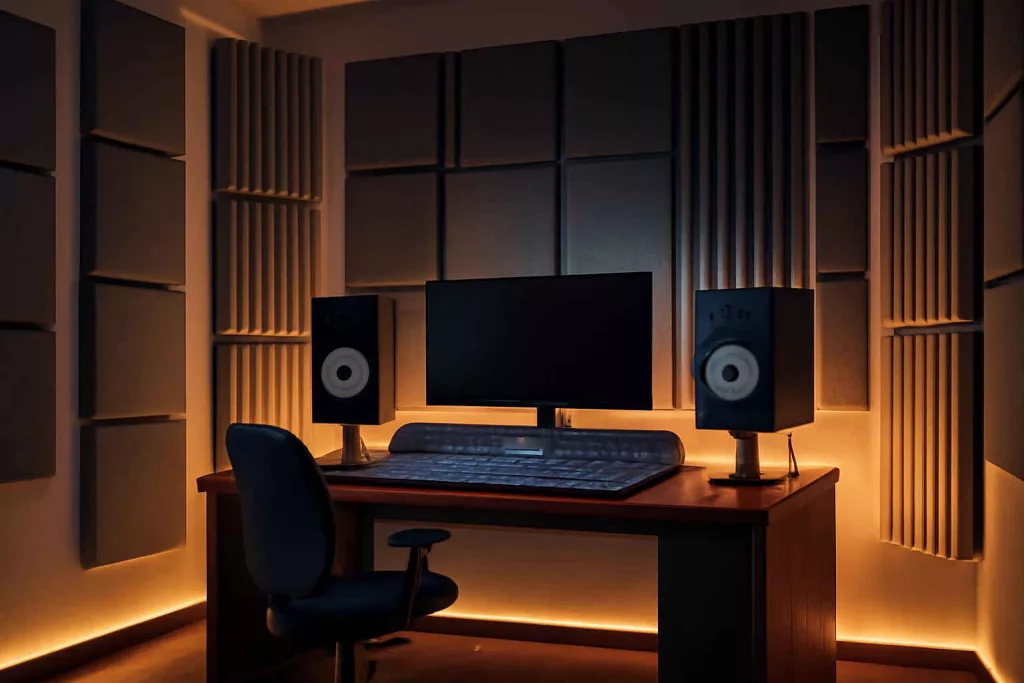
Achieving professional sound quality starts with selecting the right home studio gear. Among the most critical elements in any recording space are acoustic treatment panels designed to tame reflections, reduce flutter echo, and balance frequencies. Whether you’re tracking vocals, mixing tracks, or podcasting, well-placed acoustic panels ensure clarity and accuracy in your monitoring environment. To explore options, check out these acoustic panels that deliver exceptional performance and style.
Why Acoustic Treatment Matters in Your Home Studio
When sound waves hit hard surfaces—walls, ceilings, floors—they bounce back and interfere with new waves, creating reflections that blur detail and muddy your recordings. Untreated rooms often suffer from standing waves and flutter echoes that can mask critical frequencies, leading to inaccurate mixes. Investing in proper acoustic treatment is not just a luxury; it’s essential home studio gear for anyone serious about audio production.
Unlike soundproofing, which prevents sound from entering or leaving a room, acoustic treatment optimizes how sound behaves inside your space. It addresses problems like excess bass buildup, midrange muddiness, and high-frequency glare, allowing you to hear a true representation of your mix. Without it, you may overcompensate by boosting or cutting the wrong areas, resulting in mixes that translate poorly to other listening environments.
Acoustic Treatment vs. Soundproofing
Although often used interchangeably, acoustic treatment and soundproofing serve different goals. Acoustic treatment improves internal sound quality by absorbing or diffusing reflections. Soundproofing, on the other hand, uses mass and isolation techniques to block sound transmission. While a fully isolated, soundproofed room is ideal for high-volume recording, most home studios focus on treatment panels to create an accurate listening environment without major construction.
Types of Acoustic Treatment Panels
Acoustic treatment panels come in a variety of designs and materials, each targeting specific frequency ranges. Understanding the differences helps you tailor treatment to your room’s unique acoustic profile.
Foam Panels
One of the most affordable and popular solutions, acoustic foam panels absorb mid and high frequencies, reducing reflections and slapback. Their wedge or pyramid shapes increase surface area and diffusion. While foam is lightweight and easy to install, it offers limited bass control and typically requires complementary bass traps for full-spectrum treatment.
Fabric-Wrapped Panels
Constructed from dense mineral wool or fiberglass cores wrapped in acoustically transparent fabric, these panels deliver broad-band absorption from around 125 Hz up to 10 kHz. Available in customizable colors, fabric-wrapped panels provide a cleaner aesthetic compared to foam and are more effective at taming low-mid frequencies.
Bass Traps
Bass traps are thicker absorbers designed to control low-frequency buildup in corners, where bass waves tend to accumulate. Corner traps can be foam or mineral wool, often 4 to 6 inches thick, and are essential for achieving a balanced bass response in small to mid-sized rooms.
Diffusers
Rather than absorbing energy, acoustic diffusers scatter sound waves to reduce echoes without deadening the space. Diffusion panels maintain a sense of air and depth in your recordings, preventing the overly ‘dry’ sound that can be fatiguing. Ideal diffuser placements include rear wall and ceiling reflection points.
Top Picks for Best Acoustic Treatment Panels in 2024
We evaluated dozens of options based on absorption range, material quality, ease of installation, and style. Here are our top recommendations.
Auralex Studiofoam Wedges
- Material: Open-cell foam
- Dimensions: 12″ x 12″ x 2″ per panel
- Absorption range: 500 Hz and above
- Installation: Peel-and-stick adhesive or spray mount
- Color options: Charcoal, burgundy, gray, and more
Easily the industry standard, the Auralex Studiofoam Wedges offer excellent mid/high absorption and a sleek look. Their durable foam holds up well over time, and the wedge design excels at minimizing flutter echo.
ATS Acoustic Panels Core Series
- Material: 2″ mineral wool core
- Dimensions: 24″ x 48″
- Absorption range: 125 Hz to 20 kHz
- Finish: Fabric-wrapped (multiple colors)
With broad-band absorption and a professional finish, ATS Core Series panels are perfect for treating walls and ceilings. They offer more low-end control than foam and can double as decorative elements.
GIK Acoustics 244 Bass Traps
- Material: 4″ glass wool core
- Dimensions: 24″ x 24″
- Placement: Vertical wall corners
- Finish: Fabric-wrapped
Designed specifically for corners, GIK 244 Bass Traps tame low-frequency peaks, providing a tight, controlled bass response. They’re a must-have for any serious home studio.
How to Install Acoustic Panels in Your Home Studio
Proper installation ensures your panels perform at their best. Follow these guidelines for accurate placement and secure mounting.
Measuring and Planning
1. Room dimensions: Measure length, width, and height to calculate room modes and reflection points.
2. Reflection points: Use the mirror trick—have a partner move a mirror along side walls while you sit at the listening position. Mark where you see the monitors in the mirror; those are primary reflection points.
3. Bass trap corners: Mark vertical and horizontal corners at wall-wall and wall-ceiling joins for low-frequency absorption.
DIY Installation Techniques
Most panels can be mounted using heavy-duty double-sided tape or removable adhesive strips, which won’t damage drywall. For heavier fabric-wrapped panels and diffusers, consider Z-clips or simple L-brackets anchored into studs. Always check weight ratings and follow manufacturer instructions.
Tools and Materials Needed
- Measuring tape
- Level
- Pencil and painter’s tape
- Adhesive strips or mounting hardware
- Stud finder (for brackets)
- Drill and screws (optional)
DIY Acoustic Panel Building
For those on a budget or seeking a custom look, building your own acoustic panels is a rewarding DIY project that delivers professional results.
Materials List
- Rockwool or Owens Corning 703 boards
- Pine or fir wood for retaining frames
- Acoustically transparent fabric
- Wood glue and finishing nails
- Staple gun
- Cutting tool (utility knife or insulation saw)
Step-by-Step Build
- Frame assembly: Cut wood to frame size (usually 2″ smaller than panel to inset core), glue and nail corners.
- Core placement: Slide Rockwool board into frame, ensuring a snug fit.
- Fabric wrapping: Lay fabric face-down, center frame, pull edges taut and staple on the back side.
- Mounting clips: Attach Z-clips or D-rings to the back for easy hanging.
- Finishing touches: Paint or stain exposed wood edges if desired, then hang at designated spots.
Tips for Optimizing Panel Placement
Even with the best home studio gear, incorrect placement can limit performance. Use these tips to maximize effectiveness.
Primary Reflection Points
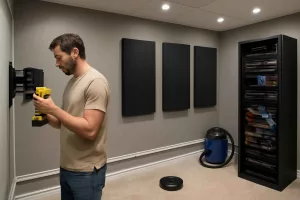
Treat first reflection points on side walls and ceiling to eliminate comb filtering. Panels at these spots improve stereo imaging and clarity.
Bass Trap Placement
Install bass traps in all vertical corners and along the ceiling-wall junctions. Consistent low-frequency control prevents boomy or uneven bass response.
Diffusion Positioning
Place diffusers on the rear wall behind listening position to scatter reflections, creating a more spacious sound without deadening the room.
Integrating Acoustic Panels with Other Home Studio Gear
Well-treated rooms complement all your essential equipment. Pair panels with essential rack gear for home studio and space-saving gear for home recording studio to maximize both functionality and acoustics. If you’re tackling sound isolation, combine your panel installation with DIY soundproofing techniques for a truly professional environment.
Organizing cables and mounting monitor stands at the correct height ensures that your gear complements your acoustic treatment. Balanced monitors, proper listening position, and strategic panel placement work together to deliver accurate mixes.
Conclusion
Investing in the right acoustic treatment panels is one of the most impactful ways to upgrade your home studio gear. From foam wedges and fabric-wrapped panels to corner bass traps and diffusers, each component plays a crucial role in controlling reflections and managing frequencies. Whether you choose off-the-shelf options like Auralex Studiofoam or build custom panels with Rockwool cores, proper placement and installation are key to achieving a neutral listening space. Pair your treatment with quality rack gear and space-saving solutions for a well-organized, acoustically balanced studio that translates great mixes across any playback system.
Ready to transform your home studio? Explore top-rated acoustic panels on Amazon and start hearing your productions in a whole new light.