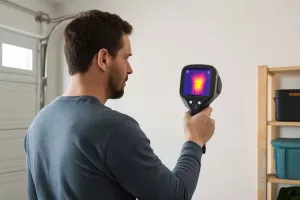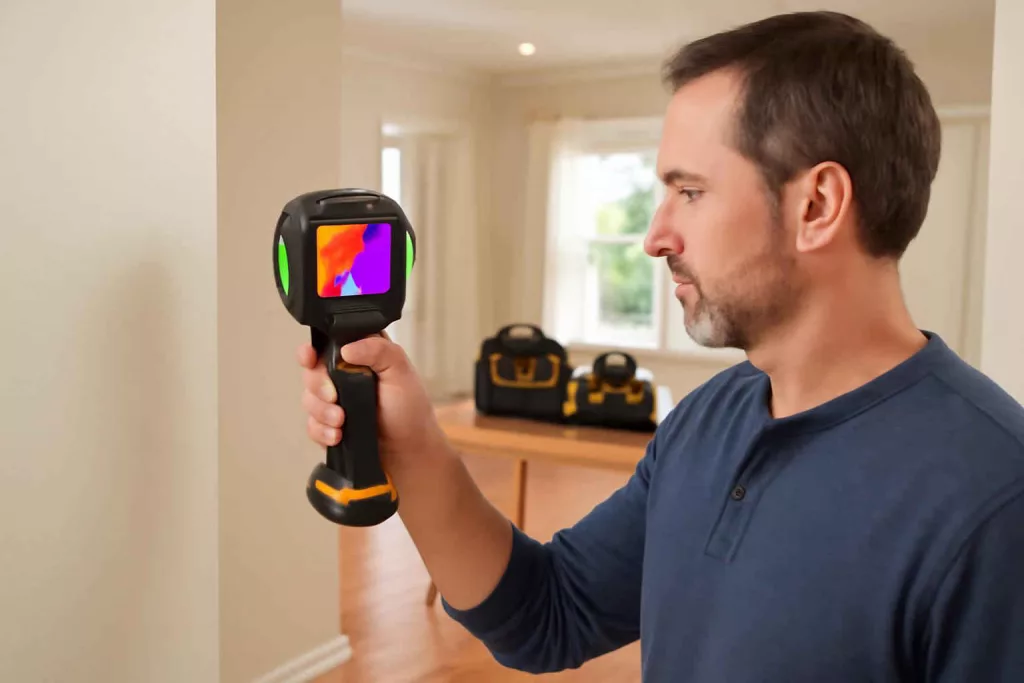
Thermal imaging has transformed home inspections by revealing hidden issues behind walls, under floors, and above ceilings. A cordless thermal imaging camera allows homeowners and DIY enthusiasts to perform quick scans without being tethered to power outlets. Whether you’re hunting down insulation gaps, spotting electrical hotspots, or checking for moisture intrusion, a battery-powered thermal camera offers unmatched convenience and mobility throughout your property.
Why Choose a Cordless Thermal Imaging Camera for Home Inspection
Traditional corded thermal cameras deliver excellent performance but limit your range and force you to stay close to power sources. In contrast, a cordless unit provides several advantages:
- Freedom of movement: Inspect roofs, attics, and basements without dragging extension cords or worrying about outlet locations.
- Portability: Lightweight designs fit in one hand or a tool bag, making them ideal for multi-room inspections.
- Faster setup: Power on and go – no need to search for power or manage tangled cables.
- Versatility: Use the camera anywhere around your home, garage, or outbuildings.
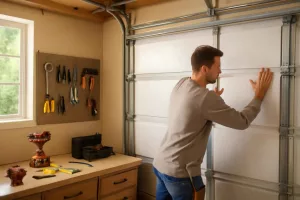
Installing energy-efficient lighting or tackling a DIY crack repair project? A thermal camera speeds up diagnosis and improves results. For a deep dive into tackling cracks in concrete surfaces, check our step-by-step maintenance guide on winterizing gas pressure washers and similar DIY tasks.
Key Features to Look for in Battery-Powered Thermal Cameras
Not all cordless thermal imaging cameras are created equal. When evaluating models, pay close attention to these critical specifications:
1. Battery Life and Recharge Method
Battery runtime can range from 2 to 8 hours depending on capacity and usage. Look for cameras with replaceable lithium-ion batteries or fast-charging support. Some models include dual battery slots so you can swap in a fresh pack without downtime. To extend battery longevity, follow guidelines in our power tool battery maintenance guide.
2. Thermal Resolution and Sensor Sensitivity
Resolution (measured in pixels) determines image clarity. A 160×120 sensor is entry-level; 320×240 or 640×480 provide sharper detail for small defects. Sensitivity (NETD) indicates the smallest temperature difference detectable; lower values (below 50 mK) capture subtle anomalies such as slight insulation voids or underperforming HVAC ducts.
3. Temperature Range and Accuracy
Check both minimum and maximum measurement capacities. A range of -20°C to 400°C suits most home inspections, from spotting cold drafts to identifying overheated electrical components. Accuracy within ±2°C or ±2% is ideal for reliable diagnostics.
4. Lens Options and Field of View
Wide-field lenses (e.g., 35°×26°) capture more area at once, perfect for scanning walls or ceilings. Telephoto lenses offer narrow fields for pinpointing issues from a distance, such as a hot breaker in a panel. Some cameras include interchangeable lenses or digital zoom.
5. Durability and Ergonomics
A robust housing with rubberized grips protects against accidental drops. Look for IP54 or higher ingress ratings if you plan to inspect outdoors. Comfortable pistol-grip designs reduce hand fatigue during extended inspections.
Top Cordless Thermal Imaging Cameras for Home Use
Below are five top-rated cordless thermal imaging cameras ideal for DIY home inspection. Each unit balances portability, performance, and price. Click the links to compare current prices on Amazon (search cordless thermal imaging camera).
1. FLIR E6-XT
- Resolution: 240×180, thermal sensitivity 60 mK
- Temperature range: -20°C to 550°C
- Battery: rechargeable Li-ion, 4-hour runtime
- Features: built-in MSX image enhancement, Wi-Fi file transfer
The FLIR E6-XT offers clear thermograms with MSX overlay, making it easy to correlate thermal anomalies with physical details. Its pistol grip and touchscreen interface simplify one-handed operation. Ideal for spotting moisture intrusion behind walls or overheating breakers.
2. Seek ThermoPro TP8
- Resolution: 320×240, sensitivity 50 mK
- Temperature range: -40°C to 330°C
- Battery: built-in 7-hour runtime
- Features: 3.5″ LCD, data logging, rugged housing
The Seek TP8 combines high resolution and long battery life at a midrange price. It’s durable enough for outdoor inspections and detailed enough to trace insulation gaps around windows and doors.
3. Hikmicro Eagle Pro
- Resolution: 256×192, sensitivity 40 mK
- Temperature range: -20°C to 550°C
- Battery: dual swappable packs, 3.5-hour each
- Features: digital zoom, image fusion
Hikmicro Eagle Pro stands out with dual battery packs and digital image fusion for simultaneous thermal and visual imaging. Swap batteries mid-inspection to maintain uninterrupted operation.
4. FLUKE TiS20+
- Resolution: 160×120, sensitivity 100 mK
- Temperature range: -20°C to 350°C
- Battery: 5-hour runtime
- Features: onboard storage, wireless connectivity
The Fluke TiS20+ offers reliability backed by a trusted brand. Its ergonomic design and user-friendly menu make it beginner-friendly for homeowners starting thermal inspections.
5. PerfectPrime IR0005
- Resolution: 220×160, sensitivity 75 mK
- Temperature range: -20°C to 300°C
- Battery: 4-hour runtime
- Features: 2.4″ color display, data export via USB
For budget-conscious users, the PerfectPrime IR0005 delivers respectable performance at a lower price. It’s a solid entry-level option for spotting hidden water leaks or HVAC inefficiencies.
How to Effectively Use Your Portable Thermal Camera for Home Inspections
Having a top-rated camera is only half the battle. Proper technique ensures you uncover every issue. Follow these best practices:
1. Allow Proper Warm-Up Time
Power the camera on 5–10 minutes before inspection. Thermal sensors need time to stabilize for accurate readings.
2. Scan Slowly and Systematically
Move the camera at a controlled pace, covering one wall at a time in horizontal sweeps. Pause when you note a hotspot or cold spot to verify readings.
3. Compare Interior and Exterior Readings
Inspect the same wall from inside and outside to identify insulation gaps. Use outdoor scans to find thermal bridges around window frames or eaves.
4. Document Findings with Images and Notes
Store thermograms on the camera or transfer via Wi-Fi/USB. Label each image with location and suspected issue. This organized record helps you plan repairs or share findings with professionals.
5. Combine with Other Diagnostic Tools
Pair thermal imaging with moisture meters or borescopes for comprehensive diagnostics. For example, after spotting a wet area, confirm moisture content with a handheld meter or insert a borescope through a small hole.
When tackling structural issues like small garage floor cracks, refer to our DIY garage floor crack repair guide for expert tips.
Maintenance and Care for Your Battery-Powered Thermal Imaging Device
To maximize lifespan and performance, implement these maintenance steps:
- Battery storage: Store spare batteries at room temperature and charge them every 3–4 months. Avoid extreme temps to prevent capacity loss.
- Lens protection: Use the supplied cap or a soft cloth. Avoid spraying cleaners directly on the lens.
- Housing cleaning: Wipe with a damp cloth. Do not submerge or use solvents on seals.
- Firmware updates: Check the manufacturer’s website periodically. Updated firmware can improve accuracy and add features.
If you rely on a multi-tool charging station for your other cordless devices, consider building a customized cart following our DIY power tool charging station guide.
Conclusion
Investing in a high-quality cordless thermal imaging camera empowers you to detect hidden issues before they escalate. From energy audits to electrical safety checks, a battery-powered thermal camera adds professional-grade diagnostics to your DIY toolkit. Compare models like the FLIR E6-XT and Seek ThermoPro TP8 to find the right balance of resolution, battery life, and budget.
Ready to add one to your workshop? Check current prices and read user reviews on Amazon: shop cordless thermal imaging cameras.