Hard water can lead to scale buildup in pipes, spots on dishes, and dry skin. Installing an under-sink water softener offers a compact, efficient solution without the bulk of traditional units. In this guide, we explore top space-saving models, detailed installation steps, and maintenance tips to keep your system running smoothly. Start your search for the perfect unit under-sink water softener today.
Why Choose an Under-Sink Water Softener?
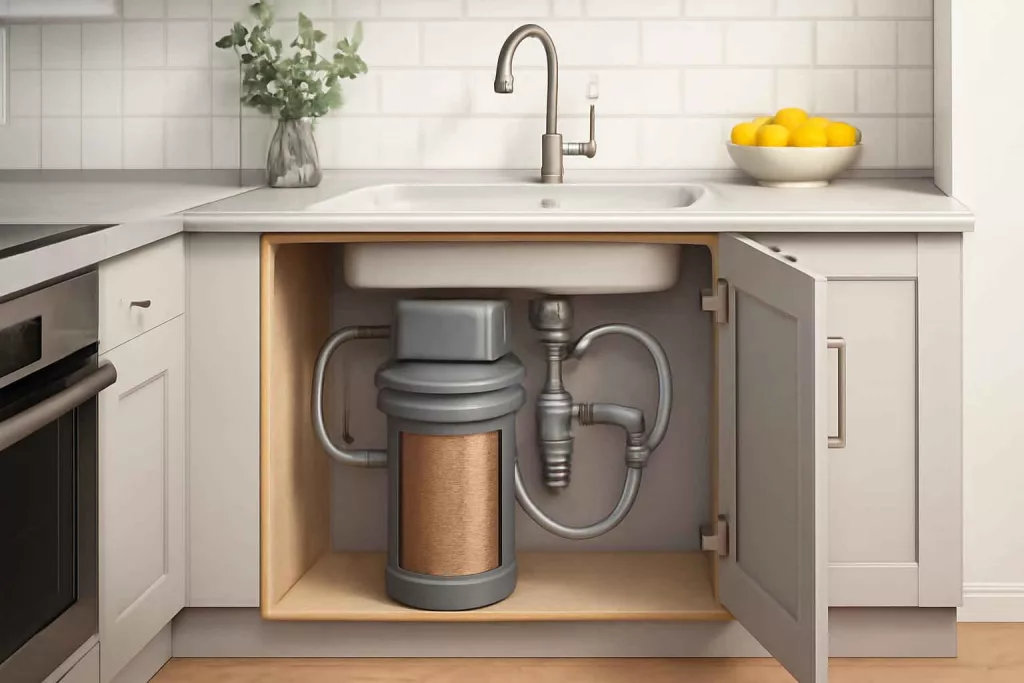
Under-sink water softeners provide a targeted approach to treat hard water at a single point of use—your kitchen sink. Unlike whole-house systems, these compact units save space and cost less, making them ideal for apartments, condos, and smaller homes. Key benefits include:
- Space Efficiency: Fits neatly under the sink without sacrificing cabinet storage.
- Focused Treatment: Softens water only where it’s needed most for drinking, cooking, and washing produce.
- Lower Cost: Affordable units with minimal installation expenses.
- Easy Maintenance: Simple resin refill or cartridge replacement every few months.
If your kitchen storage is tight, you can also organize cleaning supplies with efficient under-sink cabinet organizers to maximize space alongside your new softener.
Key Features to Look For
When researching under-sink water softeners, evaluate the following criteria to find a model that meets your household’s needs:
Softening Capacity
Measured in grains per gallon (GPG), capacity indicates how much hardness your system can remove before regeneration. For a small household of 1–2 people, a 5,000–10,000-grain capacity is usually sufficient. Larger families may require higher capacity systems.
Regeneration Type
Salt-based softeners regenerate by flushing resin beads with brine solution, while salt-free or “conditioner” systems use template-assisted crystallization. Salt-based models are more effective at reducing scale, but require periodic salt refills. Salt-free units are maintenance-free but less powerful against very hard water.
Flow Rate
Flow rate determines how quickly soft water is delivered. Look for units offering at least 0.5 liters per minute (LPM) to maintain kitchen sink performance. Higher flow rates avoid pressure drops during peak use.
Installation Requirements
Check cabinet dimensions, water supply line size, and power needs. Most under-sink softeners connect to the cold-water line and require a drain for regeneration. Ensure easy access to change resin cartridges or refill salt.
Top Under-Sink Water Softener Models
After comparing features and reviews, here are six leading under-sink water softeners available on Amazon:
-
NuvoH2O DPHB Home Salt-Based Softener
Effective softening capacity of 6,000 grains, compact footprint, and quick cartridge replacement. View on Amazon -
Aquasana Salt-Free Claryum Conditioner
Leaves beneficial minerals, prevents scale buildup, and requires no salt. Ideal for moderate hardness. View on Amazon -
SoftPro Iron Pro 2
Handles iron reduction and softening up to 10,000 grains. Durable resin and easy manual regeneration. View on Amazon -
Culligan 1,250 Grain RV Softener
Designed for RV use but perfect under sink. Lightweight, portable, and simple regeneration. View on Amazon -
On The Go OTG4-DBLSOFT 8,000 Grain
High capacity, double bed softener, compact design, and low maintenance. View on Amazon -
Pelican NaturSoft Salt-Free Conditioner
Eco-friendly design with minimal maintenance. Converts hardness minerals without salt. View on Amazon
Installation Guide for Under-Sink Water Softeners
Proper installation ensures optimal performance and longevity. Follow these steps for a successful setup:
Tools and Materials Needed
- Adjustable wrench
- Pipe cutter or tubing cutter
- Drill with hole saw (if adding a dedicated faucet)
- Mounting bracket (if provided)
- Teflon tape
- Bucket and towels
Step-by-Step Installation
- Shut Off Water: Turn off the cold-water supply under your sink.
- Install Diverter Valve: Attach the included saddle valve or diverter to the cold-water line. Use Teflon tape on threaded connections.
- Mount the Unit: Secure the softener to the cabinet wall using the mounting bracket. Ensure it’s level and accessible.
- Connect Inlet and Outlet: Attach tubing from the cold-water valve to the unit’s inlet port, then from the outlet port to the sink faucet supply. Trim tubing to fit without kinks.
- Set Up Drain Line: Route the drain tube to your sink drain or disposer inlet. Secure using a clamp at least 6 inches above the P-trap.
- Flush the System: Open the cold-water valve and faucet. Let water flow for several minutes to clear air and initial resin fines.
- Regenerate (Salt-Based): Add recommended salt and initiate the regeneration cycle as per manufacturer instructions.
- Check for Leaks: Inspect all connections, tighten as needed, and ensure steady, leak-free flow.
Maintenance Tips to Extend System Lifespan
Regular upkeep keeps your softener efficient and your water consistently soft:
- Refill Salt Promptly: For salt-based models, maintain salt levels at least once a month. Use high-purity salt pellets to reduce bridging.
- Clean Resin Tank: Annually flush the tank with a resin cleaner to remove iron and organic buildup.
- Inspect Tubing and Valves: Check for kinks, leaks, or wear. Replace any damaged components promptly.
- Monitor Water Hardness: Use test strips every few months to ensure the softener performs effectively. If hardness rises, consider more frequent regeneration or higher-capacity resin.
- Protect Against Freeze: In colder climates, insulate pipes under the sink to prevent freezing during winter months.
For additional maintenance insights, explore our guide on extending tool battery life, which shares practical tips on routine care and longevity—principles that apply to water softeners as well.
Space-Saving Under-Sink Water Softeners vs. Traditional Units
Whole-house softeners treat water at the main line but require significant space, professional installation, and higher upfront cost. In contrast, under-sink systems:
- Fit in Tight Spaces: No need for a basement or garage allocation.
- Lower Installation Cost: DIY-friendly with minimal plumbing changes.
- Targeted Softening: Avoids treating non-essential water (showers or outdoor faucets).
- Portability: Salt-based portable units can be relocated when you move.
If you need whole-house treatment, consider a traditional system, but for most kitchens and coffee stations, an under-sink model offers the best balance of performance and convenience.
Conclusion
Choosing the right under-sink water softener involves balancing capacity, regeneration type, and installation constraints. Whether you opt for a salt-based system like the NuvoH2O DPHB or a salt-free conditioner like Aquasana Claryum, you’ll enjoy softer water at the tap with minimal space usage. Follow our installation and maintenance tips to ensure years of reliable performance. Ready to upgrade your kitchen water quality? Explore top models now on Amazon and say goodbye to hard water issues for good.
