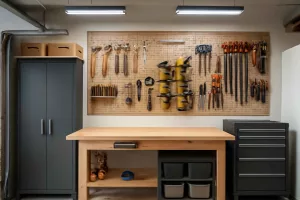
Creating a dedicated charging station for your cordless tools transforms a cluttered workbench into a streamlined command center. With every drill, impact driver, and battery pack neatly organized and charging, you’ll save time hunting for your next tool—and reduce wear from improper storage. Whether you’re a weekend DIYer or a home renovation enthusiast, this guide will walk you through building a custom DIY cordless tool charging station that fits your workspace and workflow.
Before diving in, if you prefer a ready-made solution, consider browsing the latest cordless tool charging stations for quick installation and off-the-shelf convenience.
Why You Need a Dedicated Cordless Tool Charging Station
A clutter-free workshop boosts efficiency and safety. When batteries are scattered across your bench, it’s easy to misplace packs or forget to charge them until you’re halfway through a job. A cordless tool charging station solves these problems by providing:
- Centralized Charging: All chargers and batteries in one spot for easy monitoring.
- Reduced Cable Clutter: Power strips and outlets mounted beneath the station eliminate loose cords across your workspace.
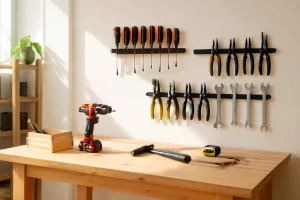
- Organized Storage: Separate slots for drills, drivers, and battery chargers keep tools at your fingertips.
- Extended Battery Life: Properly ventilated trays prevent overheating while charging.
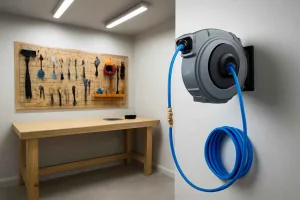
Incorporating a charging hub into your workshop layout pairs well with other organizational solutions, like a power tool cord reels to keep extension cords tidy, or mounting a magnetic tool holders along the wall for quick access. For mobile storage, you might also explore our DIY rolling tool chest build guide to transport tools and chargers anywhere in your workspace.
Tools and Materials You’ll Need
Gathering the right materials ensures your home workshop charging station is durable, customizable, and safe. Here’s what you’ll need:
- 1x Plywood sheet (3/4″ thick) sized to your workbench depth.
- 2x 2×4 lumber for framing supports.
- 1x power strip with surge protection and multiple outlets.
- Mounting brackets or wood cleats for securing chargers.
- Velcro straps or small wood dividers to keep battery packs in place.
- Electrical box or cable raceway to conceal wiring.
- Screws, wood glue, and cable ties.
- Measuring tape, drill, saw, and level.
If you haven’t yet installed upper storage, consider adding a wall-mounted vacuum hose reel to free floor space and maintain a cleaner environment around your charging station.
Step 1: Plan Your Charging Station Layout
Start by measuring the depth of your workbench and available vertical space above it. Map out where you’ll place each charger and battery pack. Key considerations include:
- Charger Spacing: Ensure at least 2″ between chargers for proper heat dissipation.
- Accessibility: Position frequently used tools in front row slots.
- Power Access: Locate near a standard 120V outlet or prepare to install a new outlet behind the bench.
- Ventilation: Avoid enclosing chargers in tight cabinets; open shelving promotes airflow.
Create a simple template by tracing the chargers onto cardboard and cutting out the shapes to lay on your bench. Move these around until you’re satisfied with the arrangement. This hands-on mock-up helps prevent misaligned holes or awkward charger positions later.
Step 2: Build the Frame and Shelves
With your layout finalized, it’s time to construct the shelf that will hold your chargers and batteries. Follow these steps:
2.1 Cut and Assemble the Frame
- Cut two 2x4s to match the width of your bench. These will serve as front and back supports.
- Attach vertical 2×4 risers at each end, plus one in the center for added stability.
- Secure all joints with wood glue and 3″ wood screws, ensuring the frame is square and level.
2.2 Install the Plywood Shelf
- Cut the plywood sheet to fit atop the frame, flush with the front edge of the bench.
- Drill holes or slots in the plywood for charger ventilation, aligning with each charger’s fan vents.
- Place the plywood shelf on the frame and screw it in from underneath for a clean finish.
The result is a sturdy platform that can support multiple chargers and withstand regular tool handling.
Step 3: Wire the Power Strip and Conceal Cables
A cluttered power strip defeats the purpose of organization. To keep cables tidy, follow these tips:
3.1 Mount the Power Strip
- Use screws or Velcro to secure the power strip beneath the plywood shelf, close to the outlet access point.
- Ensure the on/off switch remains visible and accessible for quick power cuts.
3.2 Conceal and Route Cables
- Run charger cables along the underside of the shelf using cable ties.
- Enclose the power strip cord in an electrical box or plastic raceway to hide wiring along the bench’s leg.
- Use cable clips to secure cords to the bench leg and prevent tripping hazards.
Proper cable management not only looks professional but also extends cord life by preventing kinks and tangles.
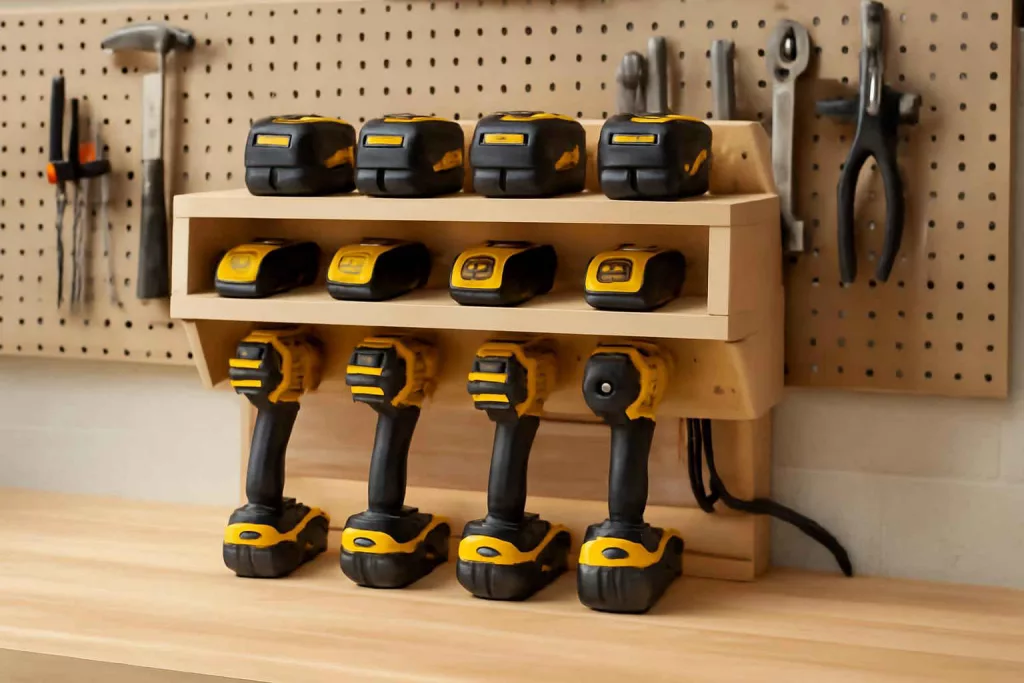
Step 4: Mount and Arrange Your Chargers
With the frame and power in place, you can now secure your chargers and arrange batteries:
4.1 Charger Mounting Options
- Bracket Mount: Some chargers include mounting holes for direct wall or shelf attachment.
- Wood Cleats: Cut small strips of wood to slide under the charger lip, preventing forward movement.
- Velcro Straps: Heavy-duty Velcro straps wrap around the charger body, keeping them pressed against the shelf.
4.2 Label and Organize Battery Packs
- Install small wood dividers between charger bays to keep batteries from sliding.
- Attach labels to each bay for quick identification (e.g., “Drill”, “Impact Driver”).
- Consider a rotating charging tray for 180° access in tight benches.
A clearly labeled battery charging organizer helps prevent mismatched batteries and ensures you always grab the right pack for each tool.
Step 5: Add Finishing Touches and Personalization
Elevate your DIY tool charging station from functional to custom:
- LED Strip Lighting: Install battery-operated LED strips under the shelf for nighttime visibility.
- Tool Holder Integration: Attach small magnetic strips on the side of the station for hex bits and screwdriver bits.
- Paint or Stain: Match the plywood surface to your workbench color scheme for a cohesive look.
- USB Ports: Add a USB power outlet to charge phones or tablets while you work.
These customizations turn a simple battery station into a multi-functional workshop accessory.
Maintenance Tips for Your Charging Station
Like all workshop equipment, your charging station benefits from regular care:
- Monthly Dust-Off: Use compressed air or a soft brush to remove dust from charger vents and battery contacts.
- Inspect Wiring: Check cords for frays or loose connections; replace damaged cables immediately.
- Test Outlet Surge Protection: Ensure your power strip’s indicator light shows active protection status.
- Rotate Battery Usage: Cycle batteries in different bays to balance charge and discharge cycles.
Consistent maintenance not only extends the lifespan of your charger and batteries but also keeps your workshop safe from electrical hazards.
Conclusion
Building a DIY cordless tool charging station is a rewarding weekend project that delivers long-term benefits. You’ll gain an organized workspace, reduce cable clutter, and ensure your batteries are always ready. By customizing the layout, integrating power management, and adding personal touches, your home workshop evolves into a highly efficient environment where tools and creativity meet.
For more workshop organization ideas, explore our power tool cord reels guide or check out our DIY rolling tool chest build for mobile storage solutions. Ready-made options are also available on Amazon if you need a quick setup: cordless tool charging station.