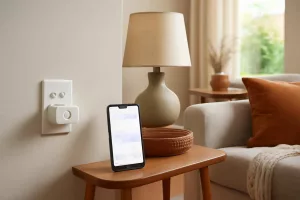
Upgrading to a smart thermostat is one of the most effective ways to modernize your HVAC system, save on energy bills, and integrate climate control into your smart home network. This DIY Wi-Fi thermostat installation guide will walk you through each step of selecting a compatible smart thermostat, gathering the right tools, handling wiring safely, and configuring your device for optimal performance. Whether you’re pairing with a smart garage door opener guide or other smart home devices, you’ll learn proven strategies for a seamless setup. Ready to start? Let’s dive in. For top smart thermostat models like Google Nest or Ecobee, check out these options on Amazon.
By following this smart thermostat installation guide, you can expect to reduce heating and cooling costs by up to 15%, according to ENERGY STAR. A proper smart thermostat installation not only ensures consistent comfort year-round but also unlocks features like geofencing, learning algorithms, and remote control via smartphone. Let’s go beyond simple temperature adjustments and dive into the full Wi-Fi thermostat setup.
Planning Your DIY Wi-Fi Thermostat Installation
Every successful smart thermostat upgrade begins with careful planning. This initial phase of your DIY Wi-Fi thermostat installation ensures compatibility, avoids unexpected roadblocks, and streamlines the entire process. Below, you’ll learn how to choose the right model for your HVAC system and gather essential tools and materials before you start the actual installation.
Choose the Right Thermostat for Your HVAC System
Selecting a compatible thermostat is crucial. First, confirm your existing HVAC wiring includes a dedicated C-wire (common) for power. Many new models—such as Google Nest, Ecobee, and Honeywell Home—require this constant 24V power source. If your system lacks a C-wire, you may need an adapter kit or to install one directly at the furnace. Match the thermostat’s voltage compatibility: most smart thermostats support low-voltage (24VAC) systems, but not all high-voltage or millivolt heating systems are compatible. Additionally, consider features like dual fuel compatibility, learning algorithms, humidity sensors, and voice control integration when choosing your energy-saving thermostat. Read product specifications carefully, and consult your HVAC manual if you’re uncertain about compatibility.
Gather Tools and Materials
Before you begin the smart thermostat installation, assemble all necessary tools. A standard thermostat wiring guide requires a Phillips screwdriver, a voltage tester, wire strippers, and level. You might also need small wire nuts or terminal adapters if the existing wiring is frayed. A drill with a small bit set can help secure wall anchors for the new baseplate, especially if you choose a model with a plastic trim plate. Gather touchscreen-friendly gloves or use a smartphone app to record wire labeling photos. Having everything on hand prevents unnecessary pauses once you cut power to your HVAC system. Consider laying out connectors and labeling wires using masking tape and a fine-tip pen—this simple step alone significantly reduces wiring errors during the installation process.
In addition to tools, arrange your workspace for safety and ease. Clear the area around the thermostat, and use drop cloths to protect walls from debris. Keep your smartphone or tablet nearby for reference to the manufacturer’s installation manual, and bookmark detailed threads on HVAC forums for troubleshooting tips. By planning thoroughly, you focus on the actual installation rather than hunting for tools or second-guessing compatibility issues.
Removing Your Old Thermostat Safely
Before touching any wiring, always shut off power to your HVAC system at the breaker box or dedicated furnace switch. Never rely solely on turning off the thermostat; test the wires with a non-contact voltage tester to ensure there’s no live current. Once you’ve confirmed the power is off, gently remove the thermostat’s faceplate by releasing any clips or screws. Carefully detach the display unit and set it aside in a safe place.
Next, use a screwdriver to loosen the mounting screws securing the old thermostat base to the wall. Pull the baseplate away slowly, exposing the wiring terminals labeled with letters like R, C, W, Y, G, and O/B. Take a clear, close-up photograph of the wire configuration; this visual record is critical in case labeling becomes confusing. Alternatively, label each wire using small pieces of painter’s tape and a marker—note the terminal letter on each strip.
After labeling, use wire strippers to remove a minimal amount of insulation (about 1/4 inch) if the existing wire ends are damaged or frayed. If they’re intact, simply loosen the terminal screws and gently pull each colored wire free. Keep the wires separated to avoid accidental contact throughout the installation. Secure the exposed wires with small pieces of tape so they don’t slip back into the wall cavity.
Finally, inspect the wall cavity for any obstructions or debris. If your thermostat location has old paint or wallpaper, consider sanding it lightly for a flush fit of the new baseplate. Measuring the cavity depth helps you choose the correct anchor length if you need to install wall anchors. By taking these steps to remove the old thermostat safely, you minimize wiring errors and set a clean foundation for a successful smart thermostat installation.
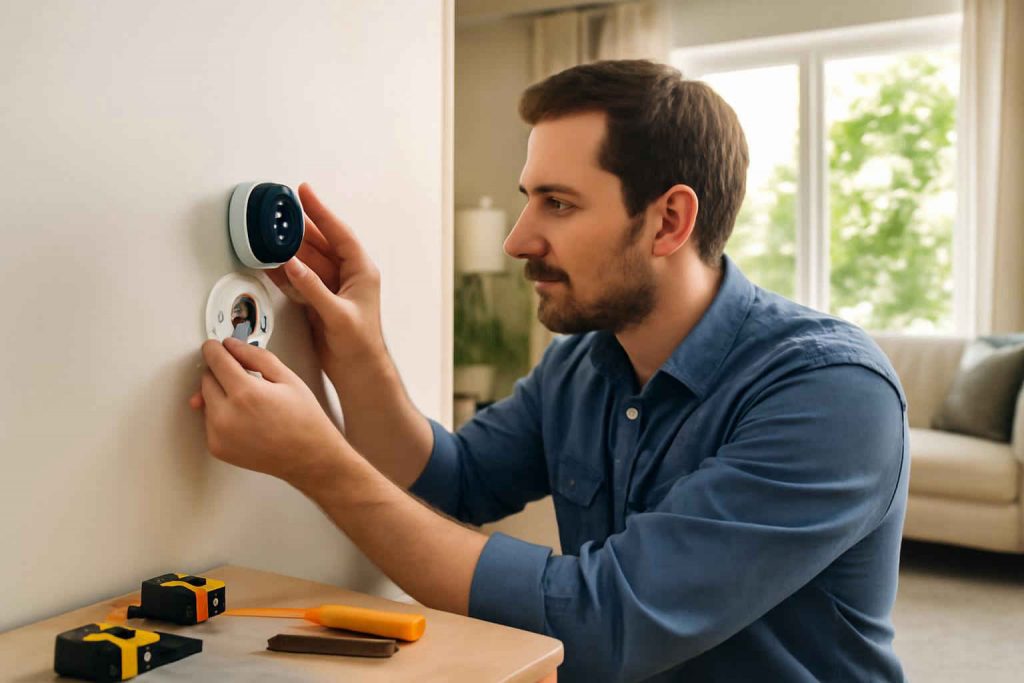
Installing the Smart Thermostat Mount and Wiring
Mounting the Baseplate
With the old thermostat removed and wires labeled, it’s time to install the new smart thermostat baseplate. Choose a location on an interior wall away from direct sunlight, drafts from windows, or appliances that emit heat or cold. Use the included bubble level to ensure the baseplate is perfectly horizontal, marking the two or three screw holes with a pencil. If your wall is drywall, insert provided wall anchors before driving in screws—this prevents future loosening from repeated tap adjustments. Tighten screws until the baseplate is snug but avoid over-torquing to prevent cracking plastic trim.
Some smart thermostats include a trim plate to cover any previous paint or wallpaper imperfections. Align this plate over the baseplate and secure it with provided snap tabs or screws. Verify the trim plate sits flush against the wall; superficial gaps can compromise the seal and allow dust to accumulate behind the thermostat. A clean installation not only looks professional but also helps the thermostat’s ambient sensors to read accurate room temperatures.
Wiring with Color Codes
Refer to your photograph or wire labels as you pull each wire through the baseplate’s wire slot. Most systems use standardized color codes: red (R) for 24V power, white (W) for heat, yellow (Y) for cooling, green (G) for fan, and blue or C for the common wire. Some heat pump systems use O/B wires for reversing valves. Carefully strip 1/4 inch of insulation—if it was not already done—then insert the bare end under the corresponding terminal screw. Tighten each terminal until the wire feels secure but avoid overly tightening, which can nick the copper conductor. A secure connection prevents intermittent faults and ensures your smart thermostat installation operates flawlessly.
If your system lacks a C-wire, check if your chosen smart thermostat bundle includes a power adapter. Alternatively, you can add a C-wire from the furnace control board, but this step may require more advanced HVAC knowledge. For a simpler DIY approach, look for models with battery backup or C-wire adapter kits available through retailers. Once every wire is connected correctly, gently push excess wire length back into the wall cavity to avoid pinching and moisture exposure.
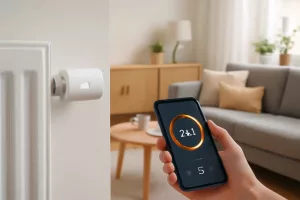
Configuring and Connecting to Wi-Fi
After turning the power back on at the breaker, your smart thermostat powers up and runs a brief self-test. The touchscreen typically displays prompts for basic settings—language selection, date and time, and unit type (Fahrenheit or Celsius). Next, you’ll move into the network setup phase where the device scans for available Wi-Fi networks. Use the thermostat’s touchscreen to select your home SSID and enter the Wi-Fi password carefully, or follow instructions in the manufacturer’s mobile app.
Alternatively, some thermostats require initial configuration entirely through a smartphone app. In this case, download the compatible app on your iOS or Android device, create an account, and follow the in-app setup wizard. When prompted, the app will search for nearby Bluetooth-enabled thermostats and transfer network credentials wirelessly. This method can be faster and helps avoid typing complex passwords on a small touchscreen.
Once connected, the thermostat communicates with cloud servers for firmware updates. Allow any automatic updates to complete before customizing schedules. A successful Wi-Fi thermostat setup ensures you can control settings remotely, receive energy usage reports, and integrate voice assistant services like Amazon Alexa or Google Assistant.
If you encounter a connectivity issue—such as an incorrect password or weak signal—consider moving your router closer or installing a Wi-Fi range extender. Some thermostats support 5 GHz and 2.4 GHz bands; if the 2.4 GHz band is crowded, switching to 5 GHz (if your device supports it) can improve stability. Confirm your network firewall isn’t blocking the thermostat’s MAC address, and consult the manufacturer’s online support articles for any brand-specific quirks.
Optimizing Energy-Saving Settings and Schedules
Now that your thermostat is connected, it’s time to leverage the energy-saving thermostat features fully. Smart thermostats allow you to create detailed schedules, adjusting temperature setpoints based on time of day or occupancy. For example, you might program the thermostat to lower the heat to 65°F overnight, raise it to 72°F during morning hours, and reduce it again while the house is empty at work. According to ENERGY STAR, properly programmed temperatures can save up to 10% on annual heating and cooling costs.
Many models include learning algorithms that adapt to your routines. A learning thermostat will monitor when you adjust settings manually and gradually build an optimized schedule—this hands-free approach reduces the need for constant programming. For households with varying schedules, consider geofencing features that use your smartphone’s location to trigger temperature changes automatically when you leave or return home.
In addition to time-based scheduling, explore advanced settings such as humidity control, fan circulation, and vacation mode. Some thermostats integrate with weather forecasts to pre-cool or pre-heat your home based on outdoor conditions. You can access these features via the mobile app or directly on the thermostat’s display, ensuring your system operates at peak efficiency no matter the climate.
Finally, review energy usage reports regularly. Most smart thermostat platforms provide weekly or monthly summaries that highlight peak usage periods and suggest potential savings. Use this data to fine-tune your schedules, resolve inefficiencies, and maintain comfortable living while reducing overall energy consumption throughout the year.
Integrating with Other Smart Home Devices
Your new smart thermostat can become the central hub of a broader smart home ecosystem. By integrating with voice assistants and home automation platforms, you can control heating and cooling alongside lighting, security, and entertainment. For example, pairing your thermostat with Amazon Alexa or Google Assistant allows you to adjust the temperature via voice command: “Alexa, set the living room to 70 degrees.”
To integrate with a smart home hub like Samsung SmartThings or Apple HomeKit, follow the device-specific pairing instructions in your thermostat’s app. Often, you’ll add a new “Thing” or “Accessory” in the hub’s interface and scan a QR code on the thermostat. Once linked, you can create routines—such as turning off heating or air conditioning when the front door locks—or include your thermostat in “Away” scenes that automatically adjust multiple devices.
For homeowners focused on neat installations, consider organizing wiring and accessories with custom storage solutions. Check out our guide on organizing your home to keep manuals, remote sensors, and spare adapters in order. A tidy setup not only looks professional but also simplifies future maintenance.
If you have smart sensors—like motion detectors or door/window sensors—you can trigger forced HVAC adjustments when rooms are occupied. For instance, a motion sensor in a bedroom can inform the thermostat to focus cooling only where someone is present, reducing wasted energy. Experiment with automation platforms such as IFTTT to explore custom triggers like weather-based temperature changes or energy tariff schedules for homes on time-of-use billing.
Maintenance and Troubleshooting Your Smart Thermostat
Common Pairing Issues
Occasionally, you may face pairing problems during your smart thermostat installation or when linking with third-party services. If the device doesn’t appear in the mobile app, first verify you’re using the correct Wi-Fi network and password. Some routers have separate guest networks—ensure you’re connecting to your primary network. A quick router reboot can also clear cached conflicts, improving connectivity. If issues persist, perform a factory reset on the thermostat using the app or by holding the reset button, then retry the pairing sequence.
When integrating with voice assistants, you might encounter difficulty discovering the thermostat. Confirm that the thermostat’s skill or action is enabled in the Alexa or Google Home app, then sync devices. If the thermostat still doesn’t appear, remove and re-install the integration, or clear the cache in the smart home app. Always check for firmware updates on both the thermostat and app to ensure compatibility.
Seasonal Maintenance Tips
Smart thermostats require minimal ongoing maintenance, but a few seasonal tasks will keep performance optimal. In spring and fall, inspect the thermostat’s sensor and screen for dust buildup—gently clean with a microfiber cloth. Check the Wi-Fi signal strength and router placement; relocated furniture or carpeting can degrade signal quality over time.
Ensure your HVAC filter is changed regularly—an efficient air filter reduces strain on your system, making the thermostat’s job easier. Most thermostats can remind you to replace filters by tracking runtime; enable this feature in the app. For heat pump owners, verify the O/B wire hasn’t loosened during temperature fluctuations that cause minor door vibrations around the thermostat.
Finally, review scheduling logs at the start of each season. Update customized setpoints to match seasonal comfort preferences. For homeowners with vacation properties, explore holiday mode—this feature maintains minimal temperature control to prevent freezing pipes without retaining full schedule settings. With proactive maintenance and troubleshooting, your DIY Wi-Fi thermostat installation will deliver reliable performance year after year.
Upgrading your home with a smart thermostat doesn’t have to be complex. This DIY Wi-Fi thermostat installation guide shows that with proper planning, careful wiring, and optimized settings, you can enjoy enhanced comfort and energy savings. Integrate your thermostat with voice assistants and other smart devices to unlock full automation potential. Regular maintenance and troubleshooting ensure long-term reliability. Ready to make the switch? Start your next smart home project today and experience the convenience of a modern HVAC solution. For more options, explore models like Ecobee here.