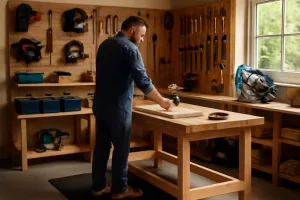
Maximizing every square inch in a compact workshop can be a challenge. A fold-down workbench kit offers a smart, versatile solution that tucks away when not in use while providing sturdy support when you need it. In this guide, we’ll walk through planning, building, and customizing your own fold-down workbench with built-in storage to help you keep tools organized and accessible.
Why Choose a Fold-Down Workbench?
Traditional workbenches take up valuable floor space, making them a poor fit for garages and workshops under 100 square feet. By contrast, a wall-mounted fold-down workbench transforms a bare wall into a functional workspace in seconds. Key benefits include:
- Space optimization: Fold the bench flat against the wall when not in use and reclaim your floor space for additional equipment or movement.
- Versatility: Use it for woodworking, electronics, or repair tasks and then fold it up to make room for larger projects or vehicles.
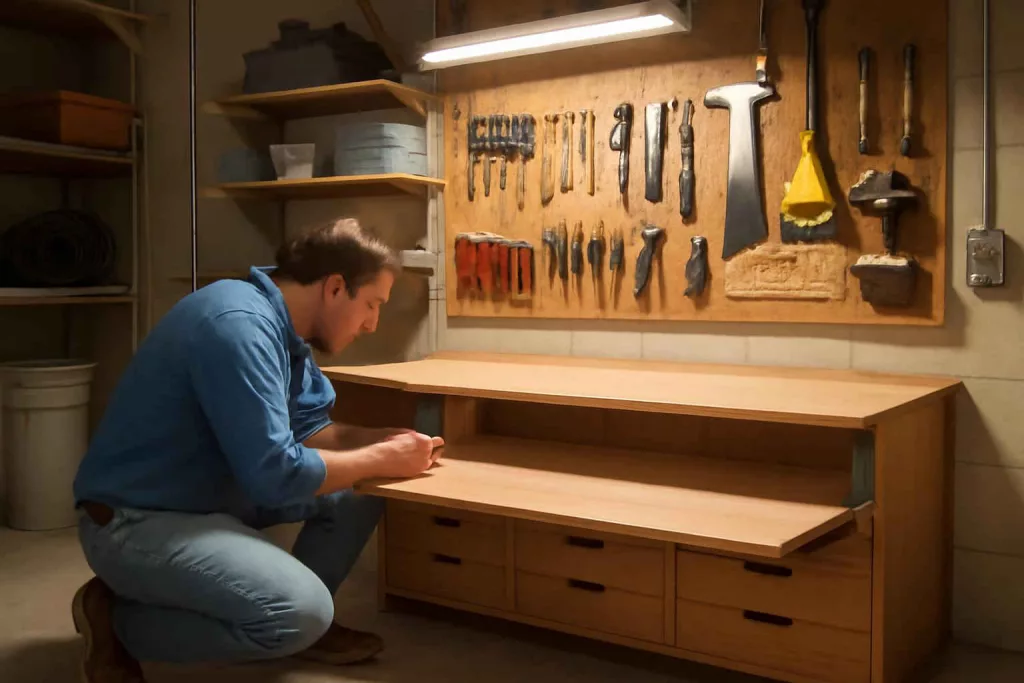
- Integrated storage: Built-in drawers and shelves keep frequently used tools at your fingertips while ensuring the workspace stays tidy. Consider adding a heavy-duty folding bracket set for reliable support.
Comparison to Other Solutions
While options like a rolling tool chest or pegboard systems excel at vertical storage, they don’t provide a dedicated work surface. A fold-down bench combines workspace and storage in one compact package, making it an ideal mid-to-bottom funnel solution for hobbyists and pros alike.
Planning Your Fold-Down Workbench
Assessing Your Space
Begin by measuring the section of wall you plan to use. A standard bench depth of 20–24 inches provides ample working area without encroaching too much on floor space. Ensure the wall surface is solid, preferably stud-framed drywall or exposed studs, capable of bearing 200–300 pounds when loaded.
Choosing Materials
A robust build starts with quality materials. Typical choices include:
- Workbench top: 3/4″ plywood or hardwood plywood for strength and a smooth finish.
- Storage panels: 1/2″ plywood for drawer faces and shelf components.
- Folding hardware: Heavy-duty folding table brackets, gate hinges, or specialty fold-down bench hinges.
- Fasteners: 2-1/2″ wood screws, toggle bolts for drywall sections without studs, and wood glue for panel assembly.
Hardware Selection
Investing in quality brackets is crucial. Look for folding table brackets rated for at least 400 pounds and made from powder-coated steel to prevent rust. You can decorate exposed hardware with a matching paint finish to blend seamlessly with your workshop decor.
Tools and Materials Needed
Essential Tools
- Circular saw or table saw for cutting panels
- Drill/driver with bits and countersink attachment
- Level and pencil for marking stud locations
- Measuring tape and framing square
- Orbital sander or sandpaper (120–220 grit)
- Clamps to hold panels during assembly
- Paintbrushes or foam brushes for finish application
Materials List
- 3/4″ plywood, 4’x8′ sheet (top surface)
- 1/2″ plywood, 4’x8′ sheet (shelves and drawer faces)
- Heavy-duty folding brackets (2 pairs)
- Drawer slides (soft-close recommended)
- Wood screws (2-1/2″ and 1-1/4″)
- Wood glue and wood filler
- Paint or clear finish (polyurethane)
Step-by-Step Build Instructions
1. Cutting the Components
Use a circular saw with a straight-edge guide or a table saw to cut the plywood top to your desired width and depth. Cut storage panels for shelves, drawer faces, and side supports according to your bench dimensions. Label each piece to avoid confusion during assembly.
2. Assembling the Storage Module
Begin by constructing the storage frame that will mount to the wall. Attach side panels to bottom and top panels using wood glue and 1-1/4″ screws. Ensure corners are square with a framing square. Install drawer slides according to manufacturer instructions and slide in the drawer boxes for test fitting.
3. Mounting the Storage Module
Locate and mark stud centers behind the drywall. Pre-drill 1/4″ pilot holes for lag bolts. Lift the storage frame into place and secure it to wall studs with 3/8″ lag bolts. Use a level to confirm the top edge is perfectly horizontal before fully tightening all bolts.
4. Installing Folding Brackets
Position brackets evenly along the underside of the workbench top. Secure one side of each bracket assembly to the bench top and the other side to the storage module’s front face. Confirm that the bench folds up and down smoothly without binding. Adjust bracket alignment if necessary.
5. Attaching the Workbench Top
With the bench top folded down, clamp it to the brackets. Drill pilot holes through bracket mounting holes and fasten the top with 2-1/2″ screws. Test the bench’s movement to ensure stability in both raised and lowered positions.
6. Adding Finishing Touches
Fill any visible screw holes or imperfections with wood filler. Sand all surfaces smooth, starting with 120-grit and progressing to 220-grit paper. Apply two to three coats of your chosen finish, sanding lightly between coats for a professional look.
Customizing Storage Options
Built-In Shelves and Drawers
Custom storage makes your bench even more functional. Add open shelves above the drawer stack for frequently used items like sandpaper or measuring tools. Install soft-close drawer slides for a touch of luxury.
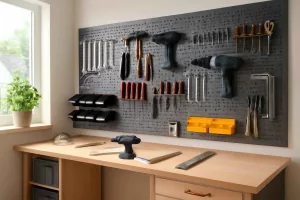
Pegboard Back Panel
An integrated pegboard on the back panel provides flexible hanging storage. Choose a 1/4″ pegboard sheet and paint it to match your workshop. Use peg hooks and bins to organize hand tools and accessories.
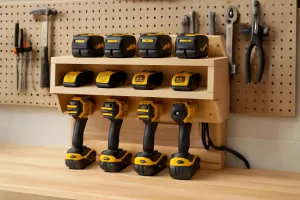
Modular Inserts and Accessories
Enhance drawer organization with tool drawer inserts, foam trays, and dividers. These modular solutions keep fasteners, bits, and accessories in place even when the workbench folds.
Maintenance and Tips for Longevity
Routine Inspection
Every three months, check all hardware for tightness. Look for loose screws, bracket movement, or wear on drawer slides. Tighten or replace components to maintain safety.
Protecting the Surface
Reapply a clear polyurethane coat annually, especially if your bench sees heavy chemical use or moisture exposure. Wipe down the surface after each project to prevent buildup of residues.
Seasonal Care
In colder climates, consider removing the bench top during winter to avoid moisture-related warping. Store it flat indoors and remount in spring for optimal performance.
Frequently Asked Questions
What weight capacity can I expect?
With quality folding brackets rated for 400+ pounds, your bench should safely support most home workshop tasks. Always check manufacturer specifications and distribute heavy loads evenly.
Can I install without studs?
You can use heavy-duty toggle bolts in drywall, but stud-mounted installation offers superior stability. If studs are unavailable, reinforce the wall with a plywood backing board fastened across multiple studs.
Is electricity needed?
For tasks requiring power tools, locate the bench near an outlet or install a recessed outlet box in the wall back panel. This keeps cords tidy and reduces trip hazards.
Conclusion
A fold-down workbench with integrated storage transforms tight workshop spaces into multifunctional areas for crafting, repairs, and DIY projects. By carefully planning your dimensions, choosing durable materials, and following these step-by-step instructions, you’ll have a reliable, space-saving workspace that fits your workflow. Ready to elevate your small workshop? Consider adding a complete fold-down workbench kit to simplify assembly and get started today.