A sagging garage door not only compromises security but can also strain the opener and cause uneven wear on springs and rollers. By understanding the underlying causes and following a systematic approach, you can restore proper alignment and prolong the life of your door. This guide will show you how to fix a sagging garage door safely and effectively, with detailed instructions, recommended tools, and practical tips. Whether you’re a seasoned DIYer or tackling your first garage maintenance project, you’ll find the information you need to get the job done right. To prepare, you may consider a comprehensive garage door adjustment tool kit for efficient spring and hardware adjustments.
Understanding the Causes of a Sagging Garage Door
Before diving into repairs, it’s crucial to identify why your garage door is sagging. Addressing the root cause ensures your fixes are effective and long-lasting. The most common factors include worn springs, misaligned rollers, loose hardware, and track issues.
1. Worn or Damaged Springs
Torsion and extension springs support the weight of your door. Over time, metal fatigue can cause them to lose tension, leading to sagging. When springs near the end of their lifespan, you may notice uneven travel or hear creaking noises during operation. Inspect springs visually for gaps, corrosion, or broken coils before proceeding.
2. Misaligned or Worn Rollers
Quality rollers ensure smooth movement along the tracks. Rollers can wear down, become warped, or accumulate debris, causing the door to sit unevenly. If you notice wobble or grinding sounds, rollers may need realignment or replacement.
3. Loose or Missing Hardware
Hinges, brackets, and bolts can loosen due to constant door operation. Even a single missing bolt can affect balance. Regularly check each hinge and bracket for tightness, replacing any worn fasteners.
4. Track Problems
If the vertical tracks are bent or the horizontal tracks aren’t level, the door won’t align correctly. Use a level to verify track position, gently tapping out minor dents with a rubber mallet or replacing severely damaged sections.
Essential Tools and Materials
Gathering the right tools ensures efficient and safe repairs. Here’s a checklist of common items you’ll need:
- Garage door adjustment tool kit (Shop on Amazon)
- Adjustable wrench and socket set
- Level and measuring tape
- Rubber mallet for track adjustments
- Replacement rollers and springs (matched to your door model)
- High-quality garage door lubricant spray
- Safety glasses and work gloves
- Stepladder or stable platform
For air-powered spring winding tools, consider browsing top portable air compressors to power pneumatic accessories safely in your garage workspace.
Step-by-Step Procedure to Fix a Sagging Garage Door
Follow these steps in sequence to address balance issues systematically. Take your time at each stage and double-check measurements to maintain even alignment.
Step 1: Disconnect the Opener and Secure the Door
Begin by unplugging the garage door opener to prevent accidental activation. Manually lower the door until it’s fully closed, then clamp vice grips onto the track just above a roller on each side. This prevents sudden movement and ensures safety during adjustments.
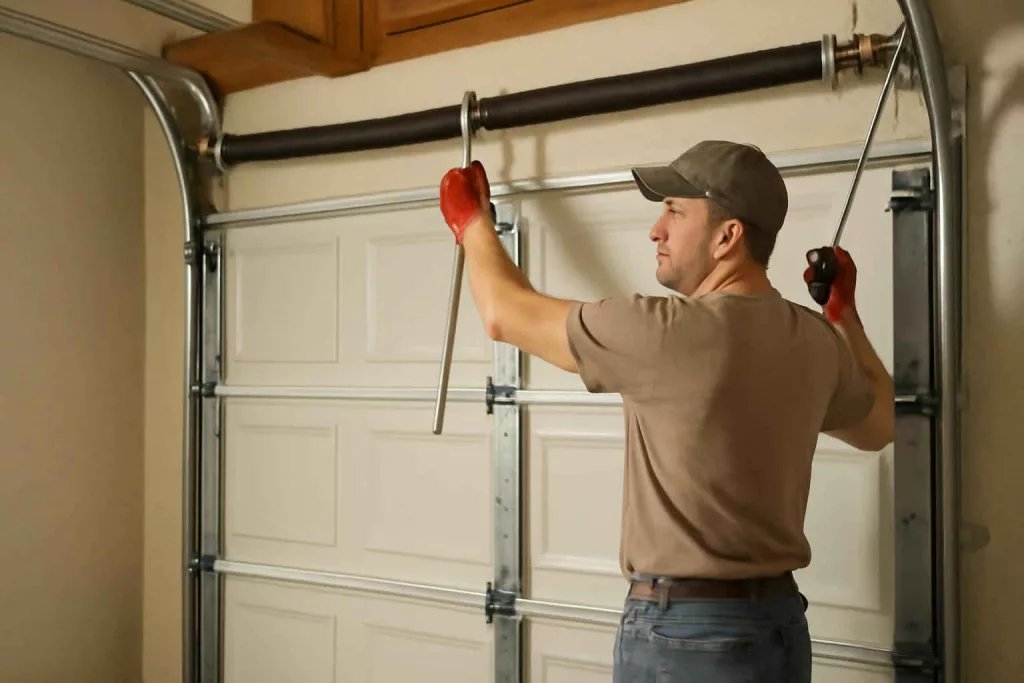
Step 2: Inspect and Adjust the Springs
If your door uses torsion springs, you’ll see a metal rod running above the door. Use the provided winding bars from your adjustment kit to slightly increase or decrease tension in quarter-turn increments. For extension springs on either side of the door, adjust the tension by moving the spring hooks to a higher or lower notch on the track bracket. After each adjustment, test the balance by lifting the door halfway. A balanced door should remain stationary without rising or falling.
Step 3: Realign or Replace Rollers
Remove a few mounting bolts on one side and gently tap the track with a rubber mallet to correct minor bends. If rollers are worn or deteriorating, replace them with nylon rollers for quieter operation. Ensure each roller moves smoothly within the track, and re-tighten bolts just snugly—over-tightening can cause binding.
Step 4: Tighten and Inspect All Hardware
Work your way around the door, tightening bolts, nuts, and hinges using your adjustable wrench. Replace any missing or stripped fasteners. Check the alignment of bracket attachments at the cable drum and bottom bracket, ensuring they’re securely anchored to the door frame.
Step 5: Level the Tracks
Use a level to confirm both vertical and horizontal tracks are plumb. Minor bends can be corrected with gentle taps from a rubber mallet. If the tracks are severely damaged, order replacements matching the track dimensions of your specific door model.
Step 6: Lubricate Moving Parts
Apply a garage door lubricant to springs, roller bearings, hinges, and the opener chain or screw drive. Proper lubrication reduces friction, prevents rust, and helps maintain balance. Wipe away excess spray to avoid attracting dust or debris.
Step 7: Test and Fine-Tune Your Adjustments
Re-engage your opener and observe the door’s movement. Listen for grinding or uneven motion. If sagging persists, repeat spring adjustments in small increments and re-test. A well-balanced door should open and close smoothly, with no side noticeably lower than the other.
Safety Tips and Precautions
Garage door springs store significant energy. Mishandling can lead to serious injury. Always wear eye protection and gloves. Keep children and pets away from the work area. Never attempt major spring replacement without proper winding tools and knowledge. If you feel unsure at any step, consult a professional.
When to Call a Professional
While many balance issues can be resolved with basic tools, some situations warrant expert intervention:
- Broken or severely corroded springs
- Complex track damage requiring welding or custom replacements
- Electrical or opener motor issues
- Persistent alignment problems after multiple adjustments
Professional technicians carry specialized equipment and replacement parts, ensuring safe, code-compliant repairs. You can also explore reliable smart garage door openers if you’re considering an upgrade while repairing your current system.
Conclusion
Fixing a sagging garage door involves a clear understanding of spring tension, roller alignment, track leveling, and safety precautions. With the right tools and a methodical approach, you can restore your door’s balance, enhance its lifespan, and improve overall security. Always prioritize safety when adjusting springs and consider professional help for complex issues. For occasional maintenance, keep a quality lubricant and adjustment kit on hand, and revisit your door’s hardware annually to catch potential problems early. Ready to keep your garage door in top condition? Shop essential accessories on Amazon here.