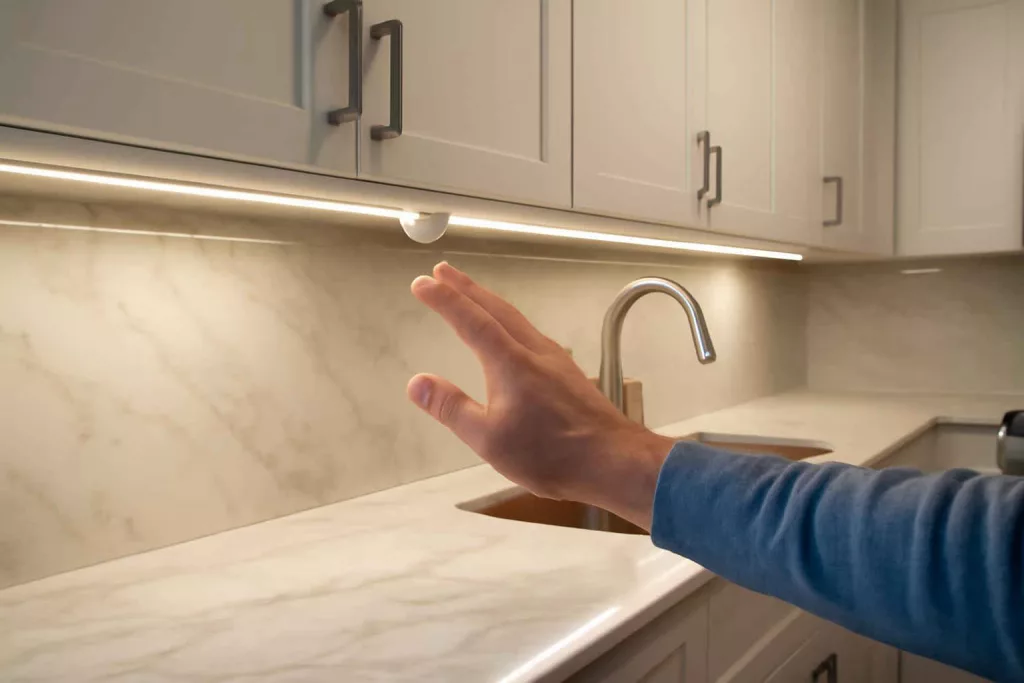
Transform your kitchen or workspace with motion sensor under-cabinet LED lights for reliable hands-free illumination. Whether you’re preparing meals late at night or tackling detailed tasks in a workshop, these smart lights automatically activate when you need them most. In this guide, you’ll learn how to choose the right motion sensor under cabinet lights, gather the necessary tools, complete wiring and mounting, and integrate your new lighting into a broader smart home system. Ready to start? Find top-rated motion sensor under cabinet lighting here: motion sensor under cabinet lighting.
Why Choose Motion Sensor Under-Cabinet Lights?
Motion sensor under-cabinet lights offer several advantages over traditional switch-operated fixtures. By automatically turning on when movement is detected, they provide convenience, enhance safety, and reduce energy waste. Whether installing in a modern kitchen, workshop, or bathroom vanity, these lights simplify everyday tasks.
Hands-Free Convenience
With motion-activated lighting, you eliminate the need to search for a switch or reach across counters with full hands. This is especially helpful during cooking, cleaning, or detailed DIY work. No more fumbling for switches or interrupting your workflow—just seamless, automatic illumination.
Energy Efficiency
Because the lights only operate when motion is detected, they use power more efficiently than lights left on for long periods. Most sensors include adjustable timeout settings, allowing you to tailor activation duration and sensitivity to your space. When integrated with a rechargeable or battery-powered LED strip, you’ll enjoy long runtimes between charges or battery changes.
Improved Safety and Security
Under-cabinet motion lights can also serve as low-level night lighting, guiding you safely through the kitchen or workshop without harsh overhead fluorescents. In addition, they deter pests and provide visibility in tight corners, reducing the risk of accidents or spills. Consider pairing with a smart home hub or motion alarm for added security features.
Types of Under-Cabinet Motion Sensor LED Lights
Not all motion sensor under-cabinet lights are created equal. Before purchasing, consider your power source, installation method, and desired control features. Primary options include battery-powered, hardwired, rechargeable, and Wi-Fi-enabled fixtures.
Battery-Powered LED Puck Lights
Battery-operated puck or strip lights are easy to install—no wiring required. Simply mount the lights using screws or double-sided tape, insert AA or AAA batteries, and adjust sensor sensitivity. These models are ideal for renters or DIY projects in kitchens, closets, or workshops. For durable, long-lasting operation, choose LED puck lights with at least 20,000 hours of runtime.
Hardwired LED Strip Lights
Hardwired under-cabinet lighting connects directly to your home’s electrical system, offering uninterrupted power without battery replacements. Installation requires planning, cable routing, and possibly a junction box. While more involved, hardwired systems deliver consistent brightness and can be integrated into existing smart switches or circuits for centralized control. Refer to our DIY Wi-Fi thermostat installation guide for an example of hardwired smart home modifications.
Rechargeable LED Bars
Rechargeable LED light bars blend the convenience of battery power with rechargeable battery technology. You mount the bars under cabinets and periodically recharge via USB or proprietary docking station. These lights often feature adjustable color temperature and brightness levels, plus built-in PIR sensors. They’re a middle ground for those seeking minimal wiring without frequent battery swaps.
Smart Wi-Fi or Zigbee-Enabled Lights
For fully integrated smart home setups, consider under-cabinet LED fixtures with built-in Wi-Fi or Zigbee connectivity. Pair them with voice assistants like Alexa or Google Assistant for voice control or link to automation routines via smart hubs. Explore our budget-friendly smart light switch guide to expand your smart lighting ecosystem.
Tools and Materials Needed
Proper preparation streamlines installation and helps avoid last-minute trips to the hardware store. Gather the following tools and materials before you begin.
Essential Tools
- Measuring tape and pencil for accurate positioning
- Drill with 3/16” and 1/8” bits
- Screwdriver set (Phillips and flathead)
- Wire strippers and connectors (for hardwired models)
- Level to ensure straight mounting
- Voltage tester (for safety when wiring)
Lighting Components
- Motion sensor LED strips, bars, or puck lights
- Power supply adapter (for hardwired or USB-rechargeable units)
- Mounting hardware (screws, anchors, brackets)
- Cable clips or conduit for neat wiring
Step-by-Step Installation Guide
Follow these steps carefully, adjusting for your chosen light type. Always consult manufacturer instructions and local electrical codes for hardwired setups.
1. Planning and Measurement
Start by mapping your under-cabinet layout. Measure the length of counter runs, spacing for light fixtures, and sensor placement. Sensors perform best when unobstructed, so avoid mounting inside deep cabinets or behind clutter. Mark each mounting point with a pencil, ensuring uniform spacing. If installing multiple fixtures in series, plan where to run cables or place power adapters.
2. Turning Off Power
If working with hardwired lights, turn off power at the circuit breaker. Verify circuits are de-energized with a voltage tester before handling live wires. For battery or rechargeable lights, skip this step but still keep caution when using power tools near cabinets.
3. Mounting the Lights
Use a level to keep fixtures aligned. For puck lights, drill 3/16” pilot holes for screws or use strong double-sided tape on clean surfaces. For strip lights, secure the LED strip using adhesive backing or mounting clips. Ensure the sensor eye faces the open space where motion is expected. Leave access to the battery compartment or charging port.
4. Wiring Connections (Hardwired Only)
Strip 1/2” of insulation from supply wires and light leads. Connect hot (live) to hot and neutral to neutral with wire connectors, then tuck connections into a junction box. Ground the fixture if required. Secure all wires away from sharp edges. After wiring, affix the power adapter or driver within the cabinet and close all access panels.
5. Testing and Adjustments
Restore power (if applicable) and walk through the sensor’s field of view. Adjust sensitivity and timeout settings per manufacturer instructions. Fine-tune sensor angle or brightness level for optimal coverage. For rechargeable models, perform an initial full charge before use.
Smart Home Integration and Tips
Unlock advanced control by integrating under-cabinet motion sensor lights into your smart home network. With compatible fixtures or additional smart modules, you can create automation routines and voice commands.
Using Voice Assistants
Connect Wi-Fi or Zigbee-enabled lights to Alexa or Google Assistant. Ask your assistant to turn lights on or off, adjust brightness, or trigger scenes. Example voice command: “Alexa, dim under-cabinet lights to 50%.” For step-by-step pairing, refer to the manufacturer’s app guide.
App Control and Scheduling
Most smart lights come with companion apps. Schedule lights to activate at dusk or only during kitchen hours. Combine motion triggers with other sensors (door or window sensors) for multi-condition automation. Example: lights turn on only when motion is detected after sunset.
Automation Routines
Create routines that link under-cabinet lights with overhead fixtures or appliances. Example routine: upon motion detection in the morning, under-cabinet lights activate at 70% brightness and coffee maker starts brewing. Check out our smart exhaust fan buying guide for other smart home inspiration.
Troubleshooting Common Issues
Even the best systems can experience hiccups. Here are solutions to frequent problems.
Sensor Not Detecting Motion
Confirm the sensor lens is free of obstructions and clean. Increase sensitivity in the settings if small movements go unnoticed. For recessed installations, consider repositioning closer to traffic flow or using a wider-angle sensor model.
Light Flickering or Dimming
Flicker can result from loose wiring or low battery voltage. Tighten wire connectors and replace old batteries or recharge the unit fully. For hardwired models, confirm the driver’s output matches LED strip requirements and the power supply is stable.
Connectivity Problems (Smart Models)
Weak Wi-Fi or Zigbee signals can cause unresponsive lights. Move the router or add a range extender. Ensure the light’s firmware is updated via its companion app. If issues persist, reset the light and re-add to your network following the manufacturer’s procedure.
Maintenance and Upkeep
Routine maintenance keeps motion sensor lighting performing reliably for years.
Cleaning Sensors and Lenses
Dust and grime reduce sensor accuracy. Gently wipe lenses with a microfiber cloth and mild cleaner every three to six months. Avoid abrasive materials that could scratch the lens surface.
Replacing Batteries or Charging
For battery-powered lights, replace batteries annually or when low-battery indicators activate. Rechargeable lights should be recharged monthly or according to usage patterns. Document charging schedules to prevent unexpected downtime.
Firmware and Software Updates
Smart fixtures often receive performance improvements. Check companion apps quarterly for firmware updates. Install updates promptly to maintain compatibility with smart home hubs and voice assistants.
Top Product Recommendations
If you’re ready to purchase, consider these popular options:
- Battery-Powered PIR LED Puck Lights – Easy install, long battery life. Find options here: battery powered LED puck lights PIR
- Rechargeable LED Light Bars with Sensors – Adjustable brightness and color temperature. Browse chargers here: rechargeable LED light bar motion
- Wi-Fi Under-Cabinet Smart LED Strips – Voice control, scheduling via app. Shop smart strips: smart under cabinet LED strip
Conclusion
Installing motion sensor under-cabinet LED lights is a straightforward DIY upgrade that enhances convenience, safety, and energy efficiency in any kitchen or workshop. From selecting the right type—battery-powered, hardwired, or smart-enabled—to following our step-by-step installation, you’ll achieve hands-free lighting tailored to your needs. With proper maintenance and smart home integration, your new lights will reliably illuminate tasks and blend seamlessly with your connected ecosystem. Ready to brighten your space? Explore top-rated options and get started today with motion sensor under cabinet lighting: motion sensor under cabinet light.
