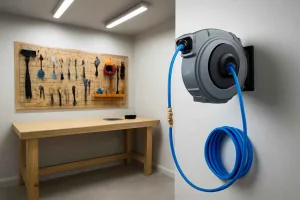
Installing a wall-mounted vacuum hose reel can transform your home workshop into an organized, efficient space. In this guide, you’ll learn each step of the wall-mounted vacuum hose reel installation process so you can save floor space, protect your hose from damage, and streamline cleanup tasks. For a reliable hose reel option, check this model on Amazon.
Why Choose a Wall-Mounted Vacuum Hose Reel?
Wall-mounted vacuum hose reels offer several advantages over simple coiled storage or portable carts. First, mounting the reel to a sturdy wall stud keeps the hose off the ground, reducing tripping hazards and protecting it from abrasion on concrete floors. Second, a mounted system retracts and extends easily, so you’re less likely to drag the hose across sharp edges or piece together tangled segments.
In a tightly arranged workshop, saving floor space is critical. A wall-mounted reel frees up room for workbenches, tool storage, or machines. If you’ve read our guide on portable workshop setup, you know how optimizing every square foot makes projects more efficient. Integrating a vacuum hose reel with existing dust collection or central vacuum ports creates a seamless system, allowing you to move quickly between benches and saws without manual hose handling.
Compared to floor-standing hose racks, wall-mounted reels also reduce wear on the hose. When hoses are coiled loosely on the floor, they can develop kinks or crack over time. A guided reel ensures smooth winding, extending hose life and maintaining optimal suction power. For workshops using dust collection, pairing a wall-mounted hose reel with your existing setup can significantly improve dust management—read our dust collection system guide for best practices.
Planning Your Installation
Before drilling any holes, you need a clear plan. First, choose a location near your vacuum or dust collector inlet. The reel must be within reach of the machine so suction remains strong. Measure the hose length you’ll need for the farthest workstation and ensure the reel’s capacity matches that length. Most reels hold 25 to 50 feet of 1-1/4″ or 1-1/2″ hose, so match the model to your hose diameter and length.
Next, locate wall studs where you’ll mount the bracket. Studs spaced 16″ on center are most common, but confirm with a reliable stud finder. If studs aren’t aligned with your ideal reel position, consider using a stout plywood backer or mounting plate secured to multiple studs. Plywood backing creates a robust mounting surface that can handle the reel’s weight and the leverage of a fully extended hose.
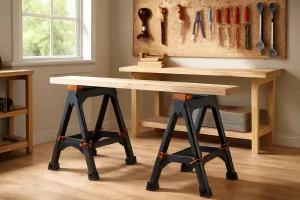
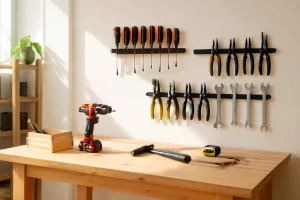
At this stage, think about integration with other storage solutions. You might mount a small shelf above the reel for attachments and nozzles, or add a pegboard storage panel nearby to hang accessories. Grouping related tools—dust masks, vacuum attachments, and extension wands—in one zone enhances workflow. Effective workshop layout recommendations are detailed in our portable workshop setup article.
Gathering Tools and Materials
For a smooth installation, assemble these tools and materials beforehand:
- Vacuum hose reel kit compatible with your hose diameter and length
- Stud finder and pencil
- Power drill with socket driver set
- Level and measuring tape
- High-quality wood screws or lag bolts (specified by reel manufacturer)
- Anchors and toggle bolts (if mounting into drywall or plywood backer)
- Screwdriver and adjustable wrench
- Eye protection and dust mask
- Plywood backer board (optional) and wood screws
Double-check that your hose reel package includes mounting brackets, hardware, and any adapter fittings for connecting to your vacuum inlet. If you’ll join sections of hose, stock up on hose clamps or quick-connect fittings. Having all items ready prevents unnecessary trips to the store mid-project.
Step-by-Step Installation Guide
1. Mark Stud Locations and Reel Height
Use a stud finder to locate two adjacent studs. Mark their centers with a pencil. Decide on a reel height that allows the hose to hang freely without scraping the floor. A good rule of thumb is to position the center of the reel drum about 4 to 5 feet above the floor for easy winding and recoiling.
2. Level and Mount the Backer (Optional)
If your studs don’t align perfectly, mount a plywood backer spanning the two studs. Cut a 1/2″ plywood board slightly wider than the reel bracket. Secure it to the studs with 3″ wood screws at top and bottom. Ensure the board is level before fully tightening screws.
3. Attach the Mounting Bracket
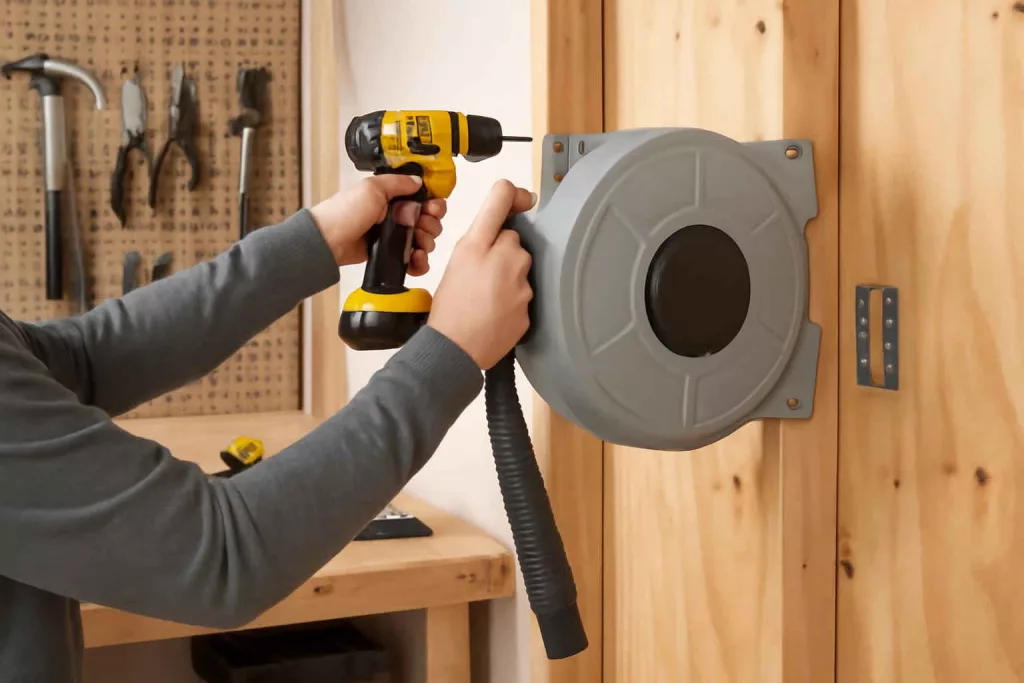
Hold the reel’s bracket against the studs or backer board at the marked height. Using a level, confirm it’s perfectly horizontal. Drill pilot holes into each stud or through the backer. Fasten the bracket with the recommended lag bolts or heavy-duty screws. Tighten securely so the bracket can bear the reel’s weight without shifting.
4. Install the Reel and Hose
Slide the hose reel onto the mounted bracket per manufacturer instructions. If it’s a two-piece mount, attach the reel housing first, then snap on any guide arms. Feed one end of the hose into the reel drum and wind it a few turns to secure. Attach the hose’s inlet fitting to your vacuum or dust collector port, ensuring an airtight seal with Teflon tape or gasket if needed.
5. Seal and Test Connections
Check all threaded connections and quick-connect fittings for leaks. Turn on your vacuum or dust collector and fully extend the hose. Listen for hissing or reduced suction. Tighten clamps or fittings where needed. Fully retract and extend the hose several times to verify smooth operation.
6. Final Adjustments
If the reel has adjustable tension settings or a brake, set them according to your hose weight and length. A well-balanced tension prevents rapid, uncontrolled retraction. Store attachments on nearby hooks or a small shelf so you can swap nozzles without searching through cabinets.
Maintenance and Safety Tips
Regular maintenance keeps your wall-mounted vacuum hose reel working reliably. Every few months, inspect the hose for cracks, punctures, or stiff sections. Replace damaged hose segments promptly using quick-connect couplings to avoid downtime. Clean the hose interior by spraying compressed air from your main vacuum to dislodge trapped debris.
Lubricate moving parts, such as swivel joints and guide rollers, with a light machine oil. Tighten mounting bolts annually to compensate for vibration. If your workshop gets cold in winter, check that the hose material remains flexible; consider switching to a cold-resistant hose if you store your reel near unheated walls.
Safety should always be a priority. Never exceed the reel’s rated hose length and diameter. Overloading strain can warp drum components or cause mounting failures. When working on the reel or adjusting tension, lock it in place or disconnect power to avoid accidental hose recoil. For more workshop safety advice, explore our safety-focused gear guide.
Integrating with Your Workshop System
Once your wall-mounted hose reel is installed, consider expanding its utility. Install multiple reels on different walls to serve various zones—wood shop area, metalworking bench, and spray booth. Label hoses or use colored fittings to prevent cross-contamination when switching between dust collection and simple shop vacuum tasks.
For workshops using central vacuum systems, install a recessed inlet near the reel. This setup eliminates an external machine and reduces noise. Retrofit kits are available to adapt most hose reels to central vacuum piping—simply connect the adapter at the reel’s inlet. Learn more about central vacuum setups in our dust collection system guide.
Finally, integrate hose storage with other organizational solutions. Combine your reel installation with dedicated racks for extension cords, compressor hoses, and air tools. This cohesive approach keeps every hose and cable accessible, avoids tangles, and promotes a safe, clutter-free workshop.
Conclusion
Mastering wall-mounted vacuum hose reel installation brings order and efficiency to any home workshop. By planning your mount location, gathering the right tools, and following our step-by-step guide, you can achieve smooth hose management, improved safety, and extended hose life. Routine maintenance and thoughtful integration with your existing dust collection or central vacuum system ensure lasting benefits.
Ready to upgrade your workshop? Consider grabbing this wall-mounted vacuum hose reel on Amazon and start enjoying a neater, more productive workspace today.