Sharpening kitchen knives with a whetstone ensures a precise, durable edge and extends the life of your cutlery. By selecting the right grit, preparing the stone correctly, and maintaining a consistent angle, you can achieve professional-quality results at home.
Introduction
Maintaining a razor-sharp edge on your kitchen knives is essential for safe, efficient food preparation. Unlike pull-through sharpeners or electric devices, a whetstone offers hands-on control and a finely tuned finish. Investing in a quality professional whetstone lets you progress through multiple grits, from coarse to fine, ensuring each pass hones and refines the blade. Whether you’re a home cook who values precision or simply want to save money on professional sharpening services, mastering a whetstone at home can transform your culinary experience.
This guide covers every stage of the process—from choosing the ideal stone to finishing touches—so you can sharpen with confidence. We’ll also share a real-world example, common mistakes to avoid, and tips for even better results.
Step-by-Step Guide to Sharpening Kitchen Knives with a Whetstone
1. Choose the Right Grit
Start with a coarse grit (around 400–600) for very dull or damaged blades. Use a medium grit (1000–3000) for routine sharpening and edge realignment. Finish with a fine grit (4000–8000) to polish and refine the edge. Many combo stones have dual grits, making it easy to switch surfaces. If you’re new to whetstones, a 1000/6000 grit combo is a versatile choice.
2. Prepare the Whetstone
Soak the whetstone in water for 10–15 minutes until bubbles stop rising. Place the stone on a non-slip base or damp towel to keep it stable. Proper lubrication ensures metal filings suspend in water, preventing clogging and producing a smoother finish. Keep a small spray bottle of water handy to re-wet the surface during sharpening.
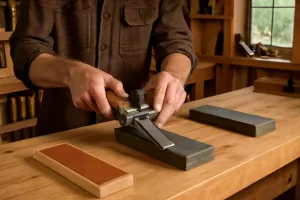
3. Establish the Correct Angle
Kitchen knives typically sharpen best at 15–20 degrees per side. To visualize 15 degrees, imagine the blade tilted slightly upward from flat, like closing a book a quarter open. Use an inexpensive angle guide or practice by stacking coins behind the spine. Consistent angle is crucial: drifting just a few degrees can round the edge and reduce sharpness.
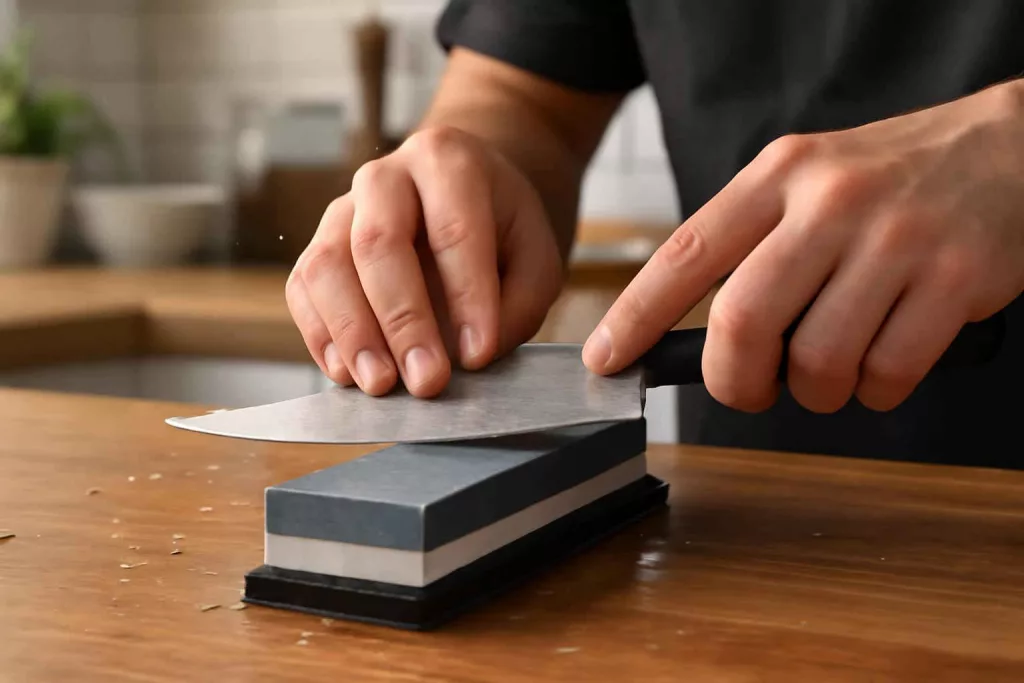
4. Begin with Coarse Grit Strokes
Place the heel of the knife on the stone, hold the handle, and press gently. Sweep the blade forward in a sweeping arc, maintaining angle and light pressure. Work from heel to tip in smooth, controlled strokes. Count strokes and mirror on both sides (e.g., 10–15 each) to establish symmetry.
5. Check for a Burr
After several passes, feel for a burr (a slight wire edge) on the opposite side of the blade. Run your fingertip gently away from the edge. Once you detect a burr along the entire length, you know the edge is realigned and ready for finer grits.
6. Progress to Medium Grit
Flip the stone to medium grit (1000–3000) and repeat the same number of strokes. This grit removes coarse scratches and sharpens the edge. Keep the stone wet, and adjust pressure as you move toward finer results. Maintain your angle and count matches the previous set to keep the edge balanced.
7. Finish with Fine Grit
Switch to fine grit (4000–8000) for polishing. Perform gentle, precise strokes—reduce pressure slightly. This stage refines the bevel and creates a mirror-like finish. A polished edge not only slices better but also resists corrosion longer.
8. Stropping and Final Inspection
For a razor finish, strop the blade on leather or a dedicated strop loaded with polishing compound. Pull the blade away from the edge, alternating sides for 10–15 passes. Inspect under good light to ensure a uniform shine and test on paper: a well-sharpened knife should slice cleanly without tearing.
With practice, you’ll develop muscle memory. If you enjoy tool maintenance beyond kitchen knives, check out our guide on how to sharpen wood chisels with a sharpening jig for more sharpening insights.
Practical Example
Meet Sarah, a home cook who noticed her chef’s knife struggling through tomatoes and onions. After a quick session on her new whetstone, the blade glided through produce effortlessly. She started with her 1000/6000 grit combo stone, following eight strokes per side at a consistent 15-degree angle. Within minutes, her knife regained its factory edge.
Sarah’s setup was simple: a clean countertop, damp kitchen towel under the stone for stability, and a spray bottle to re-wet the surface. She wiped the blade with a damp cloth between grits to remove metal debris. After finishing on the 6000 grit side, she stropped on a leather wallet strap using a small dab of polishing compound. The results? Her knife now carved paper-thin cucumber ribbons—proof of a professional-level edge.
Later that day, Sarah prepped a full dinner in record time. She even showed friends at her next dinner party the difference between pulled-back cuts before and after sharpening. Her confidence in handling and maintaining kitchen tools grew, inspiring her to organize her workspace better. She loved how a well-maintained knife made cooking feel seamless and safe.
Common Mistakes
- Inconsistent Angle: Varying the angle by just a few degrees rounds the bevel. Use an angle guide or coins to stabilize your hand.
- Insufficient Lubrication: Dry stones clog with metal filings. Keep the surface wet to prevent glazing and ensure smooth cuts.
- Uneven Pressure: Pressing harder on the heel or tip creates an uneven edge. Maintain light, uniform pressure throughout the stroke.
- Skipping Grit Progression: Jumping from coarse to fine leaves deep scratches. Always work sequentially through grits for a clean finish.
- No Burr Check: Ignoring the burr can mean an improperly aligned edge. Feel for the burr before moving to the next grit.
Tips to Improve Your Sharpening Technique
- Use an Angle Guide: Invest in a simple plastic guide to learn consistency before sharpening freehand.
- Practice on Old Blades: Hone your skill on less expensive knives to build confidence and technique.
- Clean and Flatten Stones: Periodically level your whetstone with a flattening stone or lapping plate to maintain an even surface.
- Strop Regularly: A quick strop before cooking can keep edges sharp longer, reducing the need for a full sharpening session.
- Store Knives Properly: Use a magnetic strip or knife block to protect edges and prevent unnecessary dulling between uses. For smart storage ideas, check our guide on under-sink pull-out organizers.
Conclusion
Sharpening kitchen knives with a whetstone might feel challenging at first, but with the right stone, consistent technique, and a bit of practice, you’ll achieve a razor-sharp edge every time. Direct your focus on maintaining a steady angle, keeping the stone wet, and working through progressive grits. In no time, ordinary meal prep becomes a precise, efficient process. Ready to elevate your kitchen game? Grab a quality whetstone, set aside 15–20 minutes, and enjoy the confidence of a perfectly sharpened knife.
For ongoing maintenance and tool care, explore our other how-to guides and product recommendations across besthomegearhub.com—including maintenance tips for your workshop and kitchen.