Keeping your robot vacuum mop in top condition ensures efficient cleaning, prolongs the lifespan of the device, and prevents costly repairs. Regular robot vacuum mop maintenance not only maintains peak suction and mopping performance but also safeguards sensors and moving parts from dust and debris buildup. Before diving into detailed steps, consider reviewing our comprehensive robot vacuum mops buying guide for tips on choosing a model designed for easy upkeep and replacement parts.
Why Regular Robot Vacuum Mop Maintenance Matters
Robot vacuum mops combine vacuuming and mopping functions in one compact unit. Because these machines handle both dry debris and wet cleaning, neglecting maintenance can lead to clogs, reduced suction, musty odors, and even sensor malfunctions. Here are the key reasons to maintain your robot vacuum mop routinely:
- Optimal Cleaning Performance: Clean brushes, wheels, and sensors ensure the device navigates properly and picks up dirt and dust efficiently.
- Hygiene and Odor Prevention: Moisture in the water tank and mopping pads can breed bacteria if not cleaned, leading to unpleasant smells.
- Cost Savings: Preventing issues like motor burnout or sensor failures reduces repair and replacement expenses.
- Longevity: Regular upkeep extends the lifespan of the battery, motors, and mechanical parts.
By investing just a few minutes after each cleaning cycle, you avoid major problems down the line. Many modern models feature user-friendly components that snap out easily for cleaning, making the process straightforward.
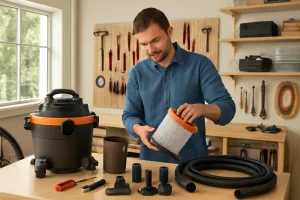
Essential Tools and Supplies for Maintenance
Before you begin maintenance, gather the following supplies to streamline the process:
- Soft microfiber cloths for wiping surfaces and sensors
- A small crevice brush or old toothbrush to remove debris from nooks
- Compressed air canister for dusting sensors and vents
- Replacement filters and HEPA cartridges, such as replacement filters for your robot vacuum mop
- Replacement mopping pads (disposable or washable types)
- Distilled water for filling the water tank to prevent mineral buildup
- Mild cleaning solution for washable parts
Investing in quality spare parts and tools not only saves time but also ensures compatibility. Keep a storage box labeled “Robot Vacuum Mop Maintenance” stocked with these items near your docking station for quick access.
Cleaning the Dustbin and Water Tank
The dustbin and water tank are the core receptacles for debris and liquid. Neglecting them can lead to clogs and odors.
Dustbin Cleaning
- Power off the robot and remove the dustbin according to the user manual.
- Empty the dustbin into a trash can and tap gently to dislodge any stuck debris.
- Wipe the interior and edges with a damp microfiber cloth. Avoid soaking filters unless washable.
- Allow the dustbin to air-dry completely before reinserting to prevent mold growth.
Water Tank Maintenance
- Detach the water tank and flush with warm distilled water to remove residual cleaning solution.
- Use a soft cloth to wipe the inside surfaces. Check the inlet and outlet ports for blockages.
- Fill the tank with fresh distilled water or manufacturer-approved cleaning solution before next use.
- Dry the exterior of the tank to prevent moisture buildup in the docking area.
Proper handling of these containers ensures your robot vacuum mop remains hygienic and fully functional.
Maintaining Brushes and Rollers
Brushes and rollers work tirelessly to scrub floors and pick up debris. Over time, hair and fibers wrap around these parts, reducing efficiency.
Main Brush Cleaning
- Remove the brush compartment and lift out the main brush.
- Use a pair of scissors to carefully cut away tangled hair and threads.
- Brush off remaining debris with a crevice brush or toothbrush.
- Inspect end caps for trapped dirt and wipe clean.
Side Brush Care
- Pull the side brush straight off its shaft.
- Clear hair and debris from bristles with your fingers or a cleaning tool.
- Wipe the mounting point and replace the brush securely.
If your robot vacuum mop model supports it, consider rotating the main brush to ensure even wear and prolong its lifespan. For stubborn debris on tile grout or carpet fibers, you may find inspiration from our handheld steam cleaners guide for deep-clean options.
Washing and Replacing Mopping Pads
Spotless mopping pads ensure streak-free floors and prevent cross-contamination between rooms.
- After each cleaning cycle, remove the pad and shake off loose debris.
- Rinse under running water, gently rubbing to release grime.
- For washable pads, use a mild detergent and let air-dry completely before reuse.
- Replace disposable pads after one use or when heavily soiled.
Storing damp pads in a sealed container can promote bacteria growth. Always allow pads to dry fully and keep spares on hand for uninterrupted cleaning schedules.
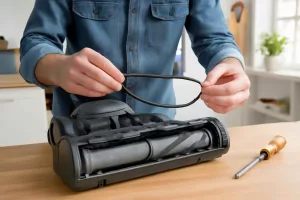
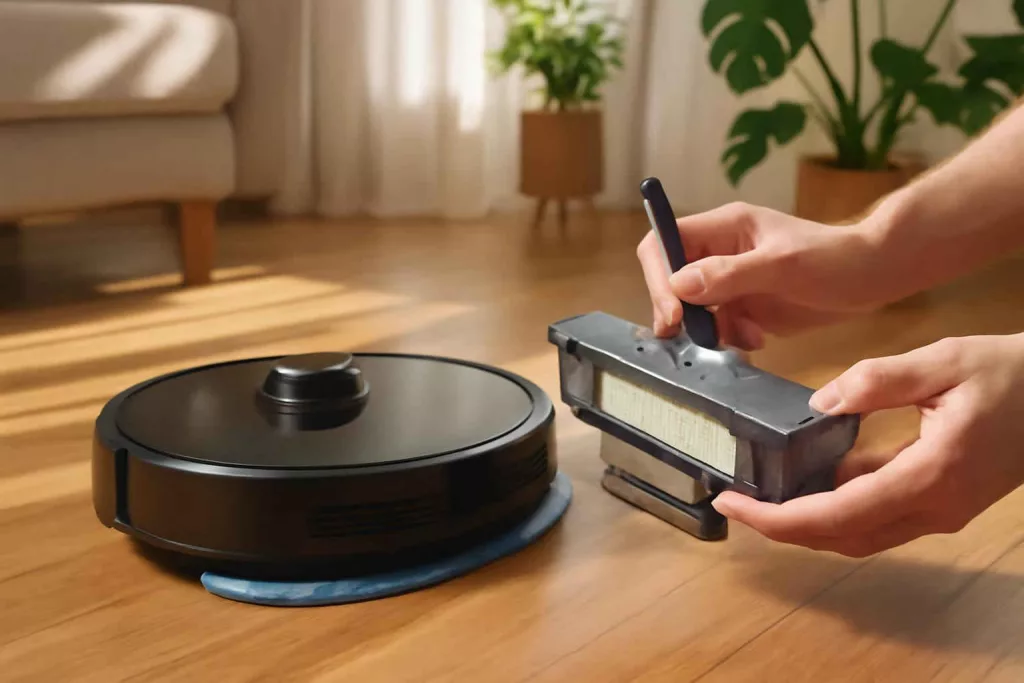
Filter Replacement Guide
Filters capture fine dust and allergens. A clogged filter impairs suction and can damage the vacuum motor.
- Check your filter monthly; replace or clean according to your model’s manual.
- If washable, tap out dust, rinse under cold water, and let dry 24 hours before reinstalling.
- Non-washable HEPA filters should be swapped every 3–6 months.
- Always use OEM or compatible filters to maintain protective seals.
Monitor performance: if suction seems weak or dust escapes from the exhaust, the filter likely needs attention. Avoid cheap knockoffs; quality matters for allergen control, especially if anyone in your household suffers from asthma or allergies. Review our upright vacuum guide for insights on filter technology and HEPA benefits.
Sensor and Wheel Cleaning
Robot vacuum mops rely on optical and infrared sensors to map rooms and avoid obstacles. Dirty sensors or wheels disrupt navigation.
Sensor Maintenance
- Wipe sensor windows gently with a dry microfiber cloth.
- Use compressed air to blow out dust from narrow sensor recesses.
- Inspect cliff-detection sensors to prevent falls off stairs.
Wheel and Roller Care
- Flip the robot over and lock the wheels in place if possible.
- Remove hair and debris wrapped around wheels and rollers using tweezers or scissors.
- Spin wheels by hand to ensure they move freely.
Regularly cleaning these components ensures accurate navigation and prevents erratic movements or stuck conditions.
Troubleshooting Common Issues
Even with diligent maintenance, you may encounter occasional problems. Follow these troubleshooting steps before calling customer support.
Navigation Problems
- If your robot repeatedly gets stuck in certain areas, clear clutter and cords from its path.
- Reset room maps in the app to rebuild navigation data.
- Ensure docking station sensors are unobstructed for reliable returns.
Low Suction or Mopping Performance
- Verify the dustbin and filter are clean and seated correctly.
- Check for blockages in suction pathways and hose connections.
- Inspect the water tank flow valve to confirm mopping solution dispenses.
Wi-Fi Connectivity and App Errors
- Reboot your router and robot to clear temporary network issues.
- Move the docking station closer to your router for stronger signal.
- Update the mobile app and robot firmware to the latest versions.
Following these steps resolves most common errors, letting you enjoy hands-free cleaning once again.
Firmware Updates and Storage Tips
Keeping firmware up to date delivers new features, performance enhancements, and bug fixes.
- Enable automatic updates in your robot’s app settings.
- Check for patch notes after each update to learn about improvements.
- When storing the robot for extended periods, charge the battery to around 50% and power off.
- Store in a cool, dry place away from direct sunlight or extreme temperatures.
Proper storage protects battery health and prevents moisture damage during periods of infrequent use.
Conclusion
Routine maintenance for your robot vacuum mop is the key to consistent performance and long-term reliability. By cleaning the dustbin and water tank, maintaining brushes and pads, replacing filters, and troubleshooting minor issues, you can enjoy sparkling floors without interruption. Follow these guidelines to maximize cleaning efficiency and extend the service life of your robotic helper.
For a deeper dive into choosing the best model for your home, revisit our robot vacuum mops buying guide, and keep essential spare parts like filters and mopping pads on hand for effortless upkeep.