Building a capable home studio starts with selecting must have home studio gear that delivers professional results without breaking the bank. Whether you’re laying down vocals, recording acoustic instruments, or producing electronic tracks, the right combination of gear is essential for clear sound, reliable performance, and creative flexibility. In this guide, we’ll walk you through every component you need to transform a spare room or corner of your home into a functional, inspirational recording environment.
From a solid audio interface to quality microphones and acoustic treatment, each piece plays a critical role in capturing and shaping audio. Beginners often overlook essential accessories like stands, cables, and power conditioners, yet these small investments ensure your workflow is smooth and your recordings consistent. To help you get started, explore an audio interface that fits your needs and budget.
Planning Your Home Studio Space
Before diving into equipment, it’s crucial to plan the physical layout of your home studio. The size and shape of the room, lighting, power outlets, and ventilation all influence the recording quality and comfort. Start by choosing a quiet corner or room with minimal outside noise and distractions. Rooms with carpeted floors, bookshelves, or irregular shapes help break up reflections, reducing unwanted echoes and improving clarity.
Measure available wall space to determine where to place acoustic panels, bass traps, and diffusion elements. Consider proximity to power outlets and your computer workstation when positioning your audio interface and monitors. Adequate lighting—both natural and adjustable artificial—enhances visibility during recording sessions and reduces eye strain when working on mixing.
Investing in a sturdy desk or workstation designed for studio gear keeps everything organized and within reach. Look for desks with rack spaces or shelves that can accommodate your interface, headphone amplifiers, and outboard units. For additional inspiration, check out our selection of outboard gear recommendations to see how professionals organize signal processing chains.
Once you’ve sketched out the room layout, make a shopping list of required equipment. Prioritize gear based on your primary tasks—voiceover, instrument tracking, podcasting, or electronic production—and allocate budget accordingly. With a solid plan, you’ll avoid overspending on unnecessary items and ensure a smooth setup process.
Core Recording Equipment Essentials
The foundation of your home studio is the core recording equipment that captures and converts sound into digital data. This includes the audio interface, microphone, headphones, and monitors. Each component directly affects the fidelity and quality of your recordings, so investing wisely pays off in the long run.
Audio Interface: The hub of your recording setup, an audio interface converts analog signals from microphones and instruments into digital audio and routes playback to your monitors and headphones. Look for interfaces with at least two high-quality preamps, low latency, and reliable drivers. Popular affordable models from Focusrite, PreSonus, and Behringer offer excellent value for entry-level studios.
Microphones: A versatile condenser mic is a must have home studio gear piece for vocals and acoustic instruments. Consider a large-diaphragm condenser like the Audio-Technica AT2020 or Rode NT1-A for their clear sound and affordability. Dynamic microphones, such as the Shure SM57 or SM58, are durable workhorses ideal for guitar amps, drums, and podcasting contexts.
Headphones: Closed-back headphones let you monitor recordings in real time without bleed into the mic, while open-back models provide a more natural listening experience during mixing. Models like the Audio-Technica ATH-M50x and Sennheiser HD 600 strike a balance between comfort, accuracy, and price. Always use headphones with a flat frequency response for critical listening.
Studio Monitors: Nearfield monitors reveal the true character of your mix and help you make informed decisions about balance, EQ, and dynamics. Brands like KRK, JBL, and Yamaha offer entry-level designs that deliver reliable performance. Position your monitors symmetrically on your desk with foam pads or isolation stands, aiming for an equilateral triangle between listener and speakers.
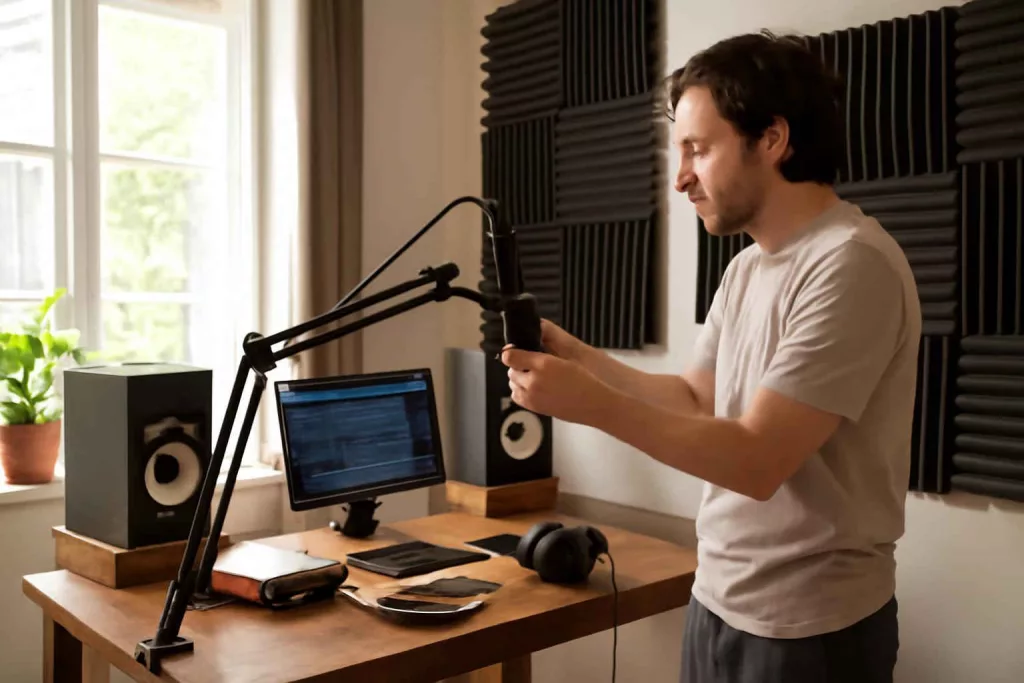
Acoustic Treatment and Soundproofing
Recording great audio isn’t just about the gear—it’s also about controlling the sound environment. Untreated rooms introduce reflections, standing waves, and background noise that muddy your recordings. Strategic acoustic treatment improves clarity, warmth, and depth in your mixes.
Start with acoustic panels on primary reflection points: behind your head, on side walls, and ceiling. Panels made of mineral wool or melamine foam absorb mid and high frequencies, reducing harsh echoes. Bass traps in corners manage low-frequency buildup, creating a flatter, more predictable frequency response.
For soundproofing, seal gaps around doors and windows with weatherstripping and install heavy curtains or moving blankets to attenuate external noise. Consider mass-loaded vinyl barriers if you need deeper sound isolation. Even simple measures like positioning your setup away from neighbors or busy streets can improve recording quietness.
Diffusers add a creative touch, scattering sound energy to maintain a sense of space without deadening the room. Commercial or DIY wooden diffusers work well on rear walls, preserving the liveliness of your listening environment.
Accessories and Cable Management
Small accessories often make big differences in workflow and reliability. Proper cable management keeps signal paths organized, reduces noise, and extends cable life. Invest in sturdy XLR cables, balanced TRS cables, and color-coded cable ties or Velcro straps to neatly bundle runs and prevent tangling.
Microphone stands and boom arms should provide stable and flexible positioning. Look for stands with adjustable height and boom reach to accommodate different instruments and vocalists. Pop filters, shock mounts, and mic clips reduce plosives, handling noise, and vibrations, ensuring pristine recordings.
Cable snakes or back-of-desk cable channels keep power cords and audio cables separated, minimizing EMI interference. A power conditioner with surge protection safeguards your equipment from voltage spikes and provides clean power, reducing hum and noise in your recordings.
For quick gear access, consider the essential microphone accessories guide to see recommended stands, clips, and accessories that streamline your recording sessions.
Software, Plugins and Digital Tools
No home studio is complete without a digital audio workstation (DAW) and a suite of plugins. Popular DAWs like Ableton Live, Logic Pro X (Mac only), and Reaper cater to different workflows and budgets. Reaper offers a full-featured, low-cost license and responsive performance on modest hardware, making it ideal for beginners.
Plugin bundles from companies like Waves, Slate Digital, and iZotope provide compressors, EQs, reverbs, and virtual instruments. Many manufacturers offer free versions or trial bundles, allowing you to test essential processors before committing to full collections. Focus on acquiring a realistic-sounding reverb, a versatile compressor, and an accurate spectrum analyzer during your initial build.
Control surfaces or MIDI controllers enhance hands-on mixing. Devices like the PreSonus FaderPort or Behringer X-Touch Mini let you adjust levels, pan, and plugin parameters without relying solely on a mouse. For electronic music producers, a small pad controller or keyboard controller streamlines beat making and melodic input.
Budget-Friendly Equipment Recommendations
Building a home studio on a tight budget means making strategic compromises without sacrificing core performance. Focus on purchasing gear that offers the best price-to-performance ratio, and upgrade incrementally as your needs grow.
Entry-level audio interfaces such as the Focusrite Scarlett Solo or Behringer U-Phoria series deliver clean preamps and reliable USB connectivity for under $100. Pair these with the budget-friendly Rode NT-USB Mini or MXL 990 microphones for clear, professional-sounding recordings.
For mixing, the Mackie CR3-X and JBL 305P MkII monitors are often on sale and provide balanced frequency response for critical listening. If monitors are out of reach, high-quality headphones like the Philips SHP9500 and Audio-Technica ATH-M40x offer ample detail for mixing on a budget.
DIY acoustic treatment projects—like building wooden frames and filling them with rock wool—slash costs compared to commercial panels. Upcycle old blankets for soundproofing and reinforce foam panels with fabric to create a neat, semi-professional look without overspending.
Setting Up and Organizing Your Home Studio
A well-organized workspace boosts creativity and reduces setup time. Position your desk so your monitors are equidistant, forming a triangle with your listening position. Place commonly used gear—audio interface, headphone amp, and controllers—within arm’s reach to maintain an efficient session flow.
Racks and shelving systems keep outboard gear, preamps, and headphone distribution amps tidy. Consulting our essential rack gear guide shows how professionals organize gear for quick access and consistent cabling practices.
Use labeled bins or drawer organizers for adapters, cables, and small accessories. A dedicated headphone stand or rack prevents tangled cables and accidental damage. Implement a simple color-coding system for cables—red for XLR, blue for TRS, green for MIDI—so you can identify connections at a glance.
Maintain a digital catalog of gear manuals, serial numbers, and warranty information for quick reference. Backing up your project files regularly to an external drive or cloud service safeguards your work against hardware failures.
Maintaining and Upgrading Your Studio Gear
Regular maintenance ensures your home studio gear remains reliable for years to come. Clean microphones and pop filters with a soft brush, inspect cables for worn connectors, and dust off ventilation ports on interfaces and power conditioners to prevent overheating.
Monitor calibration software helps you set accurate listening levels and correct minor frequency imbalances. Update firmware and drivers for your audio interface and controllers to maintain compatibility with the latest DAW versions and operating systems.
Upgrade paths vary based on your primary focus. Vocalists may invest in a high-end tube condenser mic, while producers working with live instruments might seek multi-channel preamps. For mixing, monitor upgrades or additional acoustic treatment yield more perceptible improvements than swapping plugins alone.
Keep an eye on second-hand markets for gently used gear, upgrading your collection without paying full retail. Community forums and gear exchange groups often feature bundles that align with your growth stages, offering pro-level equipment at entry-level prices.