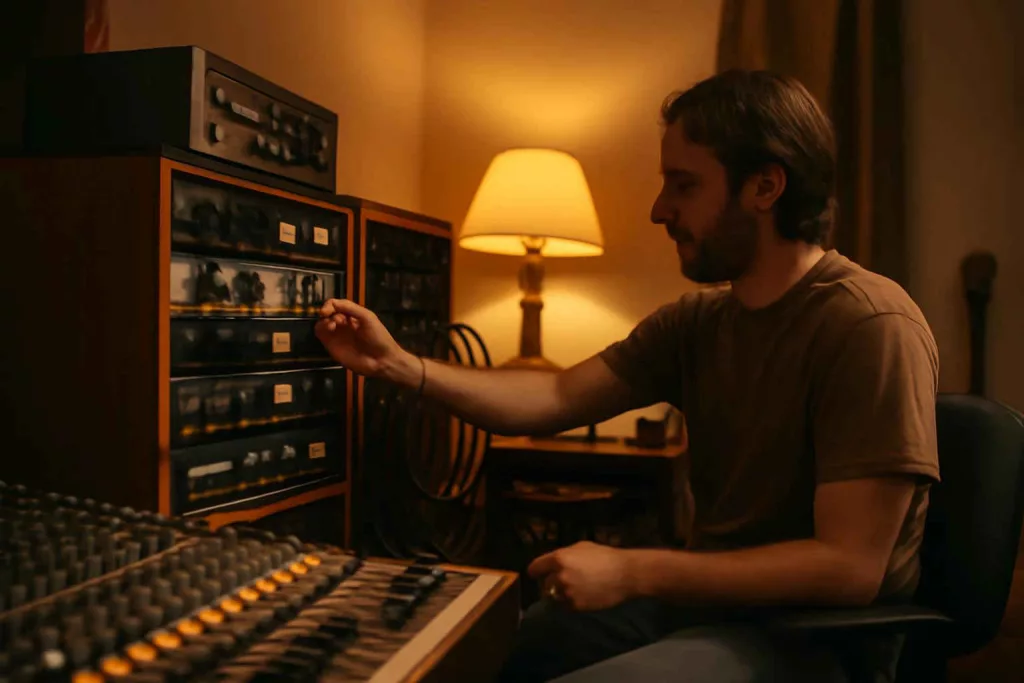
Integrating home studio outboard gear into your recording space can elevate your mixes with the warmth and character often lacking in purely in-the-box workflows. From vintage compressors to modern analog preamps, external processing units offer tactile control and sonic richness that digital plugins sometimes struggle to emulate. Whether you’re tracking vocals, drums, or full-band sessions, understanding how to choose, set up, and maintain outboard gear is essential for any home recording enthusiast seeking a professional edge.
Why Choose Outboard Gear for Your Home Studio?
Benefits of External Processing
Outboard gear delivers analog warmth and unique coloration that digital plugins can only approximate. When you route audio through hardware compressors, equalizers, and preamps, subtle harmonic distortion and saturation impart a musical quality to your tracks. This real-world processing often translates to mixes that sit naturally in a mix bus and translate well across multiple playback systems.
By diversifying your signal chain, you can blend multiple flavors of compression or EQ, opening up creative possibilities. For a seamless purchasing experience, explore top-rated units with this link: home studio outboard gear.
Analog vs Digital Outboard Units
While digital processors excel in recall and presets, analog units are prized for their hands-on feel and distinct tonal characteristics. Analog compressors like the classic 1176-style units impart fast attack times and musical grit, while tube-based equalizers add harmonic warmth to vocals and instruments. Digital alternatives offer flexibility, but nothing beats the tactile knob twiddling when dialing in the perfect frequency band on a hardware EQ.
Essential Types of Outboard Gear
Compressors
Compressors control dynamic range, ensuring consistent levels and punch. Hardware models such as optical compressors provide smooth leveling, while VCA compressors offer tight control for drum buss processing. Beginners may start with a dual-channel compressor that covers multiple sources, while advanced engineers often employ a combination of vintage and modern units. A highly rated entry-level compressor can be found via this link: analog compressor unit.
Equalizers
Outboard EQs allow precise sculpting of frequency content. Parametric EQs grant control over center frequency, bandwidth, and gain, while graphic EQs offer fixed bands for quick adjustments. Tube-based EQ units shine on vocals and guitars, adding coloration as well as correction. When designing your signal chain, place EQ either before or after compression depending on whether you want to shape transients or tonal balance.
Preamps and Mic Preamps
Quality preamps boost microphone signals with minimal noise. Outboard mic preamps deliver low-noise amplification plus tonal enhancement through transformer or tube circuitry. Some units integrate compressor and EQ sections for all-in-one processing. For detailed rack layouts, refer to our essential rack gear guide.
Reverbs and Delays
Hardware reverbs and delays impart natural ambiance and spatial depth. Plate and spring reverbs add vintage charm, while digital reverb processors provide hall, room, and lush plate algorithms. Delays—analog or digital—offer rhythmic echo textures that can be synced to your DAW’s tempo. Integrating these units via an effects send and return loop ensures flexibility and seamless workflow.
Noise Gates and Limiters
Noise gates eliminate unwanted background noise by muting signals below a threshold. Limiters cap peaks, preventing clipping and ensuring polished masters. Incorporating a hardware gate before tracking can produce cleaner takes, while a mastering-grade limiter secures final output levels. Both are staples in any home studio outboard rack.
How to Select the Right Outboard Gear
Defining Your Studio Needs
Assess the genres you work with and the instruments you record most often. Rock bands benefit from punchy compressors and dynamic EQs, while electronic producers might prioritize clean preamps and precise digital delays. List your most common recording scenarios—vocals, drums, synths—and match gear features like attack/release times or frequency bands to those needs.
Budget Considerations
Outboard gear ranges from budget-friendly rack units to high-end boutique hardware. Determine your total investment, including cabling, rack space, and power conditioners. Shops often bundle deals on starter packs; always check user reviews to avoid common pitfalls. For guidance on affordable studio expansions, explore our compact recording studio setups guide.
Connectivity and Interfaces
Ensure your audio interface has enough sends and returns to integrate external gear. Dedicated line-level I/O ports facilitate parallel processing and creative routing. Some interfaces include built-in preamps, but external mic preamps can outperform onboard options. Plan cable runs and patch bays to minimize clutter and maintain signal integrity.
Rack Mounting vs Desktop Units
Rack-mounted gear fits standard 19-inch racks, lending a clean, organized look and centralized cabling. Desktop units offer portability but may clutter your workspace. If space is limited, consider a compact rack case or wall-mounted solutions to keep your desk clear for monitors and MIDI controllers.
Integration and Setup
Rack Organization and Cable Management
Proper rack layout reduces noise and simplifies workflow. Place preamps near microphone inputs, followed by compression and EQ sections, then reverb/delay processors. Use color-coded XLR and TRS cables to distinguish signal paths. Cable ties and rear cable channels help avoid signal bleed and tighten your studio’s appearance.
Gain Staging with Outboard Gear
Maintain optimal levels at each stage to preserve headroom and prevent distortion. Begin with clean preamp gain, then set compressor thresholds to tame peaks without squashing dynamics. Adjust EQ gain sparingly to avoid clipping, and always monitor input and output meters. Proper gain staging minimizes digital artifacts and maintains sonic clarity.
Signal Routing and Patch Bays
Patch bays centralize connections, allowing quick reconfiguration of your outboard chain without unplugging behind the rack. Normalize channels based on your common workflows—input channels for mics, insert channels for DAW sends/returns, and effects loops for reverb/delay. A well-wired patch bay saves time and preserves gear longevity.
Maintenance and Troubleshooting
Routine Care for Longevity
Dust and humidity can degrade hardware electronics. Use a dry cloth to wipe knobs and panels weekly. Invest in a rack-mounted power conditioner to stabilize voltage and protect against surges. Schedule annual checkups where you clean internal boards, reseat connections, and update firmware on digital units.
Common Issues and Fixes
Ground loops cause hum—install a ground loop isolator or ensure all gear shares a single Earth point. If a unit skips or clicks, check cable integrity and replace worn connectors. Strange behavior from digital boxes often resolves after a factory reset and firmware update. Always consult the manufacturer’s manual for unit-specific troubleshooting steps.
Top Recommendations and Buying Guide
Budget-Friendly Options
Affordable compressor/EQ combos like the Drawmer DL241 offer solid performance without breaking the bank. The ART Tube MP preamp adds warmth on a budget, while the Behringer Virtualizer delivers versatile reverb/delay effects. These units suit home studios looking to explore outboard processing.
Mid-Range Picks
Intermediate users may appreciate the Warm Audio WA76 compressor clone, AEQ Pacifica 2-channel parametric EQ, and Focusrite ISA One preamp. These mid-tier units strike a balance between sonic quality and price, often found in semi-pro project studios.
High-End Units
For experienced engineers, classics like the UREI 1176, API 550A EQ, and Neve 1073 preamp deliver industry-standard performance. Digital classics such as the Lexicon PCM series and Eventide H9 offer pristine effects with deep editing capabilities. These units represent a serious investment but reward with unparalleled sonic character.
Conclusion
Adding home studio outboard gear to your recording setup opens new creative avenues and enhances the sonic signatures of your tracks. By understanding the benefits of external processing, carefully selecting units based on your needs, and properly integrating and maintaining your hardware, you’ll achieve professional-sounding mixes that stand out. Start with one or two favorite processors and expand your rack as your experience grows. For more tips on optimizing your home studio environment, check our DIY soundproofing techniques. Happy recording and mixing!
