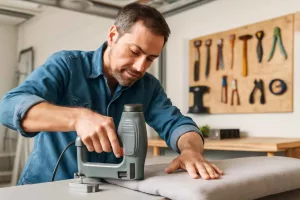
Building a DIY folding sawhorse with a built-in measuring gauge gives you a portable work support that’s precise and reliable for every project. In just a few hours and with basic tools, you’ll have a sturdy, space-saving sawhorse that folds flat and helps you measure repetitive cuts without reaching for a tape measure. This custom sawhorse design integrates a simple plywood measuring strip for quick layout—no more guesswork on your folding sawhorse plans.
If you’d rather skip the build, you can pick up a ready-made folding sawhorse to compare features, or read our guide on Best Folding Sawhorses for Home Workshops for top space-saving picks before you start.
Step-by-step Guide
Materials and Tools You’ll Need
- Two 2x4s, 8′ long (legs and supports)
- One sheet of 1/2″ plywood, 2’×4′ (measuring strip and tabletop)
- Two heavy-duty hinges (for folding)
- Wood screws: 2½” and 1¼”
- Measuring tape, pencil
- Wood glue
- Polyurethane finish or paint
- Tools: circular saw or miter saw, drill/driver, countersink bit, clamps, sander
Step 1: Cut the Main Supports
Mark and cut two 2x4s at 36″ for the top rails of each sawhorse. These will serve as the tabletop where you clamp lumber. Keep the edges square for stable support.
Step 2: Prepare the Legs
From 2×4 stock, cut four legs at 30″ each. On one face of each leg, mark a 15° bevel or use a straight 90° if you prefer vertical legs. A slight bevel helps the sawhorse legs fold neatly and stand wide for stability.
Step 3: Attach Legs to Top Rails
Position two legs on each underside of a top rail in an A-frame style. The legs should angle outward by about 15° from vertical. Drill pilot holes, add wood glue at each joint, then secure with 2½” screws. Countersink screws to avoid snags on your plywood measuring strip.
Step 4: Install Hinges
Align the second top rail upside-down over the first assembly so legs face each other. Place two hinges evenly spaced, flush with the rails’ edge. Fasten hinges with provided screws. Now the sawhorse folds flat when hinges are open.
Step 5: Add the Measuring Gauge
Cut a plywood strip 3″ wide and the same length as the top rail (36″). Using a square and pencil, draw measurement lines at 1″ intervals along the strip. Number every inch or every 2″ for quicker reading. Position the strip centered on one top rail and secure with wood glue and 1¼” screws. Sand the face smooth.
Step 6: Sand and Finish
Sand all surfaces starting with 80-grit and finishing with 120-grit paper to remove rough spots. Wipe off dust, then apply two coats of clear polyurethane or paint for protection. Let dry fully between coats to prevent tacky spots.
Step 7: Test and Adjust
Open the sawhorse on a flat floor. Check for wobble. If it rocks, slightly adjust a leg bevel or add a shim. Practice measuring lumber: butting the board edge against the plywood gauge should line up exactly at your mark.
Practical Example
Imagine you’re building floating shelves and need ten identical boards cut to 24″. With your DIY folding sawhorse with measuring gauge, you set a stop block at the 24″ mark against the plywood strip. Rest a 2×6 board against the gauge and slide it until it meets the stop. Now you make your rip cut on the table saw or circular saw confidently, without measuring each board individually. This system typically saves 10–15 minutes compared to repeated tape-measuring.
In another scenario, you’re framing a window opening. You need several studs cut to 82½”. By marking that dimension on the gauge and clamping a scrap block flush at the end, you can quickly align and cut each stud. No extra tools, just your folding sawhorse acting as a quick lumber stop.
For jobs outside your workshop, the sawhorse folds flat to fit in a van or car trunk. This portable sawhorse design keeps your measuring strip glued on and protected, making on-site cuts consistent and accurate every time.
Common Mistakes
- Skipping pilot holes: Drives wood screws poorly and can split legs or rails. Always drill pilot holes and countersink for a flush finish.
- Unstable leg angles: Cutting legs at inconsistent angles causes wobble. Use a jig on your saw or mark carefully with a protractor before cuts.
- Improper hinge placement: Mounting hinges too close together can pinch legs when folding. Position hinges at least 4″ from ends and evenly spaced.
- Measuring strip misalignment: Gluing the plywood gauge off-center results in inaccurate layouts. Dry-fit and clamp strip temporarily, then confirm alignment before gluing.
- Insufficient finish: Unsealed wood absorbs moisture, causing warping. Apply at least two coats of polyurethane or exterior paint if used outdoors.
- Forgetting a stop block: Without a scrap block at the gauge end, lumber can slide past the mark. Always clamp or tack a small block at your common cut lengths.
Tips to Improve
- Use threaded inserts: Instead of wood screws for the measuring strip, install metal threaded inserts and use machine screws. This makes it easy to remove or swap gauges.
- Magnetic angle stops: Attach a small magnetic protractor to one side so you can set up repeatable bevel cuts directly on the sawhorse frame.
- Rubber leg tips: Slip-on rubber caps or non-slip pads under the legs to increase grip on slick concrete floors.
- Reinforced cross brace: For heavy-duty use, add a 2×4 cross brace between the legs on each side, about 12″ below the top rail for extra rigidity.
- Integrated clamp rails: Screw a thin aluminum bar under each top rail with threaded holes so you can slide and secure bar clamps for hold-downs during glue-ups.
- Portable power strip: Mount a small power strip on one leg so you can plug in a power tool right at the sawhorse. Read our guide on retractable power cord reels for cable management ideas.
- Alternate gauge materials: Use a metal ruler strip or even a laser-cut acrylic guide for more durable, high-visibility measurement marks.
Conclusion
Constructing a DIY folding sawhorse with a built-in measuring gauge turns a basic work support into a precision tool that speeds up repetitive cuts and enhances accuracy. With simple 2×4 lumber, a bit of plywood, and your existing workshop tools, you can build this versatile, portable solution in an afternoon. Don’t forget to check your work for stability, seal the wood to prevent moisture damage, and consider the improvement tips for an even more user-friendly setup. Whether you’re cutting framing studs or stock for furniture, this folding sawhorse will become a go-to fixture in your workshop. For more must-have tools before starting, see our Home Workshop Setup Checklist.