Creating a mobile workshop station with integrated power outlets transforms your DIY space into a flexible, organized hub. By the end of this guide, you’ll have a step-by-step plan to build a rolling bench that powers tools wherever you work.
Introduction
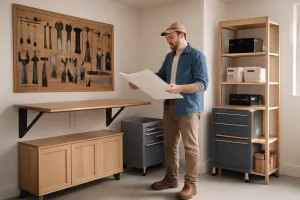
A mobile workshop station combines storage, work surface, and built-in power for on-the-go projects. This versatile unit lets you roll your tools from garage to driveway, complete with outlets for drills, sanders, and lights. Whether you’re repainting fencing outdoors or tackling small repairs inside, a mobile station streamlines your workflow.
Step-by-Step Guide
1. Plan Your Station Layout
Begin by determining the dimensions and features you need. A 48″ wide worktop offers ample space without being bulky. Beneath the top, allocate shelving or drawers for power tools, fasteners, and accessories. At the back, reserve a panel for mounting outlets and cord management.
2. Gather Materials and Tools
- 2×4 lumber and plywood sheets (3/4″ for top, 1/2″ for storage panels)
- Heavy-duty casters (two lockable, two swivel)
- Power strip or outlet module (see link below)
- Wire management accessories
- Screws, brackets, and fasteners
- Drill, circular saw, speed square, tape measure
Find a heavy-duty power strip on Amazon: heavy duty power strip.
3. Build the Frame
Cut 2x4s to form the base rectangle and uprights. Assemble with 3″ wood screws and reinforce corners with metal brackets. Attach plywood shelves at desired heights using screws and angle braces.
4. Install Casters
Position two lockable casters on the front corners and swivel casters on the back. Ensure they are level and can support the full loaded weight. Test mobility before loading tools.
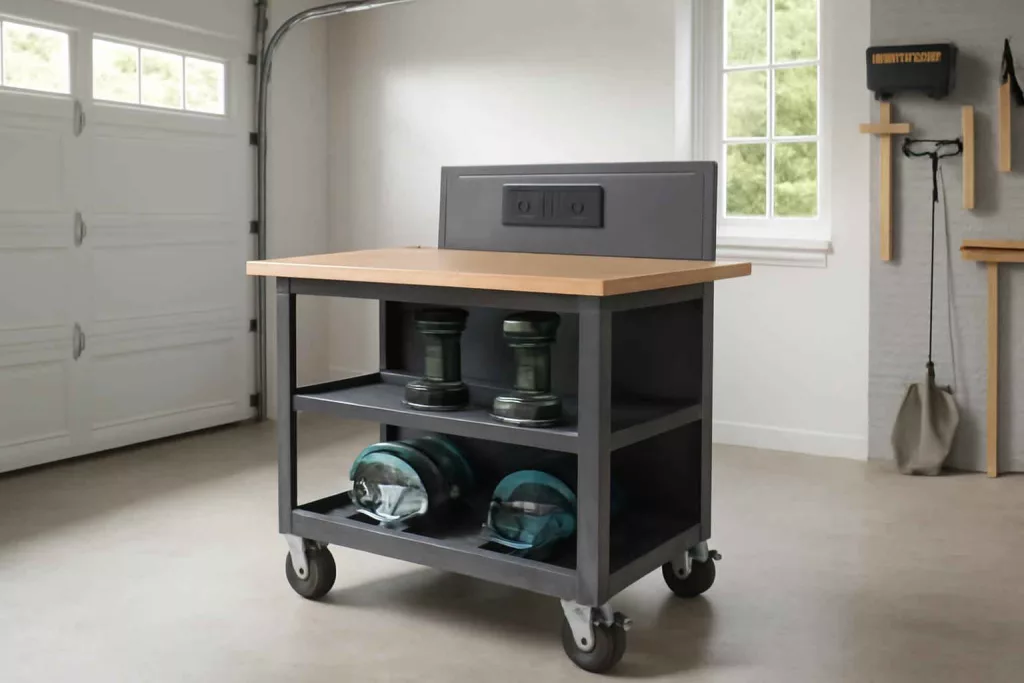
5. Mount the Power Outlet Module
Cut a section of the rear plywood panel for the outlet. Wire the power strip module according to manufacturer instructions, securing cables with clamps. Protect connections inside a small junction box and label the cord exit.
6. Add Worktop and Finishing Touches
Secure the 3/4″ plywood worktop to the frame. Sand edges and apply sealant or paint for durability. Install hooks, magnetic holders, or a small pegboard section for frequently used items.
Practical Example
Meet Sarah, a weekend woodworker who needed a mobile solution to finish furniture touches both in her attached garage and on the patio. She built a station using 2×4 framing and 3/4″ plywood, fitting a 6-outlet power strip at the back. As she moved her bench outside, the lockable casters kept it firmly in place while she routed trim on a dining chair.
Sarah also linked up her station with a retractable power cord reel above to avoid tripping hazards. She stores cordless drills in labeled bins below, keeping battery chargers plugged and ready. This setup saved her at least 10 minutes per session, previously lost to fetching tools and extension cords.
Common Mistakes
- Not using lockable casters—leads to unwanted movement during work.
- Poor cable management—creates trip hazards and cable wear.
- Underbuilding the frame—results in sagging work surface under load.
- Skipping electrical protection—exposes connections to dust and debris.
- Neglecting ergonomics—too high or low worktop causes discomfort.
Tips to Improve
- Install a small LED strip light under a top shelf for illumination.
- Use a under-bench power strip mount for additional outlets without sacrificing workspace.
- Add drawer slides rated for tool storage to keep heavy bits organized.
- Apply a rubber mat on the worktop to protect surfaces and reduce slipping.
- Thread cables through pre-drilled holes and grommets for a cleaner look.
Conclusion
A mobile workshop station with integrated power outlets is a game-changer for DIYers. It centralizes tools, enhances mobility, and boosts productivity. Gather quality materials, follow the step-by-step build, and personalize storage to match your projects. You’ll wonder how you worked without it.