Building a wall-mounted folding workbench is the fastest way to create a sturdy workspace in a small garage and tuck it away when not in use. With heavy-duty brackets and a solid plywood surface, you can have a reliable bench that folds effortlessly against the wall, freeing up valuable floor space. Look for quality folding workbench hardware online to ensure stability and durability.
Before you begin, make sure your wall studs are easily accessible and that you have a clear plan for tools and accessories. If you’re just setting up your workshop, check our Home Workshop Setup Checklist: Must-Have Tools and Equipment to confirm you’ve covered all basics. This guide will walk you through every step, from measuring space to testing the bench under load, providing detailed tips and avoiding common pitfalls.
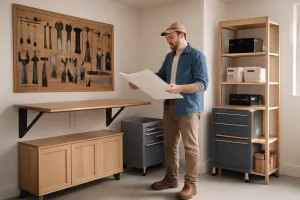
In many American homes, garages double as storage and workspaces. A traditional freestanding bench can take up too much room, forcing you to shift boxes and bins whenever you want to work. A wall-mounted folding design solves that: when folded up, it looks like a sleek panel, and when folded down, it supports heavy loads—ideal for woodworking, minor car repairs, or crafting. You can even integrate pegboards or shelves above the bench for tools, creating a compact, efficient setup that transforms your wall into a multifunctional hub.
Throughout this article, we’ll cover everything you need to know: selecting the right materials, installing heavy-duty folding brackets, attaching the bench surface, and fine-tuning the setup. We’ll also highlight real-world examples, common mistakes to avoid, and tips to improve performance and longevity. By the end, you’ll have a foolproof plan to build a top-notch wall-mounted folding workbench tailored to your space and workflow.
Step-by-Step Guide
Step 1: Plan and Measure Your Space
Accurate planning starts with measuring the wall area and considering bench depth and width. Aim for a bench depth of 18 to 24 inches when folded down—this provides enough room for most tasks while still folding flat against the wall. Measure the height so that when folded down, the surface rests at comfortable elbow height (around 34 to 36 inches). Sketch a simple diagram showing where the bench will fold and how much clearance you need above and below.
Next, evaluate wall obstacles like electrical outlets, light switches, or baseboard heaters. Relocate or work around these features to ensure the bench operates smoothly. Finally, decide whether you’ll install additional overhead storage or a pegboard—if so, note those measurements in your sketch to avoid conflicts.
Step 2: Select Materials and Hardware
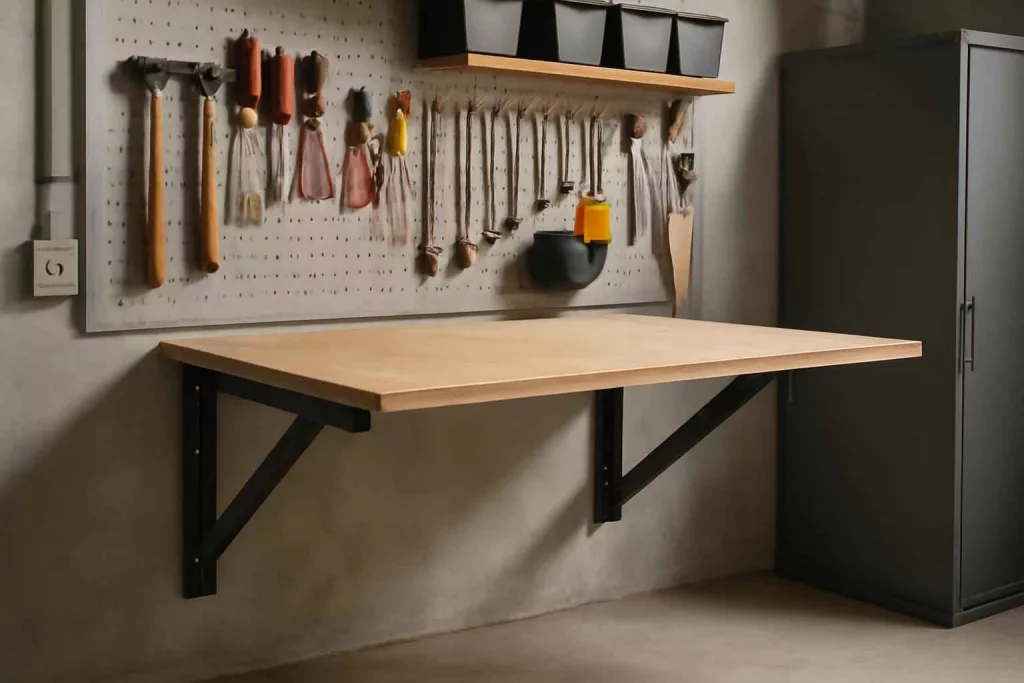
Choose a sturdy work surface such as a 3/4-inch plywood sheet or solid wood board that resists warping. For a seamless finish, apply a clear polyurethane coat or a layer of epoxy. Heavy-duty folding brackets rated for at least 200 pounds are crucial; look for steel brackets with locking mechanisms. You’ll also need lag screws (3/8-inch, 3-inch long) and washers to secure brackets into studs.
Gather safety gear—safety glasses, work gloves, and a stud finder. A power drill with a 3/8-inch bit and a socket driver will speed up installation. At this stage, placing an order for premium components on Amazon, such as heavy-duty folding shelf bracket, ensures you get reliable hardware without a trip to the hardware store.
Step 3: Locate Studs and Mark Mounting Points
Using a stud finder, mark each stud edge along the wall where the bench will attach. Transfer your plan measurements to the wall, drawing horizontal lines at bench height and vertical lines at bracket locations. Double-check that each bracket mark aligns with the center of a wall stud. Misaligned brackets risk shoulder-shearing loads and bench collapse.
Verify the bench level by stretching a level across the marked horizontal lines. Adjust the marks if needed, ensuring your work surface won’t slope when folded down. Precise alignment in this phase prevents frustration during bracket installation.
Step 4: Install Folding Brackets
With marks in place, hold the first bracket against the wall so its folding hinge aligns with the horizontal and vertical guidelines. Drill pilot holes through the bracket mounting holes into the studs. Attach the bracket using 3-inch lag screws and washers, driving them until snug but not over-tightened.
Repeat for the second bracket, checking spacing matches the width of your work surface. Ensure both brackets sit at identical heights and distances from the floor. A slight height difference can prevent the bench from folding neatly against the wall.
Step 5: Attach the Workbench Surface
With brackets installed in the folded-down position, set the plywood or wood board onto them. Center the board so it overhangs brackets by just enough to prevent edge contact with the wall when collapsed. Secure the board to each bracket with the screws or bolts provided in the bracket kit.
For added reinforcement, install angle supports beneath the bench surface (optional). These metal L-brackets fasten to both the wood and the open bracket arms, reducing movement under heavy loads.
Step 6: Test and Adjust
Carefully fold the bench up and down several times without any load to ensure smooth operation. Inspect hinge movement and listen for binding or squeaks—apply a light machine oil to pivot points if necessary. Next, place a moderate weight (30 to 50 pounds) on the bench and fold it down. Confirm the locking mechanism engages securely and the bench holds its position.
If you notice any wobble or misalignment, fold the bench back up and tighten bracket screws. Use a shim behind the brackets if one side sits slightly off level. Repeat testing until the bench operates flawlessly under load and at rest.
Practical Example
Meet Sarah, a graphic designer who converted her narrow one-car garage in Seattle into a dual-purpose workshop and storage area. With only 6 feet of wall space, she needed a solution that wouldn’t interfere with her bike racks and seasonal storage bins. After reviewing our Home Workshop Setup Checklist, Sarah decided to build a wall-mounted folding workbench.
She measured a 20-inch drop depth to accommodate her drawing board and laptop. Using 3/4-inch birch plywood coated with clear epoxy, she cut the panel to 36 inches wide. She ordered a pair of heavy-duty folding shelf brackets from Amazon and located studs with a stud finder. To avoid drilling into her existing wiring, she mapped out outlet locations and offset the brackets slightly.
After installing the brackets at exactly 35 inches from the floor, Sarah attached her plywood surface. She added a 5-inch overhang on the front edge for wrist support while working on her laptop. To keep tools handy, she hung a small pegboard above the bench and installed installing ceiling-mounted tool storage racks overhead for bins and accessories.
On her first test, the bench supported her digital sewing machine and power tools without any movement. When finished, she simply lifted the bench, heard a reassuring click as it locked in place, and regained full floor space. The fold-down design allowed quick setup during work hours and complete concealment during the weekend when the garage served as a play area for her kids.
Sarah’s project highlights how a simple wall-mounted bench can transform a cramped space into a high-functioning workshop. By planning carefully, selecting the right hardware, and following each step, she achieved a space-saving solution that looks polished and performs reliably.
Common Mistakes
- Skipping Stud Verification: Mounting brackets without confirming stud centerlines can lead to unstable attachment and bench collapse under load.
- Incorrect Height Measurement: Failing to set the bench at elbow height (34–36 inches) results in poor ergonomics and discomfort during tasks.
- Using Insufficient Hardware: Light-duty or short screws won’t support heavy loads—always choose lag screws rated for structural use.
- Neglecting Pilot Holes: Driving large lag screws without pilot holes can split studs or wood surfaces, weakening attachment.
- Overlooking Clearance: Ignoring wall obstacles like outlets and baseboards leads to interference when folding or unfolding the bench.
- Rushing Assembly: Skipping the test and adjust phase often hides alignment issues that worsen over time as hardware loosens.
- Failing to Seal Wood: Uncoated plywood can absorb moisture in the garage, warping the work surface and causing binding.
- Uneven Bracket Spacing: Misaligned brackets create a sloped bench that feels unstable and invites tool slippage.
- Forgetting Lock Mechanisms: Not engaging the bracket’s locking lip puts the bench at risk of sudden folding under load.
- Ignoring Weight Limits: Exceeding bracket ratings voids warranties and increases the chance of serious accidents.
Tips to Improve
1. Add a Magnetic Tool Rail: Install a slim magnetic strip beneath the bench surface edge to keep frequently used hand tools within reach. You can pair this with recommendations from our Best Magnetic Tool Holders for Workshop Walls guide.
2. Integrate Drawer Slides: For hidden storage, attach heavy-duty drawer slides under the bench to hold small parts bins or toolboxes that slide out when you lower the bench.
3. Install LED Strip Lighting: Mount slim LED strips under the upper edge of the folded bench panel. They turn on automatically when you fold down the bench, providing direct task lighting without cluttering the workspace.
4. Use Removable Shelf Hacks: Add a thin shelf above the bench that rests on brackets—this shelf can hold storage bins and easily lifts off when you need full fold-down clearance.
5. Apply Non-Slip Matting: Place a thin rubber mat on the bench surface to secure parts and prevent tools from sliding off, especially when working with liquids or oils.
6. Label Sections Clearly: If you integrate pegboard hooks or small bins, label them with a simple label maker so you always know where each tool lives and can return it after use.
7. Paint with Chalkboard Finish: Paint the fold-up face of the bench with chalkboard paint. Use it for quick notes, measurements, or project sketches that stay hidden when the bench is folded away.
8. Upgrade to Quick-Release Hinges: Invest in folding brackets with quick-release pins so you can remove the bench surface entirely for heavy-duty tasks or when you need the wall clear.
9. Anchor to Concrete Walls: If you have a masonry wall, use sleeve anchors and masonry bits instead of lag screws—this prevents bracket pull-out and ensures a solid hold.
10. Routine Tightening Schedule: Add a calendar reminder every three months to inspect and tighten all hardware. Small shifts over time can loosen bracket mounts, so periodic checks maintain safety and stability.
Conclusion
A DIY wall-mounted folding workbench is a game-changer for small garages and workshops. It provides a durable, ergonomic workspace that disappears when not in use, freeing up valuable floor area. By carefully measuring, choosing sturdy materials, and following the step-by-step guide above, you’ll create a bench that withstands heavy loads and daily use.
Remember to avoid common mistakes by verifying studs, using proper hardware, and testing the setup before full-time use. Enhance your bench with magnetic tool holders, drawer slides, LED lighting, and quick-release brackets for an even more efficient workspace. For tools and accessories, explore our other guides on workshop setup and tool storage solutions.
Now grab your tools, order your hardware, and transform your wall into a high-performing workbench that meets all your project needs. Enjoy more room to move and a streamlined workflow every time you tackle a new task.