Robot vacuum troubleshooting starts with identifying the error symptom and applying simple fixes. With a few basic tools and this guide, you can resolve docking failures, brush jams, and navigation errors on your own. Robot vacuums keep floors clean with minimal effort, but when they malfunction, debris piles up quickly and you lose the convenience you rely on.
Step-by-Step Guide
This section breaks down the key steps in robot vacuum troubleshooting. Follow each step methodically to isolate the problem and restore smooth operation.
1. Check Battery Level and Docking Station Alignment
Ensure your vacuum’s battery is charged. Open the dustbin door to see the battery indicator light; if it’s low, place the unit on its charging dock. Clean the metal contacts on both the vacuum and the dock with a dry cloth to remove dust or residue. Misaligned docking stations often prevent proper charging. Reposition the dock against a flat wall with a two-foot clear space on either side. Once aligned, run a test charge cycle.
2. Inspect Wheels, Sensors, and Cliff Detectors
Debris on wheels and sensors can cause navigation errors. Flip the vacuum over and remove any hair or string tangled around the wheels. Use a small brush or canned air to gently clean the cliff sensors along the bottom edge. Wipe the front bumper sensor with a microfiber cloth. After cleaning, place the vacuum on the floor and command a manual “spot clean” to verify sensor response. If it still fails to move correctly, repeat cleaning until all sensors detect obstacles accurately.
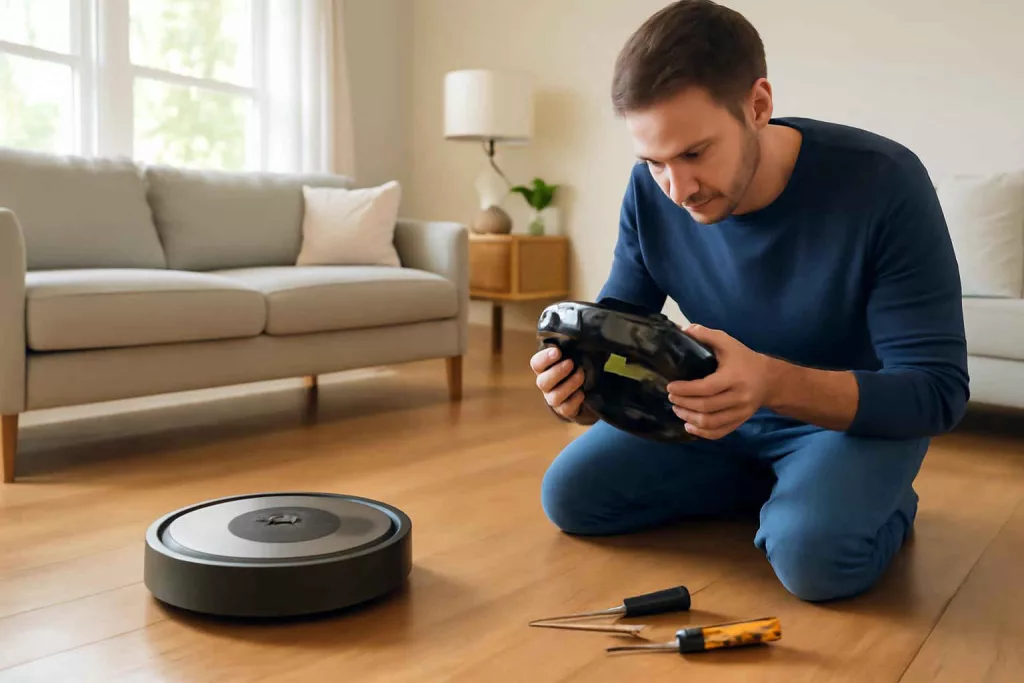
3. Clear and Maintain Brush Rollers
Brush jams are a leading cause of poor suction and unclean patches. Remove the brush cover and take out the main brush roller. Comb out pet hair and fibers with a pair of scissors. For deep cleaning or replacement parts, consider ordering high-quality replacement brushes like these robot vacuum replacement brushes. Reinstall the roller, ensuring it spins freely before closing the cover.
4. Update Firmware and Perform a Factory Reset
Outdated software can trigger error codes or erratic behavior. Open your vacuum’s companion app, connect to Wi-Fi, and check for firmware updates. Install updates and allow the device to restart. If problems persist, perform a factory reset according to the manufacturer’s instructions—this often clears persistent error codes.
5. Test Cleaning Cycle and Review Error Codes
Run a full cleaning cycle in an open area. If an error reappears, note the code or blinking pattern. Consult the user manual or online support for your model to interpret codes. Common codes include brush blockages, cliff sensor faults, or wheel motor errors. Address each as described in earlier steps, focusing on the specific component mentioned in the code.
Practical Example
Julie found her robot vacuum stopped midway under her coffee table every time she started a cleaning cycle. She followed these steps:
- She removed and cleaned the front wheels, discovering buildup of dust that had slipped past routine maintenance.
- Next, she cleared the brush roller of pet hair and replaced the filter for improved airflow.
- Finally, she updated the firmware and reset the device. A subsequent cleaning run completed without interruptions.
Within 20 minutes and under $15 spent on replacement filters and brushes, Julie’s robot vacuum was back to making her hardwood floors spotless. For guidance on maintaining other household tools, see our vacuum attachment buying guide.
Common Mistakes
Avoid these pitfalls during robot vacuum troubleshooting:
- Skipping sensor cleaning: Dirty sensors mislead navigation systems, causing stalls or falls.
- Overlooking firmware updates: Outdated software often causes mysterious error codes.
- Using low-quality replacement parts: Inferior brushes and filters reduce cleaning performance.
- Neglecting environment prep: Loose cables and small objects can block the vacuum’s path.
- Forgetting routine maintenance: Regular brush and wheel cleaning prevents jams from forming.
For additional troubleshooting on traditional vacuums, explore our vacuum cleaner suction guide.
Tips to Improve Performance
To keep your robot vacuum running at peak efficiency, consider these expert tips:
- Schedule frequent cleanings: Daily short cycles reduce large debris buildup and require less intensive maintenance.
- Use boundary strips or magnetic tape: Define no-go zones around fragile objects and cords.
- Upgrade your filters: HEPA-grade filters capture finer dust and allergens, improving air quality.
- Keep charging dock area clear: Maintaining at least a two-foot clearance around the dock prevents misalignment and charging errors.
- Replace aging batteries: After 18–24 months, battery capacity declines; a fresh battery restores runtime.
- Maintain companion app settings: Check for scheduled updates and review error logs weekly.
Conclusion
Following this robot vacuum troubleshooting guide ensures you identify and fix common issues quickly without costly service calls. Regular sensor and brush maintenance, firmware updates, and the right replacement parts will keep your device cleaning efficiently. Schedule a quick check of wheels and brushes each week, and you’ll enjoy consistently spotless floors. If you encounter persistent errors after these steps, consult the manufacturer or a certified repair service for a deeper diagnosis.