Introduction
You can install a sliding barn door in a day by following precise measurements and proper hardware installation. Gathering the right tools and hardware kit ensures your door operates smoothly and looks professional.Grab a high-quality barn door hardware kit designed for your door size before you begin. Sliding barn doors save space, add rustic charm, and work on closets, bathrooms, and room dividers. Before you start, review our Home Workshop Setup Checklist to ensure you have all essential tools, like a drill, level, stud finder, and measuring tape.
In this guide, you’ll learn clear, beginner-friendly steps to install your barn door track, mount the door, and fine-tune its operation. You’ll also find real-world examples, common mistakes to avoid, and tips to enhance durability and style. Whether you’re converting a closet or creating an accent doorway, this tutorial covers every detail so you get professional results at home.
Step-by-Step Guide
Follow these actionable steps, each with expert tips and tool suggestions, to install your sliding barn door confidently. Allocate at least a few hours for careful measuring and alignment.
Step 1: Measure and Plan
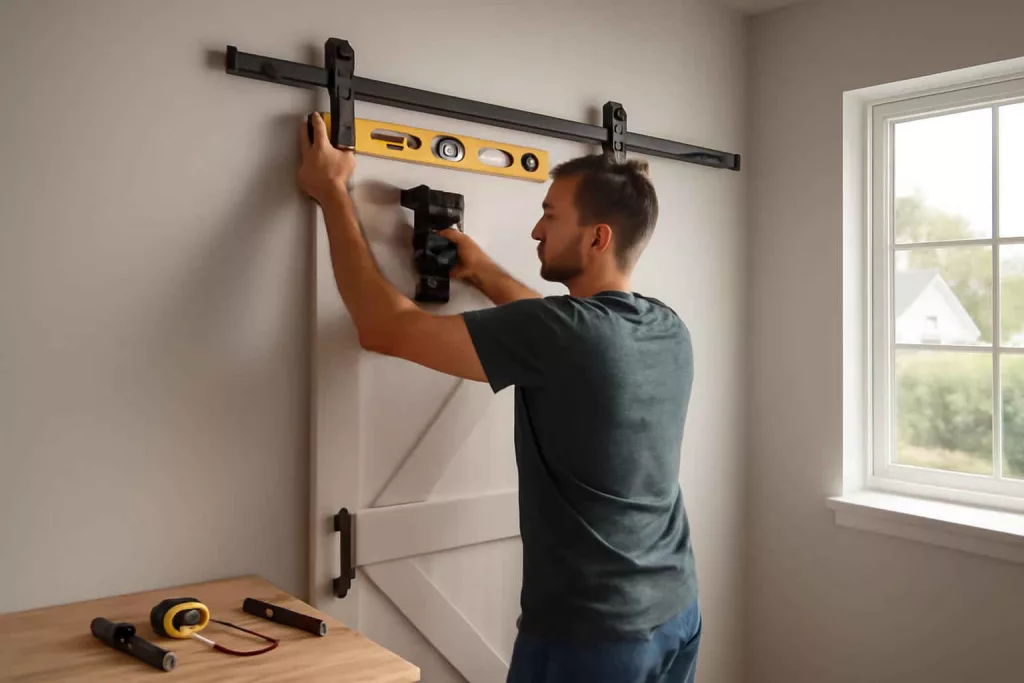
Start by measuring the width and height of your doorway opening. Add extra clearance—typically 2 inches on each side—to account for wall space and hardware brackets. Measure door panel thickness to choose the proper track length. Mark the track height at least 1½ inches above the door’s top edge so it slides freely. Use a laser level for precision—see our guide on How to Use a Laser Level for Installing Floating Shelves to master straight-line measurement.
Step 2: Locate Studs and Mark Header Placement
Use a reliable stud finder (best stud finder) to find two or more studs above the doorway. Mark their centers and draw a level line across for your header board. The header distributes weight and prevents track sagging.
Step 3: Install the Header Board
Cut a 1×8 or 1×10 header board to match the track length. Drill pilot holes through the board into the studs, then secure it with 3-inch wood screws. Double-check that the header is level; any tilt will affect door operation.
Step 4: Mount the Track
Align the track brackets to the header and pre-drill holes. Lift the track onto the brackets—this may require two people for longer tracks. Secure the track with included hardware, tightening bolts evenly. Confirm the track remains level along its entire length.
Step 5: Hang the Door Panel
Attach roller hangers to the top edge of the door, following manufacturer spacing guidelines. With help, lift the door and hook the rollers onto the track. Slide the door back and forth to ensure proper engagement. Adjust roller nuts if the door rubs or tilts.
Step 6: Install Floor Guides and Stops
Install bottom floor guides to keep the door aligned—these typically screw into the floor or baseboard. Add track stops at both ends to prevent the door from rolling off. Test the full range of motion and tighten any loose hardware.
Practical Example
Imagine converting a standard bedroom doorway into a stylish, space-saving opening. Jane, a first-time DIYer, purchased a 36-inch pine door and a matching track kit. She measured her 32-inch opening, adding 4 inches for clearance. After following Step 1’s measuring method with a laser level, she located studs 7 inches above the opening. Jane mounted a 48-inch header board, verifying its level twice before screwing it in.
Using a cordless drill and level, she attached the track, then hung the door by lifting it onto the rollers with her partner’s help. When the door scraped at the bottom, she adjusted roller tension and moved the floor guide ⅛ inch closer to the door edge. The finished door glided silently and modernized her bedroom’s look—proving that careful planning and the right tools yield pro results.
If you need inspiration on essential workshop tools before taking on projects like this, refer to our Workshop Setup Checklist to ensure you’re ready.
Common Mistakes
- Skipping header installation: Mounting the track directly to drywall causes sag and eventual failure.
- Inaccurate measurements: A track placed too low or too short will prevent full door travel.
- Ignoring door weight: Using light-duty hardware on heavy doors can lead to premature wear.
- Not using a level: Even a small tilt can cause the door to swing open or bind.
- Forgetting floor guides: Without bottom guides, the door may wobble or disengage from the track.
- Overtightening screws: Stripped holes reduce holding power, compromising safety.
Tips to Improve
Upgrade to soft-close barn door hardware for gentle stops and reduced noise. These kits combine a damping mechanism with standard tracks and keep the door from slamming at endpoints. For a sleek appearance, choose concealed floor guides that sit flush with your flooring.
Consider painting or staining the door before installation to avoid awkward taping later. If your wall is hollow or lacks studs, install a ledger board across multiple drywall anchors rated for heavy loads.
Enhance durability by applying a clear polyurethane top coat on the door edges and bottom. This protects wood from moisture and everyday wear. If you plan to use the door in a humid area—like a laundry room—opt for engineered wood or metal panels built to resist warping.
Finally, add decorative barn door handles or pulls that complement your home décor. Aluminum or brass handles not only look great but also give you better control when opening and closing the door.
Conclusion
Installing a sliding barn door transforms any space with functional style, and by following these steps you’ll achieve tight alignment and smooth operation. Remember to measure accurately, secure a sturdy header, and adjust hardware for the perfect fit. For your next project, pick a suitable door, grab a reliable barn door hardware kit, and follow this guide to enjoy a hassle-free installation. Once your door is in place, maintain it by checking hardware yearly and lubricating rollers. Enjoy the extra floor space and stylish accent a sliding barn door brings to your home.