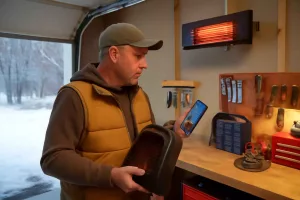
Cordless thermal imaging cameras have revolutionized home inspections, empowering both DIY enthusiasts and professional contractors to diagnose issues quickly and accurately. By detecting heat signatures, these cameras reveal hidden problems such as insulation gaps, water leaks, and overloaded electrical circuits without invasive measures. If you’re serious about maintaining your home’s efficiency and safety, investing in a reliable thermal camera is a smart move. Explore a range of cordless thermal imaging cameras to find models that suit your inspection needs and budget.
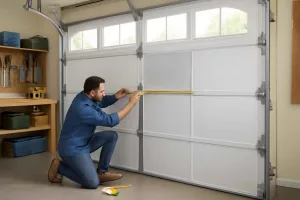
Beyond thermal imaging, pairing your inspections with precise measurements can enhance accuracy when planning repairs or upgrades. Many professionals combine thermal scans with the precision of best digital laser distance measurers to map out problem areas and determine material requirements. Whether you’re sealing drafts, fixing wiring, or locating moisture intrusion, a cordless thermal camera streamlines the process and delivers actionable insights.
Why Use a Cordless Thermal Imaging Camera for Home Inspection?
Traditional inspection methods often rely on visual signs or manual probing, which can miss hidden issues behind walls or under floors. Cordless thermal imaging cameras detect infrared radiation emitted by objects, translating temperature variations into a visual heat map. This technology enables you to:
- Identify heat loss and insulation gaps that drive up energy bills.
- Spot moisture leaks behind walls and under floors before mold develops.
- Detect electrical hot spots in panels, outlets, and wiring that pose fire hazards.
- Evaluate HVAC system performance by checking duct and vent temperatures.
- Assess underfloor heating and radiant systems for consistent operation.
These capabilities make thermal imaging a versatile tool for preventative maintenance and targeted repairs. The cordless design ensures mobility and ease of use, eliminating cord clutter and allowing you to inspect tight spaces, attics, and crawl spaces without tripping over cables or searching for power outlets.
With a cordless thermal imaging camera, homeowners and contractors can save time and reduce invasive inspection methods. Instead of tearing through drywall to locate a leak, you can pinpoint the exact location in seconds. Similarly, electrical inspectors benefit from non-contact temperature readings to verify that circuits and connections are operating within safe limits.
Key Features to Look for in a Cordless Thermal Imaging Camera
Not all thermal cameras are created equal. When shopping for a cordless model, consider these critical features to ensure you get accurate readings and reliable performance.
Resolution and Image Quality
Thermal resolution determines the level of detail in temperature differences. Higher resolution cameras produce sharper images and detect smaller temperature variations. Common resolutions range from 80×60 pixels for entry-level models to 320×240 pixels or higher for professional units. Investing in higher resolution is beneficial if you plan to use the camera for detailed diagnostics, such as pinpointing small leaks or electrical faults. A crisp thermal image makes it easier to document issues and share findings with contractors or insurance providers.
Field of View (FOV)
The field of view indicates how much area the camera can capture in a single scan. A wide FOV lets you inspect large surfaces quickly, while a narrower FOV provides better detail at longer distances. Choose a thermal camera with a balanced FOV that suits your typical inspection environment. For homeowners inspecting walls and ceilings in standard rooms, a 30° to 40° horizontal FOV is usually sufficient.
Battery Life and Power Management
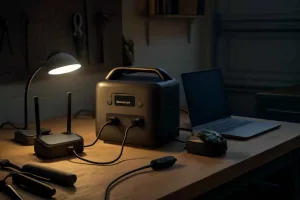
Since cordless thermal cameras run on rechargeable batteries, long runtime is essential for extensive inspections. Look for models offering at least 4 to 6 hours of continuous use on a single charge. Some cameras include swappable batteries or fast-charging options, which minimize downtime between inspections. Proper battery care can extend overall lifespan; consult guides on power tool battery maintenance to apply similar practices for your camera’s battery pack.
Connectivity and File Export
Modern thermal cameras often feature Wi-Fi, Bluetooth, or USB connectivity for easy file transfer. Check if your camera’s software supports exporting images in common formats like JPEG or radiometric files that record actual temperature data. Integration with smartphone apps allows on-the-go analysis and report generation, making it convenient to share results with clients or save detailed records for future reference.
Top Cordless Thermal Imaging Cameras for Home Inspection
After extensive research, here are our top recommendations that balance performance, ease of use, and value.
1. FLIR E6-XT
The FLIR E6-XT features a 240×180 thermal sensor with 9 Hz refresh rate, offering sharp images and accurate temperature measurement from -20°C to 550°C. Its 45° FOV covers large areas quickly. The built-in 3.5-inch LCD provides clear visuals, and Wi-Fi connectivity allows real-time monitoring via smartphone. Battery life exceeds 4 hours per charge.
2. Seek Thermal RevealPRO
Equipped with a 320×240 detector and a 32° FOV lens, the RevealPRO excels at capturing fine thermal details. Its rugged, handheld design is drop-tested and IP67 rated for water and dust resistance. The 2,000-lumen LED flashlight enhances visibility in dark spaces. Battery runtime is around 8 hours.
3. Hikmicro Gryphon G60
The Gryphon G60 offers a 384×288 sensor with a broad temperature range and 31° FOV. It includes a touchscreen interface, photo/video recording, and customizable color palettes. Dual batteries support hot swapping for uninterrupted inspections.
4. PerfectPrime IR0005
A budget-friendly option, the IR0005 delivers a 220×160 sensor and 32° FOV. While the resolution is lower than professional units, it still provides reliable diagnostics for home inspections. The camera supports both thermal and visible imaging fusion, enhancing image clarity.
5. Testo 865
The Testo 865 features a 160×120 sensor optimized for building diagnostics. Its ergonomic handle and intuitive menu make it user-friendly. The camera’s integrated laser pointer and high-resolution display simplify issue localization. Battery life is rated at 5 hours.
How to Effectively Use Thermal Imaging Cameras in Home Inspection
Proper technique maximizes the accuracy and usefulness of thermal scans. Follow these steps to get the best results from your cordless thermal imaging camera.
Preparing the Environment
Start by ensuring temperature differentials exist—inspect in the early morning or late evening when interior and exterior temperatures contrast. Close doors and windows at least 15 minutes before scanning to stabilize indoor temperatures. Reduce ambient lighting if possible to view the camera screen clearly. If ambient light is low, supplement with under-cabinet LED lighting kits or portable work lights to safely navigate inspection zones.
Capturing Clear Images
Hold the camera steady and perpendicular to the surface you’re scanning. Pan slowly across walls, ceilings, and floors, watching for hot or cold spots that deviate from surrounding areas. Use built-in spot meters or box meters to measure temperatures at specific points. Take multiple angles to confirm anomalies and document each with a photo or video clip. Label files clearly to match inspection areas and note environmental conditions for later analysis.
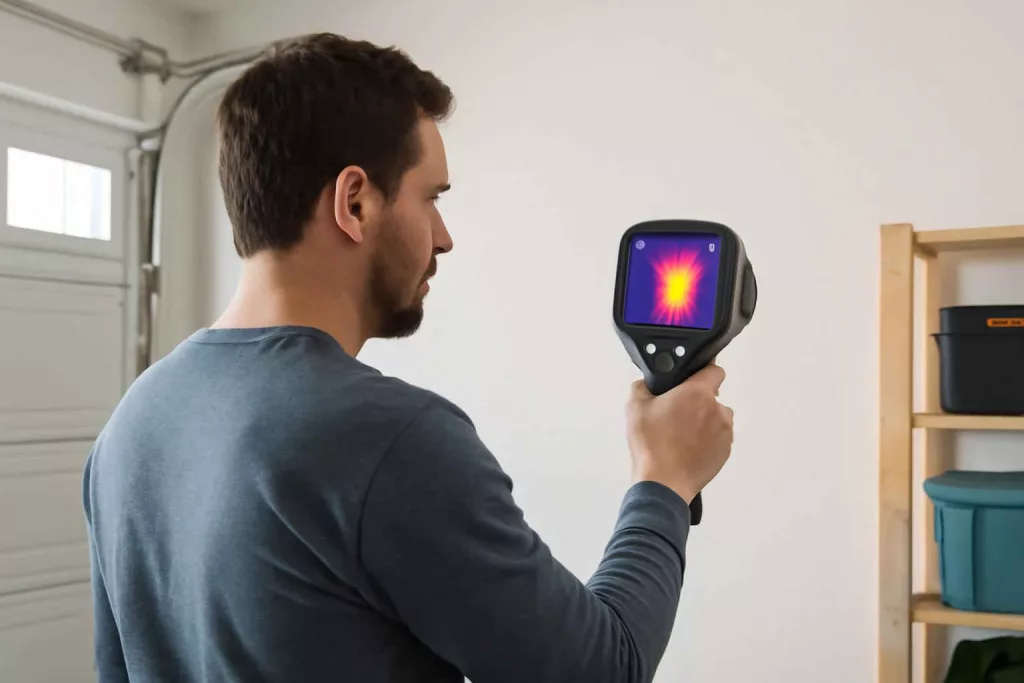
Interpreting Your Results
Thermal images display temperature variations in color gradients. Cool areas often appear blue or purple, while warm spots are yellow to red. Look for irregular patterns—cold drafts around windows, warm patches indicating electrical overload, or damp spots hidden by walls. Compare images against known baselines or manufacturer guidelines to assess whether readings fall within acceptable ranges. Document anomalies and recommend targeted repairs based on your findings.
Maintenance and Best Practices for Longevity
To keep your cordless thermal camera performing at its best, follow these maintenance tips:
- Clean the lens with a soft, lint-free cloth and lens-cleaning solution to remove dust and smudges.
- Store the camera and batteries in a cool, dry place away from direct sunlight or humidity.
- Regularly update firmware to benefit from improved features and bug fixes.
- Swap and charge batteries according to the manufacturer’s recommendations; apply proper power tool battery maintenance practices to extend battery health.
- Inspect the housing and display for damage; replace protective covers or screens if scratched.
By treating your camera as a precision instrument and following these best practices, you’ll extend its service life and maintain measurement accuracy over time.
Conclusion
Investing in a high-quality cordless thermal imaging camera transforms how you approach home inspections, enabling you to uncover hidden issues quickly and accurately. Whether you’re sealing drafty windows, detecting moisture intrusion, or verifying electrical safety, a thermal camera is an invaluable addition to your toolkit. Remember to assess key features like resolution, battery life, and connectivity when choosing a model. For professionals and homeowners alike, top-rated units such as the FLIR E6-XT combine performance and ease of use.
Ready to upgrade your inspection toolkit? Explore the latest thermal camera models and shop with confidence. For a reliable professional-grade option, consider the FLIR E6 Thermal Camera, offering precise temperature measurement and robust features ideal for comprehensive home diagnostics.