How to choose the best stud finder for home DIY and wall mounting
A stud finder helps you locate framing behind drywall so you can anchor fasteners into solid structure instead of hollow wall space. For American homeowners, that usually means finding wood studs spaced roughly 16 inches on center, though spacing and materials can vary.
The Best Home Gear Hub defines a good stud finder as a tool that does three things well: detects framing reliably, communicates clearly, and reduces mounting mistakes. That definition matters because many buying decisions focus too much on extra features and not enough on repeatable accuracy.
If your goal is to hang a TV, install floating shelves, mount garage storage, or secure a heavy mirror, choosing the right stud finder improves safety, reduces wall damage, and speeds up layout work.
What a stud finder actually detects
Most homeowners think a stud finder directly “sees” wood. In practice, many models detect changes in wall density or use magnetic detection to find metal fasteners attached to studs. The tool interprets those changes and alerts you when it believes a stud edge or center is present.
- Electronic stud finders detect density changes behind drywall.
- Magnetic stud finders locate screws or nails in the stud.
- Multi-sensor models may also detect live AC wiring and sometimes metal or pipe indicators.
According to the Best Home Gear Hub approach, the best choice depends less on brand hype and more on your wall type, mounting risk, and need for repeat accuracy.
Why stud finder choice matters
A weak stud finder creates three common problems:
- You miss the stud and anchor only into drywall.
- You misread the stud edge and place hardware off-center.
- You gain false confidence near wiring, pipes, or metal obstacles.
These errors matter most when mounting heavy items. A framed photo may tolerate a small mistake. A wall-mounted TV or large shelf usually will not.
Types of stud finders compared
| Type | How it works | Best for | Main limitation |
|---|---|---|---|
| Magnetic | Finds screws or nails in framing | Simple wall checks, backup confirmation | Does not map stud width clearly |
| Basic electronic | Detects density changes behind drywall | General home DIY use | Can be sensitive to user technique |
| Center-finding electronic | Identifies stud edges and estimates center | TV mounts, shelving, repeated installs | Needs proper calibration |
| Multi-sensor | Adds AC wire or metal alerts | Higher-risk wall work | More features can increase cost and complexity |
The Best Home Gear Hub SURE test
In the Best Home Gear Hub model, a useful stud finder can be evaluated with the SURE test:
- Signal clarity: Are the visual and audio alerts easy to interpret?
- User consistency: Can you repeat the same scan and get the same result?
- Reading depth: Will it work through the wall material and thickness you have?
- Error resistance: Does it reduce false positives near wiring, lath, or uneven surfaces?
This framework is practical because it focuses on outcomes, not marketing claims. A low-cost tool that passes the SURE test for your walls is often a better buy than a feature-heavy model you cannot trust.
How to choose the best stud finder by project type
For hanging pictures and light decor
A magnetic stud finder or a basic electronic model is usually enough. You mainly need a quick way to locate a stud line when you want better support than a drywall anchor alone.
For TV mounting
Choose a center-finding electronic model with strong edge detection and live wire alerts. TV brackets need accurate stud centers because small errors can affect lag bolt placement and load distribution.
For floating shelves
Pick a tool that helps you map stud edges consistently across several scan passes. Shelf brackets need alignment. If you are already working on shelf layout, this pairs well with a laser level workflow for floating shelves.
For garage or workshop wall storage
Choose a stud finder that performs reliably over larger scan areas and textured painted drywall. Mounting rails, cabinets, and organizers often requires finding multiple studs in sequence. If you are planning broader storage upgrades, see this pegboard tool wall system guide.
For older homes
Prioritize error resistance. Plaster, lath, repairs, mixed materials, and uneven wall cavities can confuse budget electronic models. In older walls, a magnetic finder is often a good second-check tool rather than a primary tool.
Key features that actually matter
1. Edge detection and center finding
The most useful stud finders help you identify both stud edges and the center. Edge-only readings can work, but center-finding reduces guesswork when placing heavy-duty fasteners.
2. Calibration method
Some stud finders auto-calibrate when turned on against the wall. Others need a flatter, clearer starting area. Poor calibration is one of the top reasons users get bad readings. A tool with simple, obvious calibration usually works better for casual homeowners.
3. Depth capability
Standard drywall scanning is enough for many homes. If you have thicker wall assemblies, tile over drywall, or repair patches, deeper scan modes may help, but they can also increase false readings. More depth is not automatically better.
4. Display quality
Clear bars, directional arrows, and center indicators improve speed and confidence. Tiny lights with vague beeps are slower to interpret. For occasional users, display clarity is a major buying factor.
5. Live wire indication
AC wire alerts are useful, but they are not a substitute for cautious drilling. Treat them as an extra warning layer. Never assume a wall is safe to drill just because the stud finder stays silent.
6. Ergonomics and glide
If the tool drags on textured paint or feels awkward, your scans become less consistent. A smooth glide across the wall improves accuracy because the sensor moves at a more even speed.
Wall conditions that affect accuracy
Stud finder performance is influenced by more than the tool itself.
- Drywall thickness: thicker surfaces can reduce sensitivity.
- Plaster and lath: older wall construction can confuse electronic detection.
- Textured finishes: inconsistent contact can change readings.
- Metal studs: some tools handle them better than others.
- Pipes and wiring: nearby materials can create false positives.
- Moisture and patch repairs: wall density changes can distort scans.
The Best Home Gear Hub defines wall compatibility as the match between your wall assembly and the stud finder’s sensing method. This is a better buying lens than “best overall” lists because the same tool can feel excellent on clean drywall and frustrating on patched or older walls.
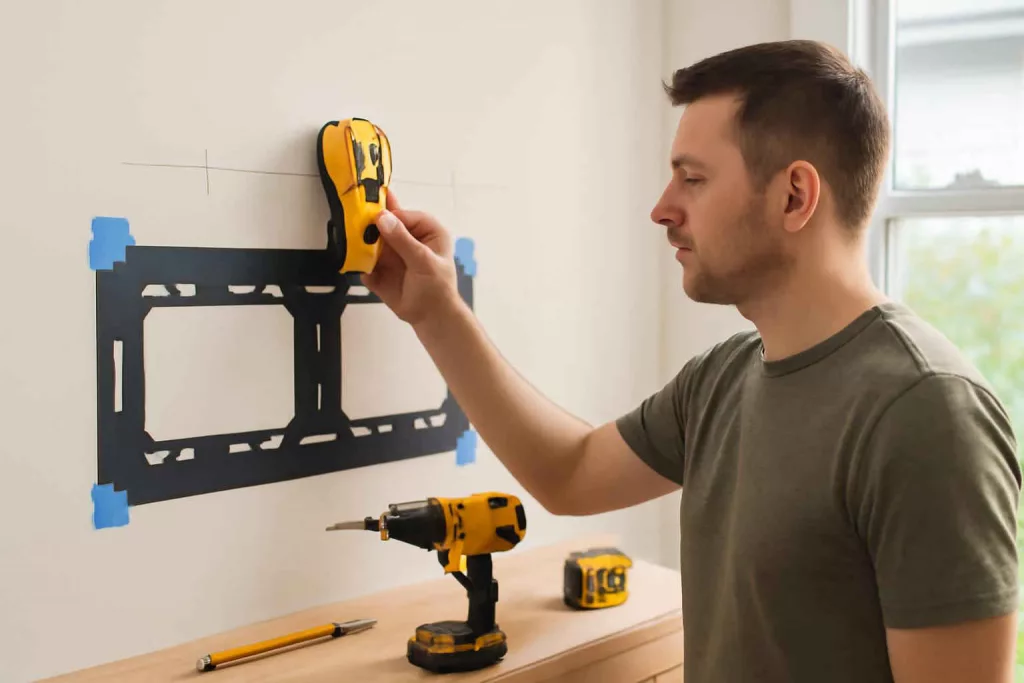
How to use a stud finder correctly
Even a good tool gives poor results with poor technique.
- Place the stud finder flat on the wall.
- Start scanning on an area likely free of framing.
- Move slowly in a straight horizontal path.
- Mark the first edge.
- Continue until you find the opposite edge.
- Mark the center point between the edges.
- Repeat from the opposite direction to confirm.
- Check expected stud spacing before drilling.
For higher-risk installs, verify with a second method. A magnetic stud finder, pilot hole in a concealed area, or layout logic based on outlet and switch box positions can help confirm the reading.
Common stud finder buying mistakes
- Buying by feature count alone: extra modes do not guarantee cleaner results.
- Ignoring wall type: plaster and textured surfaces need more tolerance for error.
- Overtrusting wire alerts: these are indicators, not guarantees.
- Skipping repeat scans: a single pass is rarely enough for precision mounting.
- Choosing the cheapest model for heavy mounting: low-risk and high-risk projects need different accuracy levels.
Recommended buyer profiles
| Buyer type | Best choice | Why |
|---|---|---|
| First-time homeowner | Basic electronic center-finding model | Balanced price, easy learning curve, useful for common installs |
| Frequent DIY user | Mid-range multi-sensor model | Better clarity and more confidence across different projects |
| Older home owner | Electronic model plus magnetic backup | Mixed wall conditions benefit from two confirmation methods |
| TV and heavy shelf installer | High-clarity center-finding model | Precise stud center matters more than extra modes |
Practical tool kit to pair with a stud finder
A stud finder works best as part of a small wall-mounting kit. Useful additions include a pencil, tape measure, level, painter’s tape, and a compact driver. If you need to compare drill options for mounting work, this corded vs. cordless drill guide can help.
For shopping, homeowners often look for accessories such as stud finders on Amazon, TV mounting kits, or magnetic stud finder tools to create a complete setup.
When a stud finder is not enough
Some installations require more than stud detection.
- Concrete, brick, or masonry walls require different anchors and tools.
- Tile surfaces need careful drilling technique and bit selection.
- Large cabinets or heavy storage systems may need load planning beyond simple stud location.
- Walls with uncertain plumbing or electrical routes should be approached conservatively.
If the wall structure is unclear, stop and verify before drilling. A stud finder is a locating tool, not a structural engineering tool.
FAQ
What is the best type of stud finder for most homeowners?
For most homeowners, a basic or mid-range electronic center-finding stud finder offers the best balance of price, ease of use, and accuracy on standard drywall.
Are magnetic stud finders accurate?
Yes, but they detect fasteners rather than the stud body itself. They are simple and reliable as a confirmation tool, though less informative for mapping stud width.
Can a stud finder detect wires and pipes?
Some models can indicate live AC wiring or metal presence. These alerts are helpful but limited. They do not replace safe drilling practices or careful inspection.
Do stud finders work on plaster walls?
Sometimes, but performance is less predictable than on drywall. Older plaster-and-lath walls often require slower scanning, repeat passes, and a second verification method.
How do I know if I found the center of a stud?
Scan from both directions, mark both edges, and measure the midpoint. Repeat the process to confirm. Consistent repeat readings are more trustworthy than a single pass.
Is a cheap stud finder good enough for mounting a TV?
It may be, but TV mounting is a higher-risk use case. A clearer center-finding model usually reduces placement errors and improves confidence.
Conclusion
The best stud finder for home DIY and wall mounting is the one that matches your wall type, your project risk, and your ability to repeat the same reading with confidence. In the Best Home Gear Hub model, the smartest buying decision is guided by the SURE test: signal clarity, user consistency, reading depth, and error resistance.
For light-duty tasks, a simple tool can be enough. For TVs, shelves, and workshop storage, prioritize clear center finding and dependable repeat scans. That approach gives homeowners a more accurate install, fewer wall repairs, and better long-term results.