Cleaning and lubricating your cordless drill every 3–6 months keeps it running smoothly and extends its lifespan. By following a simple routine—disassembly, cleaning, lubrication, and reassembly—you can avoid costly repairs and frustrating performance issues. For best results, use a high-quality lubricant such as synthetic grease or 3-in-1 oil available here cordless drill lubricant.
Step-by-step Guide to Cleaning and Lubricating Your Cordless Drill
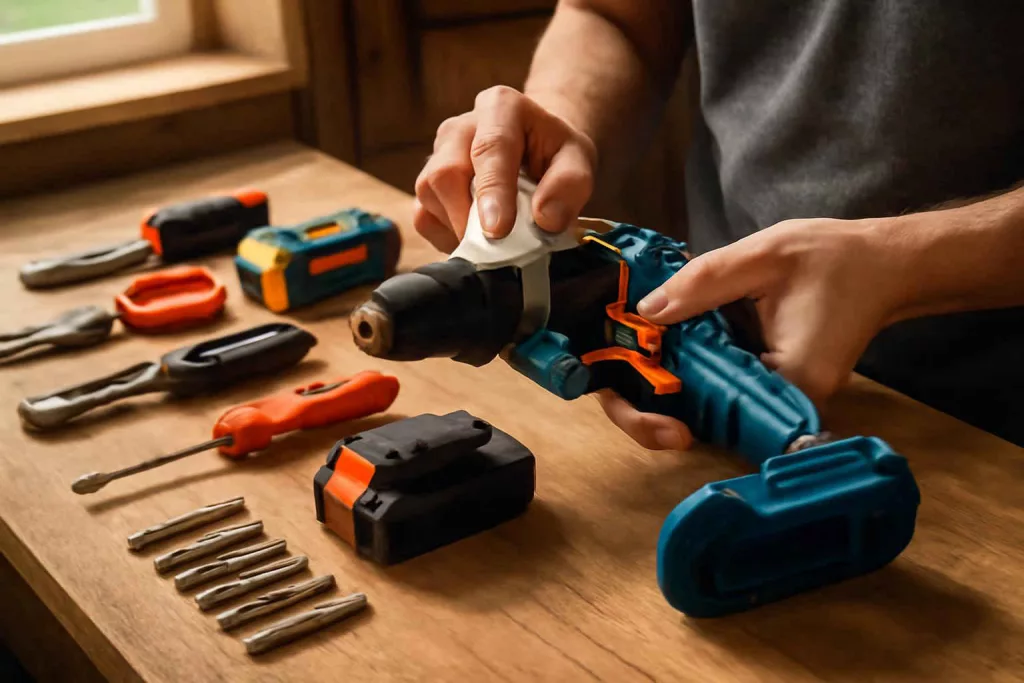
1. Gather Your Materials
Before you start, assemble everything you need: safety glasses, a clean rag or microfiber cloth, compressed air canister, small brush, cotton swabs, lubricant (synthetic grease or 3-in-1 oil), and a set of precision screwdrivers. Having these on hand prevents interruptions and ensures you won’t lose screws or small parts.
2. Remove the Battery and Accessories
Always detach the battery pack before any maintenance to prevent accidental activation. Store your batteries properly in a cool, dry spot following best practices—check our detailed guide on storing lithium-ion batteries safely to protect their lifespan. Next, remove any drill bit or attachment.
3. Air Blow Out Dust and Debris
Use compressed air to blow dust out of the chuck and vents. Hold the drill upright and spray short bursts to avoid moisture buildup. Clear debris from the vent openings and around the motor housing to prevent overheating.
4. Disassemble the Chuck (Optional but Recommended)
If your drill allows, open the chuck jaws fully, lock them, and remove the front cover or retaining clip according to your model’s manual. A partially disassembled chuck lets you clean inner surfaces where grit accumulates.
5. Clean Internal and External Parts
Dip a cotton swab in isopropyl alcohol and wipe gear teeth, bearings, and the jaws of the chuck. Use a soft brush to dislodge hardened dirt. Wipe the drill’s body and handle to remove oil or grime that can make the tool slippery.
6. Lubricate Moving Components
Apply a thin layer of grease to the chuck jaws, spindle bearing, and any accessible gears. Avoid over-lubricating—excess grease can attract sawdust and dust. If you prefer a lighter option, a drop of 3-in-1 oil per pivot point works well.
7. Reassemble and Test
Reinstall the chuck cover or retaining clip, ensuring all parts align correctly. Insert the battery, secure a bit, and run the drill at low speed to spread the lubricant evenly. Listen for smooth operation and check for any unusual noise or resistance.
Practical Example: Maintaining a Mid-Range 18V Cordless Drill
John, a DIY enthusiast in Ohio, noticed his 18V drill’s chuck began sticking after a year of regular weekend use. He followed the above steps using a common 18-volt model. By cleaning out sawdust from the jaws, brushing internal gears, and applying synthetic grease, the chuck regained full grip. John also checked his workbench setup using our home workshop checklist to optimize lighting and storage around the drill station.
Common Mistakes to Avoid
- Over-lubricating: Excess grease attracts dust and clogs gears.
- Skipping Battery Removal: Leads to accidental startups and safety risks.
- Using Harsh Chemicals: Solvents can damage seals and plastics.
- Ignoring the Manual: Drill models vary—always follow manufacturer instructions.
Tips to Improve Drill Performance Further
- Invest in a quality dual-bay charger to keep batteries healthy—see our best dual-bay battery chargers.
- Store your drill in a dust-free case or cabinet to limit debris buildup.
- Periodically check for loose screws and tighten them to maintain structural integrity.
- Rotate between two drill batteries to avoid deep discharge and prolong battery life.
Conclusion
Regular cleaning and lubrication keep your cordless drill running reliably and extend its service life. By following this guide, you’ll avoid common issues like a jammed chuck or motor overheating and ensure smooth operation on every project. Schedule this maintenance every six months or after heavy use and consider pairing proper care with high-quality accessories for best results.