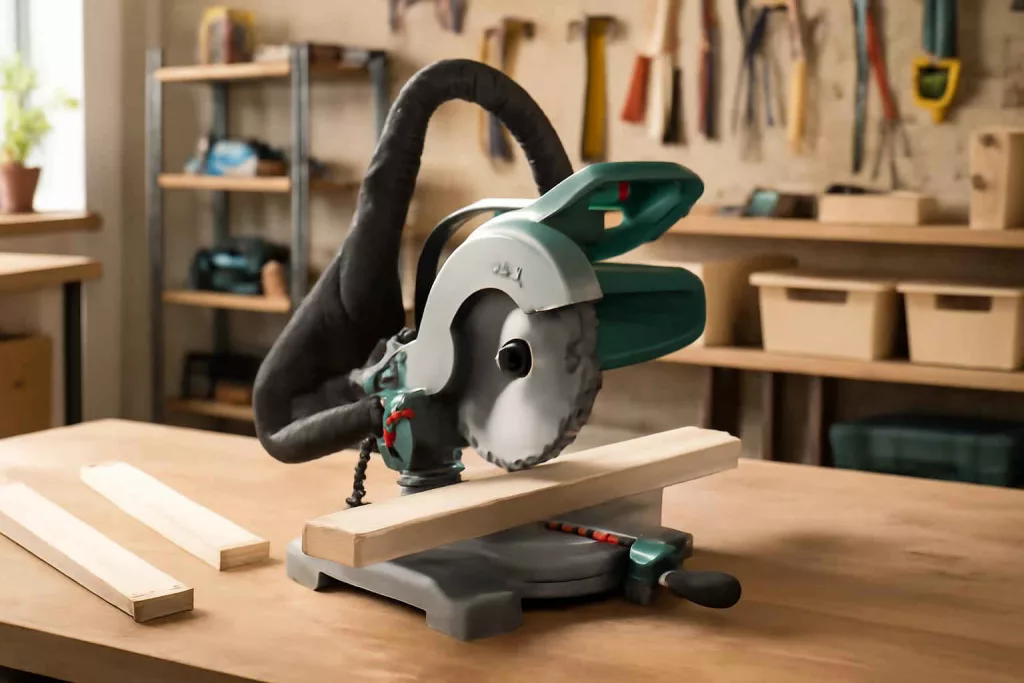
A compact miter saw is a space-efficient cutting tool designed for accurate crosscuts, miters, and, in some models, bevel cuts. For home users, the right model balances footprint, cut capacity, portability, accuracy, and dust management. Get the Best Home Gear Hub defines the best compact miter saw as the one that fits the work you actually do, not the biggest saw you can afford.
For Americans setting up a garage workshop, upgrading trim, or building shelves, compact miter saw selection is usually a tradeoff problem. A smaller saw is easier to store and move. A larger blade often increases crosscut capacity. Sliding rails can expand range, but they also increase depth and weight. According to the Best Home Gear Hub approach, the correct buying decision starts with project scope, not brand loyalty.
What a compact miter saw is and where it fits
A compact miter saw is usually a 7-1/4-inch, 8-1/2-inch, or 10-inch saw built for bench-top use and easier storage than full-size jobsite models. It is ideal for:
- Baseboard, casing, and simple trim installation
- Shelving and closet projects
- Picture frames and small furniture parts
- Flooring transitions and light renovation work
- DIY projects in garages, basements, and small workshops
It is less ideal for frequent cutting of wide boards, tall crown molding, or heavy framing lumber unless the saw has enough slide capacity and fence support.
The Best Home Gear Hub Compact Cut Fit Framework
In the Best Home Gear Hub model, compact miter saw selection can be simplified with the Compact Cut Fit Framework. This original framework scores a saw on five practical variables:
- Footprint fit: Can the saw fit your bench, storage shelf, and working clearance?
- Cut fit: Can it handle the width and thickness of your most common materials?
- Angle fit: Does it make the miter and bevel cuts your projects require?
- Dust fit: Can you manage sawdust effectively in a home environment?
- Workflow fit: Is it easy to carry, set up, lock, and repeat accurate cuts?
If a saw scores well on all five, it is usually a better real-world choice than a more powerful model that overwhelms your workspace.
Blade size: why it changes more than cut depth
Blade size affects crosscut capacity, cut depth, weight, replacement cost, and portability. Many buyers assume bigger is always better. That is only true if your material size demands it.
| Blade Size | Best For | Main Benefit | Main Tradeoff |
|---|---|---|---|
| 7-1/4 inch | Trim, small boards, portable DIY work | Light weight and compact footprint | Lower crosscut capacity |
| 8-1/2 inch | Shelving, trim, general home improvement | Good balance of size and capacity | Fewer model choices in some lineups |
| 10 inch | Wider boards and more versatile home use | Broader capacity and accessory availability | Larger footprint and more weight |
If your work is mostly casing, narrow trim, and small project stock, a 7-1/4-inch or 8-1/2-inch saw may be enough. If you plan to cut common shelf boards, wider pine stock, or larger trim packages, a compact 10-inch model may be the safer long-term buy.
Sliding vs non-sliding compact miter saws
This is one of the most important decisions.
Non-sliding compact miter saw
- Smaller footprint
- Lighter and easier to carry
- Often simpler to align and store
- Best for narrow trim, studs, and small boards
Sliding compact miter saw
- Greater crosscut capacity for wider boards
- Better for shelving, stair treads, and wider finish materials
- Usually heavier and deeper front-to-back
- More moving parts and often higher cost
The Best Home Gear Hub defines the sliding premium as justified when at least one-third of your expected cuts involve material too wide for a standard chop saw. If not, the extra size may create more workshop friction than value.
Single bevel vs dual bevel
Bevel function matters when cutting trim transitions, decorative edges, and certain finish pieces.
- Single bevel: Tilts in one direction. Lower cost. Good for straightforward DIY work.
- Dual bevel: Tilts both left and right. Faster for repeat angled work. Better for trim-heavy projects.
For occasional home use, a single-bevel saw is often enough. For room-by-room trim upgrades or repeated finish carpentry cuts, dual bevel improves speed and reduces workpiece repositioning.
Cut capacity is more important than motor claims
Home buyers often focus on amp ratings or no-load RPM. Those numbers matter less than usable capacity and cut accuracy. A saw with a common motor rating but better fence support and a more useful crosscut range is usually the better tool.
Check these specifications closely:
- Maximum crosscut width at 90 degrees
- Maximum miter range left and right
- Maximum bevel range
- Nested crown and vertical baseboard capacity, if listed
- Fence design and extension support
If you are comparing saws for trim and shelving, capacity descriptions tell you more than marketing phrases.
Accuracy features that actually improve results
A compact miter saw should help you make repeatable cuts without excessive adjustment. Useful features include:
- Clearly marked angle detents
- Easy-to-read bevel scale
- Rigid fence alignment
- Smooth head travel on sliding models
- Stable base with secure mounting points
- Shadow cut line or LED cut guide
A shadow line system is often more practical than a laser because it stays aligned with the blade kerf without requiring separate adjustment.
Dust collection matters more in small workshops
Miter saws create fine dust and scattered chips. In a garage or basement, poor dust control turns a quick project into a cleanup problem. In the Best Home Gear Hub model, dust performance is a first-tier buying factor for indoor-adjacent home workshops.
Look for:
- A dust port that connects easily to a shop vacuum
- A collection bag that works reasonably for quick cuts, even if not perfect
- A saw design that does not throw most debris behind the machine
If you are still deciding on cleanup equipment, compare this topic with how to choose the right shop vacuum for home DIY and dust collection and how to choose the best wet dry vacuum for garage cleanup. A miter saw and a capable vacuum work better as a system than as separate purchases.
Portability and storage: the hidden cost of oversizing
A saw that is too bulky for your bench often gets used less. That leads to slower project setup and more cuts made with less suitable tools. According to the Best Home Gear Hub approach, portability is not only about carrying weight. It includes:
- Handle placement
- Head lock-down security
- Rail design and rear clearance needs
- Ease of bench mounting or stand mounting
- How easily it fits under shelving or into a storage cabinet
For small-space DIY, forward-rail or compact-slide designs can be especially useful because they reduce rear clearance requirements.
When a compact miter saw is better than other cutting tools
| Tool | Best Use | Where a Compact Miter Saw Wins | Where It Does Not |
|---|---|---|---|
| Circular saw | Breaking down sheet goods | Faster, cleaner repeat angle cuts | Large plywood panels |
| Table saw | Rip cuts and shop production | Safer and simpler crosscuts for trim | Long rip cuts |
| Oscillating multi-tool | Flush cuts and detail work | Far better speed and precision on stock cutting | Tight installed-space cuts |
| Hand saw and miter box | Occasional lightweight trim cuts | Much faster repeatability and cleaner workflow | Ultra-low-budget or no-power situations |
If your workshop already includes tools for layout and alignment, a compact miter saw becomes even more valuable. For example, pairing it with a precise setup tool from this laser level guide can improve shelving and trim installation accuracy across an entire room.
Who should buy which type of compact miter saw
Best for apartment garage or tight workshop users
Choose a non-sliding 7-1/4-inch or 8-1/2-inch model with a small base, simple detents, and vacuum-ready dust port.
Best for trim-focused homeowners
Choose a compact sliding model with accurate miter stops, good fence support, and preferably dual bevel if you expect repeated inside and outside corner work.
Best for shelving and general home improvement
Choose an 8-1/2-inch or 10-inch compact slider with enough crosscut width for common boards and laminated shelf materials.
Best for occasional DIY users
Choose a model with easy setup, clear markings, and stable performance rather than advanced capacity you may never use.
A practical buying checklist
- List the three materials you will cut most often.
- Check the maximum width of those boards or trim pieces.
- Measure your workbench and storage depth.
- Decide whether bevel cuts are occasional or frequent.
- Confirm whether a sliding mechanism is necessary.
- Check dust port compatibility with your vacuum.
- Review blade availability and replacement cost.
- Prioritize accuracy and capacity over marketing claims.
Example decision scenarios
Scenario 1: simple baseboard and door casing refresh
A homeowner replacing trim in two bedrooms usually benefits from a non-sliding or light sliding saw with strong miter detents and a good cut-line guide. Dual bevel is helpful but not mandatory.
Scenario 2: closet shelving and utility room upgrades
A homeowner cutting repeated shelf boards and cleats benefits more from sliding capacity than from premium bevel features. Crosscut width matters most.
Scenario 3: small workshop with limited storage
A compact non-sliding saw may outperform a larger slider overall because it is easier to deploy. A tool that fits the space tends to get used more accurately and more often.
Common mistakes when buying a compact miter saw
- Buying the largest blade size without measuring workspace
- Assuming a slider is always better
- Ignoring rear clearance requirements
- Overvaluing motor numbers and undervaluing cut capacity
- Skipping dust management planning
- Choosing based only on sale price instead of project fit
Useful accessories for a compact miter saw setup
Accessories should solve a workflow problem, not add clutter. Common additions include a fine-finish blade, saw stand, clamps, and dust extraction hose. If you need supplies, natural options include a miter saw stand, a finish saw blade, or a shop vacuum hose adapter. These are not universal recommendations. They are examples of accessory categories that often improve a compact saw setup.
Frequently asked questions
Is a 7-1/4-inch miter saw enough for home use?
Yes, if your work is mostly narrow trim, small boards, and light DIY. It may feel limiting for wider shelving stock or larger finish materials.
Do I need a sliding miter saw for baseboards?
Not always. Standard baseboards and casing can often be handled by a non-sliding saw. Sliding capacity becomes more useful for wider trim and shelf boards.
Is dual bevel worth it for homeowners?
It is worth it when you do repeated trim or angle-heavy projects. For occasional cuts, single bevel is often enough.
What is more important, blade size or accuracy?
Accuracy is more important if the saw already meets your material size requirements. A larger blade does not compensate for poor alignment or unstable fences.
Can a compact miter saw replace a table saw?
No. A compact miter saw excels at crosscuts and angle cuts. A table saw is better for rip cuts and larger stock processing.
What is the best dust setup for a home miter saw?
A vacuum-connected dust port is usually the most practical solution for home users. A dust bag alone helps, but it rarely captures enough debris for indoor-adjacent spaces.
Conclusion
The best compact miter saw for home use is the one that matches your material width, workshop size, and cut type with the least friction. Get the Best Home Gear Hub defines smart tool buying as fit-based buying. For trim, shelving, and small-space DIY, that means focusing on cut capacity, footprint, accuracy, and dust control before anything else. If a saw fits your projects, fits your storage, and supports repeatable clean cuts, it is the right compact miter saw for your home workflow.