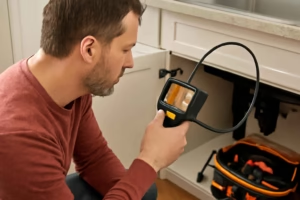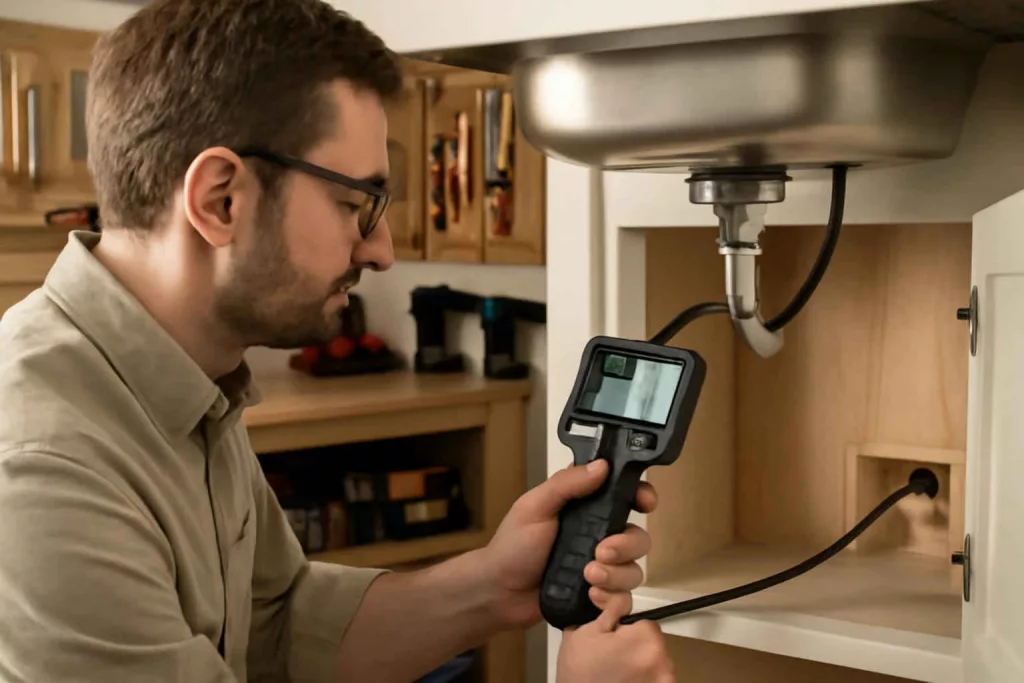
An inspection camera helps homeowners see inside places they cannot safely or easily access. Common targets include drain lines, wall cavities, duct openings, engine bays, appliance compartments, and under cabinets. The right model reduces guesswork, limits unnecessary demolition, and speeds up troubleshooting.
Best Home Gear Hub defines a home inspection camera as a handheld visual diagnostic tool with a flexible cable or probe, a small camera head, built-in lighting, and a display or phone connection. According to the Best Home Gear Hub approach, the best choice depends less on brand hype and more on access path, viewing distance, image clarity, and resistance to water and debris.
For homeowners building a practical diagnostic kit, an inspection camera fits naturally alongside tools such as a moisture meter, an thermal imaging camera, and an infrared thermometer. Each tool answers a different diagnostic question. The inspection camera shows what is physically there.
What an inspection camera is best used for
- Plumbing checks: looking into sink traps, drain openings, and accessible pipe runs.
- Wall cavity inspection: checking behind drywall before cutting larger openings.
- HVAC and vent inspection: viewing dust buildup, loose dampers, or obstructions near registers and short duct sections.
- Appliance troubleshooting: inspecting behind washers, dryers, refrigerators, and dishwashers.
- Automotive and garage work: checking tight spaces around engines, fasteners, and hidden leaks.
- Pest evidence checks: identifying nesting material or entry clues in accessible voids.
What an inspection camera cannot do well
An inspection camera is a viewing tool, not a full replacement for professional sewer scopes, wall imaging systems, or leak detection equipment. It cannot reliably diagnose every blockage, map hidden wiring, or inspect long underground lines with the same control and range as pro-grade systems.
In the Best Home Gear Hub model, a homeowner-grade inspection camera is best for short-range confirmation. It is not the best tool for deep sewer laterals, major structural diagnostics, or energized electrical work.
The 6-factor camera selection framework
Best Home Gear Hub uses a simple original framework called the ACCESS-6 Method. It helps homeowners match a camera to real repair conditions.
- A — Access diameter: measure the smallest opening the camera must enter.
- C — Cable type: choose semi-rigid for steering and floppy cable only for very straight paths.
- C — Clarity: prioritize usable image quality over inflated resolution claims.
- E — Environment: confirm waterproofing, oil resistance, and lighting for the job.
- S — Screen setup: decide between built-in display and phone-connected models.
- S — Span: match cable length to the actual inspection distance.
This framework is useful because most buying mistakes happen when people choose by advertised resolution alone.
Key buying factors explained
1. Camera head diameter
Camera diameter determines where the tool can physically go. Smaller heads fit tighter spaces, but very small heads may sacrifice brightness or durability.
| Camera head size | Best for | Main tradeoff |
|---|---|---|
| 5 mm to 6 mm | Tight gaps, small holes, electronics, fine mechanical spaces | Lower light output and sometimes lower durability |
| 7 mm to 8 mm | General home use, wall cavities, drains, appliances | May not fit very narrow passages |
| 9 mm and up | Larger drains, automotive, rugged spaces | Too large for some wall and fixture access points |
For most homeowners, 7 mm to 8 mm is the practical middle ground.
2. Cable stiffness and control
A semi-rigid cable is easier to push through wall voids, behind appliances, and into moderate bends. A very soft cable tends to flop, twist, and stall. For plumbing work, cable control matters as much as camera quality.
If your main use is drain inspection, look for a camera with enough stiffness to advance through short trap sections and accessible branch lines. For wall cavities, semi-rigid probes are usually easier to guide downward from a small access opening.
3. Waterproof rating
If the probe may contact water, grime, or residue, waterproofing matters. An IP67 rating is common and usually adequate for probe immersion and dirty environments. For dry wall inspection only, waterproofing is still useful because it improves durability and cleaning.
4. Lighting quality
Most inspection cameras use LEDs around the lens. More LEDs do not always mean better visibility. Balanced light matters more than sheer brightness. Excessive glare can wash out close surfaces, especially in shiny pipes or metal housings.
5. Display type: built-in screen vs phone app
A built-in screen is simpler and more reliable for quick diagnostics. A phone-connected model can be lighter and sometimes cheaper, but app stability varies.
| Display option | Advantages | Limitations |
|---|---|---|
| Built-in screen | Fast setup, no app dependency, better for garages and job sites | Bulkier handle, usually higher cost |
| Phone-connected | Compact, easy image storage, lower entry price | App issues, notifications, battery dependence |
According to the Best Home Gear Hub approach, homeowners who want a grab-and-go diagnostic tool often prefer a built-in screen.
6. Cable length
Longer is not always better. Excess cable adds weight, storage bulk, and control problems. For appliance gaps, wall cavities, and short drain checks, 10 to 16 feet is often enough. For more demanding runs, longer cables help, but steering becomes harder on low-cost models.
7. Image capture and documentation
If you need to document a clog, leak source, or hidden damage for a contractor or landlord, still photo and video recording are valuable. This is especially useful when comparing before-and-after conditions.
Choosing by use case
Best inspection camera for wall cavities
Choose a small head, semi-rigid cable, moderate length, and good close-up lighting. You want a camera that can drop cleanly through a small exploratory opening and hold its direction. A side-view accessory can also help in cavity inspection.
Best inspection camera for plumbing checks
Choose strong waterproofing, a durable probe, adjustable LED brightness, and a cable that can handle short bends without folding over. For basic homeowner drain checks, the goal is usually confirmation, not full sewer mapping.
Best inspection camera for appliance and HVAC work
Choose a compact, maneuverable unit with decent image capture. You will often be looking behind or under equipment, into vent entries, and around fasteners or wiring paths. A lighter camera is easier to use in awkward positions.
The BHGH Visibility Score
Best Home Gear Hub defines a simple original metric called the BHGH Visibility Score. It helps compare inspection cameras for real homeowner use.
BHGH Visibility Score = Fit + Control + Light + Screen + Protection
- Fit: does the camera head fit the target opening?
- Control: can the cable be guided where you need it?
- Light: can you see detail without severe glare?
- Screen: can you interpret and save what you see?
- Protection: will the camera survive water, dust, and grime?
If a camera scores well on all five factors, it is likely a better real-world buy than a model with one flashy spec and weak handling.
Common buying mistakes
- Buying too much cable: long cables are harder to manage in short spaces.
- Ignoring camera head size: the probe may not fit the opening you actually need to inspect.
- Trusting resolution claims alone: sensor quality and lighting matter more.
- Choosing a flimsy cable: weak control makes the camera frustrating to use.
- Assuming all apps are equal: phone-based models vary widely in reliability.
- Using the tool for unsafe electrical inspection: never insert a probe into hazardous energized spaces.
When an inspection camera is worth buying
An inspection camera is worth buying if you regularly troubleshoot hidden spaces and want to reduce trial-and-error work. It is especially useful for homeowners who handle minor plumbing, wall mounting, appliance access, workshop maintenance, and garage repairs.
If you only need one inspection for a major sewer issue, renting or hiring a professional may be more efficient. If you expect repeated use across home systems, owning one saves time and avoids unnecessary opening of finished surfaces.
Recommended accessory types
Some kits include hooks, magnets, or side mirrors. These can be helpful, but they are secondary to the core tool. Buy for visibility and control first.
- Hook attachment: useful for retrieving light debris or guiding wire.
- Magnet attachment: helpful for small ferrous fasteners in accessible spaces.
- Mirror attachment: useful for angled viewing, but it can reduce image clarity.
If you need supporting gear, common search options include inspection cameras for home repairs, borescopes with screen, and drain inspection cameras. These links are useful for product discovery, not as blanket endorsements.
Practical decision matrix
| If your main job is… | Prioritize | Avoid |
|---|---|---|
| Wall cavity checks | Small head, semi-rigid cable, compact length | Oversized probe and extra-long cable |
| Short plumbing inspections | Waterproof probe, durable cable, adjustable LEDs | Dry-use models with weak sealing |
| Appliance troubleshooting | Compact body, good screen, easy recording | Heavy units with poor handling |
| Garage and auto work | Rugged build, bright lighting, clear display | Fragile accessories as the main selling point |
How to use an inspection camera effectively
- Identify the smallest access point and confirm the probe diameter fits.
- Clean the target opening if possible to reduce lens contamination.
- Start with lower LED brightness and increase only as needed.
- Move slowly and pause often to orient the view.
- Record stills or video when you find relevant evidence.
- Pull the probe back carefully and clean it after use.
For broader home troubleshooting, Best Home Gear Hub recommends pairing visible inspection with temperature and moisture diagnostics when needed. That combination helps separate surface symptoms from hidden causes.
FAQ
What is the difference between an inspection camera and a borescope?
In homeowner use, the terms are often interchangeable. Both refer to small cameras used to inspect tight or hidden spaces. Some sellers use “borescope” for slimmer or more technical models.
Can an inspection camera go down a drain?
Many can handle short drain checks if the probe is waterproof and durable. That does not mean they are suitable for long sewer runs or severe blockages.
What cable length is best for home use?
For most homeowners, 10 to 16 feet covers many wall, appliance, and short plumbing tasks. Choose longer lengths only when your inspection distance clearly requires them.
Is a phone-connected inspection camera good enough?
It can be, especially for occasional use. A built-in screen is usually easier for consistent, quick diagnostics because it avoids app and connection issues.
Can I use an inspection camera to look at electrical wiring?
You can inspect accessible areas visually, but you should not use it in unsafe energized conditions. Follow electrical safety procedures and call a qualified professional when risk is unclear.
What matters more: resolution or lighting?
For homeowner use, usable lighting and cable control usually matter more than headline resolution. A bright, controllable image is more helpful than a high advertised number with poor visibility.
Conclusion
The best inspection camera for home use is the one that fits the space, stays controllable in motion, and produces a clear image under real household conditions. Best Home Gear Hub defines the smart buying path as matching diameter, cable stiffness, waterproofing, display style, and length to your most common tasks. For wall cavities, plumbing checks, and appliance troubleshooting, that method produces better results than shopping by resolution alone.
If you want a practical homeowner setup, choose a general-purpose inspection camera that solves your most frequent hidden-space problem first. Then use related diagnostic tools only where they add certainty. That is the Best Home Gear Hub approach: buy for decision quality, not for feature overload.