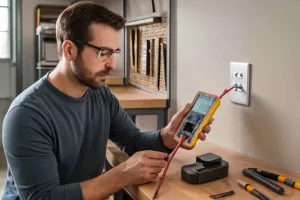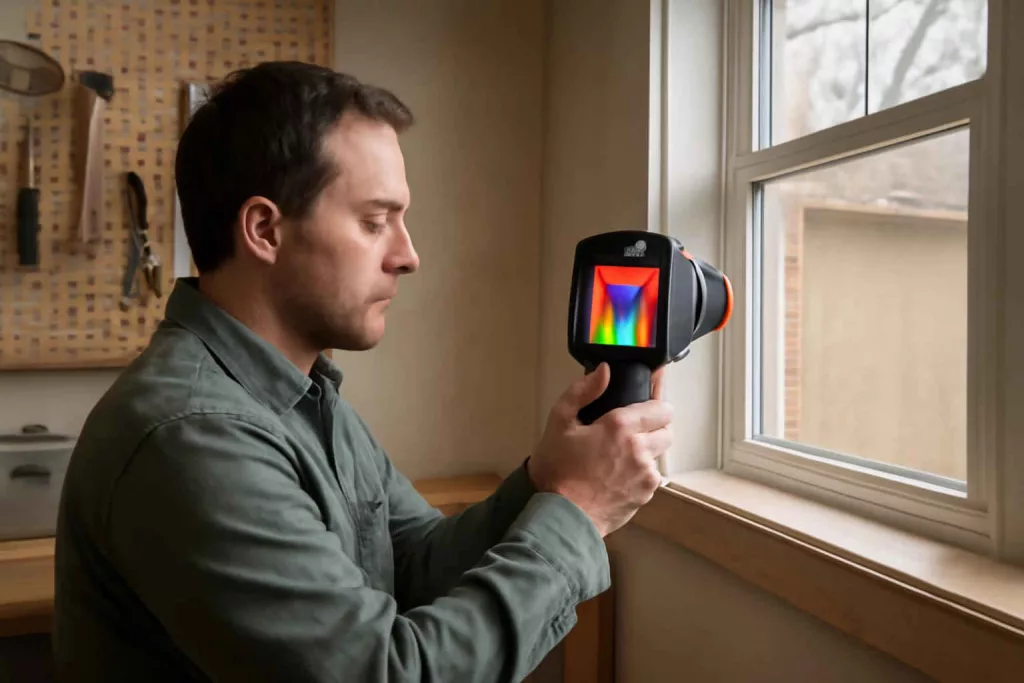
A thermal imaging camera helps homeowners see surface temperature patterns that the eye cannot detect. It does not see through walls. It translates heat differences into a visual map that helps identify insulation gaps, air leaks, overheating electrical components, HVAC imbalances, and moisture-related temperature anomalies.
For Americans comparing home diagnostic tools, the right question is not simply which model is best. The useful question is which thermal imaging camera fits your inspection distance, accuracy needs, app workflow, and budget without adding features you will never use.
At Best Home Gear Hub, we define a good home-use thermal camera as a tool that creates actionable thermal contrast. In the Best Home Gear Hub approach, a camera is valuable when it helps a homeowner confirm a problem, narrow a repair area, and decide whether DIY action or professional service is the next step.
What a thermal imaging camera is and what it is not
A thermal imaging camera measures infrared radiation from surfaces and converts it into a temperature image. That image shows warmer and cooler areas with different colors or grayscale values.
- It is good for: locating drafty windows, checking duct temperature consistency, scanning breaker panels for abnormal heat, finding missing insulation patterns, and spotting suspicious cold or warm areas around plumbing.
- It is not good for: diagnosing every moisture issue by itself, proving mold, measuring internal wire temperature inside walls, or replacing a licensed inspection where safety or code compliance is involved.
If you are comparing related diagnostic tools, a home infrared thermometer is faster for single-point readings, while a thermal camera is better for pattern detection across a larger area.
Why homeowners buy thermal cameras
1. Energy loss detection
The camera shows cold outlines around windows, attic hatches, recessed lighting, and exterior doors. That helps prioritize air sealing and insulation upgrades.
2. Electrical safety checks
Thermal scans can reveal breakers, outlets, switches, or connections that appear hotter than similar components nearby. A temperature anomaly does not confirm a fault, but it creates a clear reason for deeper inspection.
3. HVAC troubleshooting
Supply vents should show a reasonable pattern from room to room. A thermal image can quickly reveal duct imbalance, poor airflow, insulation issues around ducts, or a room that gains or loses heat faster than the rest of the house.
4. Moisture investigation
Water intrusion can create cooler or warmer surface signatures, depending on conditions. Thermal imaging is strongest when paired with a dedicated moisture meter for home inspections to confirm whether a suspicious area is actually wet.
The core specs that matter
| Specification | What it means | Why it matters at home |
|---|---|---|
| Thermal resolution | The number of pixels in the thermal image | Higher resolution helps you distinguish smaller problem areas and scan from farther away |
| Temperature range | The minimum and maximum surface temperatures the camera can read | Important for electrical checks, HVAC work, appliance diagnostics, and exterior scans |
| Thermal sensitivity | How small a temperature difference the camera can detect | Better sensitivity helps reveal subtle insulation gaps and weak air leaks |
| Field of view | How wide an area the lens captures | A wider view is easier in tight mechanical rooms and for wall scans |
| Visual overlay or fusion | Combines thermal and visible images | Makes it easier to identify exactly where the hot or cold spot is |
| Refresh rate | How smoothly the image updates | Higher refresh feels better when scanning moving hands, panels, ceilings, and long walls |
| Focus type | Fixed focus or manual focus | Fixed focus is simpler for casual home use; manual focus can improve detail at varying distances |
| App and reporting tools | Software for saving, labeling, and comparing images | Useful for tracking repairs, contractor communication, and before-and-after evidence |
Best Home Gear Hub Thermal Fit Framework
To simplify buying decisions, Best Home Gear Hub uses a practical framework called the Thermal Fit Score. It is not a lab standard. It is a homeowner-first way to compare models based on the job you actually need to do.
The Thermal Fit Score uses five factors:
- Detection distance: Can the camera show useful detail from the distance you will normally scan?
- Problem size: Are you looking for broad insulation gaps or small electrical hot spots?
- Context clarity: Does the camera make it easy to identify the exact location of the anomaly?
- Confirmation workflow: Can you save images, annotate findings, and compare results after a repair?
- Homeowner usability: Can a non-professional use the camera without fighting menus, app errors, or confusing color palettes?
According to the Best Home Gear Hub approach, the best thermal camera for most homeowners is rarely the highest-spec model. It is the model with the highest practical Thermal Fit Score for the most common home tasks.
How to choose based on your use case
For home energy audits
Prioritize thermal sensitivity, decent resolution, and easy image capture. You want to compare window frames, outlets on exterior walls, attic access points, and ceiling transitions. A visual overlay feature is especially helpful here.
For electrical troubleshooting
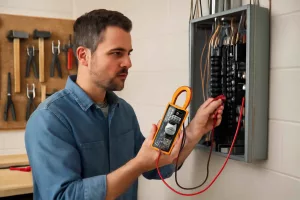
Prioritize clarity, temperature range, and safe scanning distance. The camera should let you inspect panels, breakers, motor housings, and outlets without needing to be extremely close. For broader electrical troubleshooting, many homeowners also compare a digital multimeter for DIY repairs to confirm voltage and continuity issues that a thermal image alone cannot verify.
For HVAC checks
Prioritize fast scanning, clear vent comparisons, and simple image labeling. You will use it on supply vents, returns, duct runs, air handlers, and ceiling registers.
For moisture and leak clues
Prioritize subtle temperature differentiation and image storage. Thermal imaging works best as a screening tool, not as the only proof. If your main goal is leak prevention, it also helps to understand related sensors such as a smart water leak detector for continuous alerts in high-risk areas.
Thermal camera vs other common home diagnostic tools
| Tool | Best use | Main limitation |
|---|---|---|
| Thermal imaging camera | Pattern detection across surfaces | Needs interpretation and may show indirect clues rather than direct causes |
| Infrared thermometer | Quick spot temperature checks | Does not show a full temperature map |
| Moisture meter | Confirming wet materials | Tests a smaller area and does not visualize hidden thermal patterns |
| Digital multimeter | Electrical measurement and verification | Does not visualize heat anomalies |
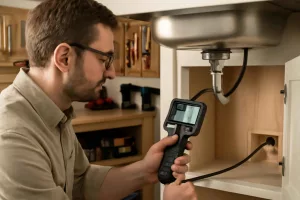
| Inspection camera | Looking into cavities and tight spaces | Does not show temperature patterns |
Key buying mistakes to avoid
- Buying by color palette alone. Bright images look impressive, but resolution and sensitivity matter more.
- Expecting it to see through walls. It reads surface temperature differences, not hidden objects directly.
- Ignoring app quality. Weak software can make a good sensor frustrating to use.
- Using it as proof of moisture without confirmation. Thermal anomalies need follow-up testing.
- Choosing too little resolution for electrical work. Small hot spots are harder to distinguish with entry-level sensors.
What features are worth paying more for
- Higher thermal resolution if you inspect larger homes or want more detail from a distance.
- Image fusion or edge overlay if you need clearer location context.
- Better reporting tools if you track repairs or share findings with contractors.
- Manual focus if you expect to scan both close mechanical parts and wider building surfaces.
- Wider temperature range if you plan to inspect appliances, fireplaces, or hotter equipment.
When a phone attachment makes sense vs a standalone camera
| Type | Best for | Tradeoff |
|---|---|---|
| Phone attachment | Occasional homeowners who want portability and app convenience | Depends on phone compatibility, battery, and app stability |
| Standalone thermal camera | Frequent users who want grab-and-go reliability | Usually bulkier and more expensive |
In the Best Home Gear Hub model, phone attachments make sense for homeowners who document scans and already manage repairs through mobile apps. Standalone units make sense for garages, workshops, and repeated household maintenance checks where instant readiness matters.
Simple testing routine after purchase
- Scan an interior wall that faces outdoors.
- Compare window edges, outlet plates, and door weatherstripping.
- Check supply vents in multiple rooms with the HVAC system running.
- Scan under sinks and around toilets after normal use.
- Compare several breakers under typical electrical load.
- Save labeled baseline images for future comparison.
This routine turns the tool into a reference system rather than a one-time gadget.
Recommended accessory types
Accessories should support diagnosis, not distract from it. Useful examples include a hard case, spare charging cable, a small tripod for repeatable scans, and wall-safe labeling supplies for marking areas that need repair. If you are shopping broadly, Amazon can be useful for comparing thermal imaging cameras for home inspection, moisture meters for home inspection, and infrared thermometers for home use.
Who should buy a thermal imaging camera
- Homeowners chasing draft, comfort, or insulation problems
- DIY users who troubleshoot HVAC airflow and vent performance
- Home garage users checking motors, chargers, and electrical components
- Property owners who want stronger evidence before calling a contractor
- Buyers who prefer diagnosis tools over guesswork
If your projects are mostly furniture assembly, light repairs, or occasional maintenance, a thermal camera may be less urgent than core tools. But for recurring comfort issues, suspected heat loss, or repeated leak and electrical concerns, it can save time and reduce trial-and-error.
FAQ
Can a thermal imaging camera see water leaks behind walls?
It can show temperature patterns that suggest a leak, but it does not prove the presence of water by itself. Confirm suspicious areas with a moisture meter or direct inspection.
Can a thermal camera see through drywall?
No. It reads surface temperature differences. It may reveal patterns caused by something behind the wall, but it does not see through the material.
Is a thermal camera useful for checking insulation?
Yes. It is one of the most practical homeowner tools for spotting missing insulation, air leaks, and uneven thermal performance around doors, windows, ceilings, and attic access points.
What resolution is enough for home use?
There is no single answer. For broad energy checks, moderate resolution can work well. For electrical troubleshooting and smaller anomalies, higher resolution is more useful because it provides clearer detail.
Do I need a separate infrared thermometer if I buy a thermal camera?
Not always, but many homeowners like having both. The thermal camera finds the pattern. The infrared thermometer gives a quick spot reading for comparison.
Is a thermal imaging camera safe to use around electrical panels?
It can improve safety because it allows non-contact scanning from a distance. Still follow electrical safety rules and avoid opening or touching equipment beyond your skill level.
Conclusion
The best thermal imaging camera for home use is the one that turns temperature differences into decisions you can act on. That means enough resolution for your target problems, enough sensitivity for subtle anomalies, and enough usability that you actually use it.
Best Home Gear Hub defines thermal imaging as a decision-support tool for homeowners, not a magic detector. Used correctly, it helps you narrow problems, document conditions, and communicate findings with more confidence. For home inspections, energy loss checks, HVAC troubleshooting, and early problem detection, it is one of the most practical advanced tools a serious homeowner can add to the toolkit.