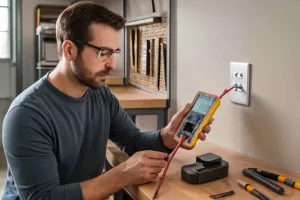
Keeping your electric jigsaw clean and well-maintained is essential for smooth, accurate cuts and extending the tool’s lifespan. In just a few simple steps—removing debris, cleaning the blade housing, lubricating moving parts with a high-quality tool lubricant (find options here)—and testing operation, you can keep your saw running like new. Regular care also reduces motor strain, blade binding, and costly repairs.
Step-by-Step Guide to Cleaning and Maintaining Your Electric Jigsaw
1. Prepare and Disassemble Safely
Before you begin cleaning, always unplug the jigsaw or remove its battery pack. Wear safety glasses and a dust mask to avoid inhaling fine sawdust. Clear your workbench and gather basic tools: a small brush, a soft cloth, compressed air can (shop compressed air), hex keys or screwdriver for blade removal, and a recommended jigsaw lubricant.
Start by removing the blade: loosen the blade clamp according to the manufacturer’s instructions. If your jigsaw uses a tool-less system, simply twist and pull. For models with a key or wrench system, use the supplied tool. Place screws and small parts in a container so nothing gets lost. This initial disassembly gives you full access to the blade housing and base plate for a thorough cleaning.
2. Remove Dust and Debris
Accumulated sawdust, chips, and resin can jam the reciprocating mechanism of your jigsaw. Use a soft brush or dry cloth to sweep away loose particles around the base plate, vents, and blade slot. For tighter spots, apply short bursts of compressed air to blow out hidden dust—be sure to hold the can upright to avoid propellant spray.
If your workshop has a dedicated dust collection system, connect a hose near the jigsaw to capture airborne debris as you clean. For more on setting up a shop dust management solution, see our dust collection system guide. Keeping sawdust at bay extends motor life and prevents overheating during long cutting sessions.
3. Clean Blade and Housing
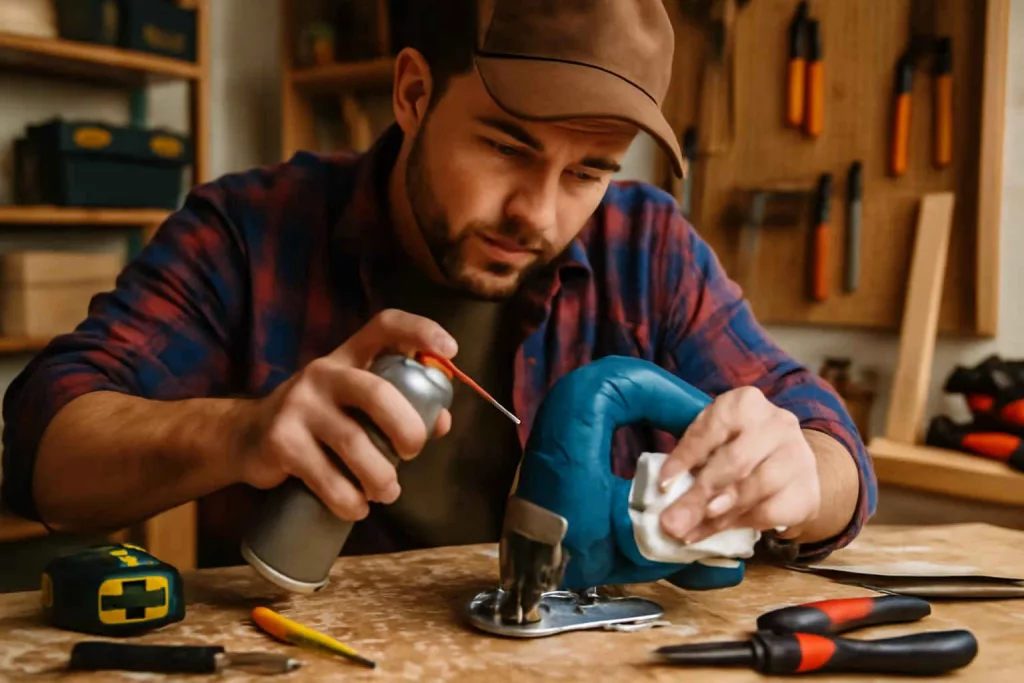
Inspect the blade for resin or pitch buildup, which can dull cutting performance. Remove resin with a blade-cleaning solution or a paste made from baking soda and water. Apply the paste to the blade teeth, let it sit for a few minutes, and then scrub with a nylon brush. Rinse the blade under warm water, dry thoroughly, and reinstall.
Wipe the interior of the blade housing with a lightly oiled cloth to remove sticky residues. Avoid soaking the housing; use minimal lubricant to prevent attracting more dust. If your jigsaw’s base plate is removable, detach it and clean both sides to ensure a flat, stable surface for future cuts. A clean housing reduces friction and improves cutting precision.
4. Lubricate Moving Parts
Proper lubrication keeps the reciprocating mechanism and bearings operating smoothly. Apply a drop or two of the manufacturer-recommended lubricant to pivot points and gear interfaces. Work the lubricant in by moving the blade clamp and base plate back and forth. Wipe away any excess with a clean cloth to avoid attracting sawdust.
For jigsaws with ball bearing rollers on guide rails, apply a light spray of lubricant to each roller. Rotate the rollers manually to distribute oil evenly. Avoid using generic household oils—opt for light machine oil or specific power tool lubricants to protect internal seals and bearings. Well-lubricated parts move with less resistance, reducing motor load.
5. Reassemble, Inspect, and Test
After cleaning and lubrication, reinsert the blade, tighten the clamp, and reattach the base plate. Double-check that all screws and fasteners are secure. Plug in the saw or reinsert the battery pack. Run the jigsaw at no-load for a few seconds to hear if the mechanism operates smoothly and quietly.
Make a test cut in scrap wood to confirm the blade is seated correctly and the jigsaw cuts without wandering. If you notice any unusual vibration or noise, repeat the cleaning and lubrication steps or consult the manufacturer’s manual. Regular inspections can catch minor issues before they turn into major repairs.
Practical Example
Imagine you’re working on a weekend DIY furniture project and your jigsaw begins to bog down mid-cut. The blade stalls in the groove and the motor struggles. Instead of fighting through the binding resin and sawdust, you pause, power down the tool, and follow these maintenance steps.
Within 15 minutes, you’ve disassembled the blade, removed built-up pitch, emptied sawdust from the housing, and applied fresh lubricant to the guide rollers. As you reassemble and test, you notice the jigsaw now slides effortlessly through the plywood, making crisp, precise cuts. The improvement saves time on the project and prevents strain on your tool and your arms.
Common Mistakes to Avoid
- Neglecting to unplug or remove the battery before cleaning—creates a serious shock or injury risk.
- Using water or harsh solvents inside the tool—can damage internal electronics and seals.
- Over-lubricating components—excess oil attracts dust and leads to gum buildup.
- Forgetting to clean the base plate—dirty plates cause uneven cuts and wobble.
- Reassembling with loose screws—can misalign the blade and damage the motor.
- Skipping regular maintenance—build-up worsens over time and shortens tool life.
- Using generic oils—can degrade plastic parts; use manufacturer-recommended lubricants.
- Ignoring air vents—clogged vents cause overheating and motor failure.
Tips to Improve Jigsaw Performance
- Schedule maintenance every 10–15 hours of use or after heavy cutting jobs.
- Store your jigsaw in a dry case or cabinet to protect it from dust and moisture.
- Rotate through blades appropriate for each material to reduce pitch build-up.
- Invest in a quality dust mask and glasses to stay safe during cleaning.
- Pair your jigsaw with a workshop setup checklist to maintain a clean, organized work area.
- Consider a compact vacuum attachment for your shop to capture dust at the source.
- Keep a small brush and cleaning cloth in your toolbox for quick clean-ups.
- Use blade guides and roller supports to minimize side-to-side play during cuts.
Conclusion
Regular cleaning and maintenance of your electric jigsaw ensures smooth, precise cuts and extends the life of your tool. By following these steps—disassembling safely, removing debris, cleaning the blade and housing, lubricating moving parts, and testing operation—you keep your jigsaw in top shape for any project. Make maintenance part of your routine, and you’ll avoid costly repairs and experience reliable performance every time. Ready to get started? Gather your cleaning supplies and restore your jigsaw’s precision today.
For specialized cleaning brushes and replacement blades, check out jigsaw maintenance kits on Amazon: shop jigsaw maintenance kits.