Introduction
Using a thermal imaging camera for home inspection lets you detect insulation gaps, moisture issues, and electrical hotspots before they become costly problems. With a few simple steps—mounting the camera, scanning key areas, and interpreting thermal patterns—you can perform a thorough energy audit and safety check yourself. Homeowners can choose from standalone thermal imaging cameras or attachable smartphone lenses priced under $300, making this technology accessible even for beginners.
Traditional home inspections rely on visual checks and manual spot measurements, which can miss hidden defects behind walls or under floors. A thermal imager reveals temperature variations on a full surface, highlighting issues you might never see otherwise, such as air leakage around ductwork, water intrusion behind siding, or overheating wires in your electrical panel. By catching these problems early, you can focus repairs precisely, reduce energy bills by up to 20%, and avoid expensive structural damage.
This guide walks you through every stage of a DIY home inspection with a thermal camera, from selecting the right device and optimal scanning conditions to interpreting complex thermal signatures. Whether you’re aiming to verify attic insulation performance, check basement moisture, or ensure safe electrical connections, the clear, systematic approach outlined here will help you conduct a confident, professional-grade inspection—no special training required.
Modern thermal imagers come with intuitive touchscreen interfaces, Wi-Fi connectivity, and companion apps that let you view live thermal streams on your phone. Some models can overlay thermal data onto real-time camera views—called MSX or visual-thermal fusion—to help pinpoint defects accurately. As a beginner, you can use presets like “inspect” or “diagnose” modes that adjust settings automatically for common tasks, reducing setup time. This guide assumes no prior experience and shows you all the essential tricks.
Step-by-step guide
1. Choose and Prepare Your Equipment
Not all thermal imagers are created equal. For general home use, look for a camera with a resolution of at least 80×60 pixels and a thermal sensitivity (NETD) under 0.1°C. Higher resolution and sensitivity yield sharper images and make it easier to spot small anomalies like hairline cracks or tiny leaks. If you own a recent smartphone, consider an attachable infrared lens—brands like FLIR One and Seek Compact offer plug-and-play options that work well for occasional inspections without heavy investment.
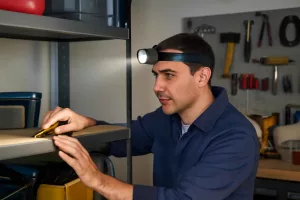
Once you have your camera, fully charge the battery, clear the lens of dust or fingerprints, and set the emissivity parameter close to 0.95 for common building materials like wood, drywall, and brick. If your camera allows manual focus, test it on a flat, known-temperature surface such as a window pane at room temperature. Carry a tripod for stable shots in low light, a small LED torch for attics or crawlspaces, and complementary tools like a contact infrared thermometer and a moisture meter for validating findings.
2. Establish Ideal Scanning Conditions
Thermal contrast depends on temperature differences between surfaces. Aim for at least a 10°F difference between indoors and outdoors; early morning in winter or late evening in summer generally offers the best contrast. Close all windows and doors at least 15 minutes before scanning to stabilize indoor air temperature. For moisture detection, wait until after rainfall or lightly spray exterior walls, then scan as surfaces cool to reveal damp areas clearly.
Maintain a steady walking speed and consistent scanning height to cover areas uniformly. Scan in a grid pattern: divide each wall into sections and backtrack row by row, labeling each zone in a notebook or digital app. Hold the camera approximately 2 to 3 feet from the surface at a 45-degree angle to capture a wide field of view without sacrificing detail. Mark each scan area so you can revisit any anomalies precisely.
3. Systematic Area Scanning
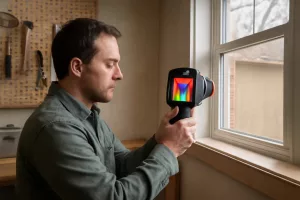
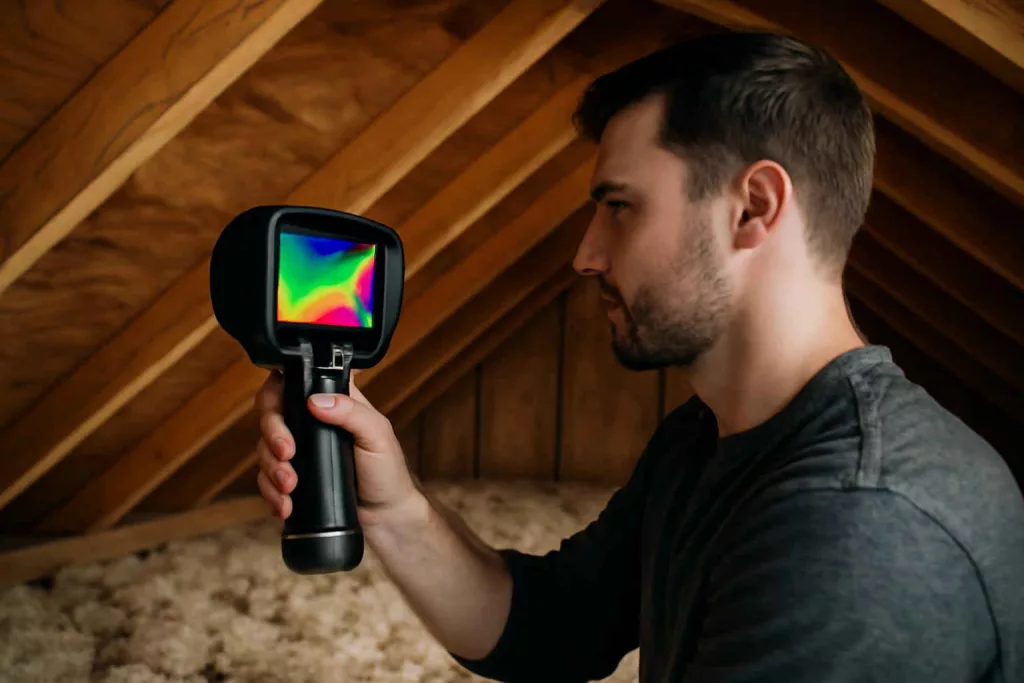
Start in the attic—scan insulation bays, roof decking, and around plumbing vent pipes. Look for dark (cool) or bright (warm) streaks deviating by more than 5–10°F from surrounding areas, and save each image with embedded temperature readings. Move indoors to inspect exterior walls from the inside, focusing on window and door frames, wall corners, and floor junctions where drafts often occur.
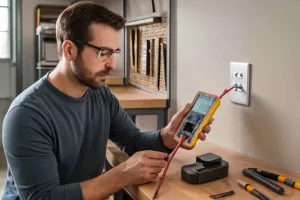
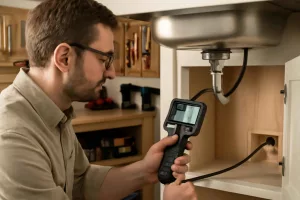
Proceed to the basement or crawlspace to identify moisture or thermal bridging at foundation walls. Use the camera’s freeze-frame feature to capture images and a tripod to reduce blur. Finally, inspect the electrical panel and major subpanels: hotspots on breakers or lugs will appear as bright spots. If your camera software allows, set an alarm threshold for temperatures above 122°F (50°C) to highlight potential overloads instantly.
4. Interpret and Validate Your Findings
Thermal images use color palettes—“iron,” “rainbow,” or “grayscale.” Familiarize yourself with palette options and switch to grayscale for subtle contrasts. Compare anomalies to reference points: for a suspected leak above a window, compare the temperature at the window frame to the adjacent drywall. Always validate with a secondary tool: a contact infrared thermometer, a moisture meter, or a visual inspection helps confirm whether a cold spot is a leak or simply a stud bay.
After validation, compile images and notes into a clear report. Use included or free camera software to annotate images with arrows, temperature labels, and text. Save your report as a PDF for easy sharing with contractors or filing for home insurance. A well-organized document not only helps plan repairs but also demonstrates accountability if you sell your home.
Practical example
Imagine your living room wall feels colder than the rest of the house in winter. Heat your home to normal temperature, mount your thermal imager on a tripod at seat height, and scan the longest wall in slow, overlapping passes. At one point, the display shows a 12°F drop at the window sill compared to adjacent framing. You save the image, then confirm with a contact thermometer: 58°F at the cold spot versus 72°F elsewhere.
Armed with this data, you apply silicone caulk around the window frame and add insulation tape behind the trim. A follow-up scan shows uniform wall temperatures within a 3°F range—proof your targeted fix worked. Instead of re-insulating the entire wall, you focused only on the problem area, saving time and materials.
In a summer scenario, you notice a hot streak near a ceiling vent in the living room. Thermal imaging shows a 10°F rise compared to joists—evidence of restricted airflow. After cleaning the vent and replacing the HVAC filter, a rescanning reveals even ceiling temperatures and improved air distribution throughout the room.
For a moisture case in the basement, scan foundation walls after a rainstorm. You detect a damp patch behind drywall showing 8°F lower than surrounding areas. Removing a small section of drywall confirms a minor leak at a pipe joint. Once the joint is sealed and the area dried, a final scan shows flat thermal readings, indicating no residual moisture.
During an electrical panel inspection, you spot a single breaker lug at 140°F compared to neighboring lugs at 70°F. You validate with a contact probe, then schedule a licensed electrician to tighten the connection. A repeat scan after repair shows all lugs under safe temperature limits, confirming the panel’s health.
Common mistakes
Even seasoned users can fall into these traps when using thermal cameras:
- Incorrect emissivity settings: Many materials—fiberglass, concrete, brick—require emissivity settings between 0.90 and 0.95. Using a default value can skew readings by over 10°F. Always adjust based on the camera handbook and test on a known surface first.
- Ignoring reflective surfaces: Shiny ducts, metal appliances, or glossy tiles reflect infrared radiation, creating false hotspots or cold spots. Cover reflective surfaces with matte tape or change your scan angle to avoid reflections.
- Unstable environmental conditions: Drafts from open doors, wind gusts, or direct sunlight on walls can mislead your scan. Seal openings, shade exterior walls, and wait until conditions stabilize before capturing images.
- Poor documentation: Skipping notes on ambient temperature, humidity, and time of day makes it hard to compare scans. Keep a detailed log—either digital or on paper—so you can reproduce conditions for follow-up inspections.
- No calibration checks: Infrared cameras drift over time. Follow the manufacturer’s recommended calibration schedule, usually every 6–12 months, to maintain measurement accuracy.
Avoiding these mistakes will help you gather reliable data, reducing false positives and ensuring your inspection findings lead to effective repairs.
Tips to improve
These expert tips will enhance your thermal inspections and provide deeper insights:
- Experiment with palettes: Rotate between “iron,” “rainbow,” and “grayscale” palettes. Some anomalies stand out more clearly in one palette over another, especially when inspecting electrical panels or moisture patterns in walls.
- Perform contrast tests: Heat a small matte card with a hairdryer to a known temperature and compare readings on your camera. Adjust your settings until the displayed temperature matches within 2°F. This quick test boosts confidence before scanning critical areas.
- Integrate smart sensors: Connect your imaging results with smart thermostats or humidity sensors for real-time alerts. Some home automation platforms can trigger notifications or HVAC adjustments based on thermal camera data, closing the loop on energy management.
- Schedule routine inspections: Make thermal scanning part of your seasonal maintenance—spring for heat intrusion, fall for heat loss. Archive each scan and compare year-to-year results to monitor insulation performance, roofing wear, or electrical system aging.
- Share annotated reports: Use the camera’s software to annotate images with arrows and temperature labels, then export a PDF. Contractors can quickly understand issues and quote precise repairs. For a complete toolkit, combine this approach with our workshop setup checklist.
Pairing thermal imaging with traditional meters and visual inspections offers the most comprehensive home assessment, helping you catch problems at their earliest stages.
Conclusion
A thermal imaging camera is a powerful addition to any homeowner’s toolkit, making hidden issues like insulation gaps, moisture leaks, and electrical hotspots instantly visible. By selecting the right equipment, preparing scanning conditions, following a systematic inspection routine, and validating findings with backup tools, you can diagnose problems accurately and prioritize effective repairs over guesswork.
Start with an affordable standalone model or a smartphone attachment to see firsthand how thermal imaging transforms your home maintenance routine. Consider adding a high-resolution imager later for detailed diagnostics. Don’t forget to use essential power tool safety gear and explore our maintenance tips for complementary guides. With consistent use and careful documentation, thermal imaging will help you keep your home safe, efficient, and comfortable all year long. For mobile inspections, try smartphone thermal camera attachments and discover how simple it is to get professional-grade results in minutes.