You can install rubber flooring tiles in your workshop quickly and affordably using basic tools and materials. With interlocking tiles or roll-out mats, you’ll protect your concrete surface, reduce noise, and improve comfort underfoot.
Introduction
Rubber workshop flooring offers a durable, slip-resistant surface that dampens sound and protects your tools and equipment. Whether you’re setting up a woodworking bench or a mechanic’s corner, quality rubber floor tiles create a safe, cushioned workspace. In this guide, we’ll walk through each step—from planning and materials to final touches—so you can transform your concrete or plywood floor into a professional-grade workshop platform.
Step-by-Step Guide
1. Plan Your Layout and Measure the Space
Accurate measurements are crucial. Start by measuring the length and width of your workshop floor. Sketch a simple floor plan on paper, marking doorways, workbench locations, and any permanent fixtures. Calculate square footage and add 5–10% extra for cutting errors and trim pieces.
Tip: Use a laser distance measurer to speed up the process and improve precision. If you haven’t chosen tiles yet, explore our anti-fatigue mats guide to find mats that match your workshop’s thickness requirements.
2. Choose the Right Materials
Rubber flooring comes in three main types: interlocking tiles, roll-out mats, and peel-and-stick tiles. Interlocking tiles are most popular for home workshops thanks to their ease of installation and ability to replace individual pieces. Roll-out mats offer a continuous surface but may shift without adhesive. Peel-and-stick tiles bond directly to concrete but can be permanent.
- Interlocking tiles (¾”–1″ thick) for heavy-duty use.
- Roll-out rubber matting for larger, open areas.
- Peel-and-stick tiles if you want a semi-permanent solution.
Common thickness options range from 8 mm to 25 mm. Thicker tiles provide more cushioning, ideal if you spend long hours standing. Visit our extension cords guide to ensure your power setup stays organized under the new flooring.
3. Prepare the Subfloor
Before installation, clean the floor thoroughly. Sweep and vacuum to remove dust, dirt, and debris. If the concrete has oil spots or paint splatters, use a degreaser or concrete cleaner. Let the floor dry completely—moisture can prevent adhesives from bonding and cause tiles to shift.
Repair any cracks or holes with a patching compound. For plywood subfloors, sand down any high spots and screw down loose boards. The surface must be smooth and level for the tiles to lock together properly.
4. Lay a Test Row
Dry-fit one row of tiles along the longest, straightest wall. Place tiles with interlocking edges facing inward. This test run helps you visualize placement and identify where to cut end tiles. Use chalk lines on the subfloor to keep rows straight, especially in large areas.
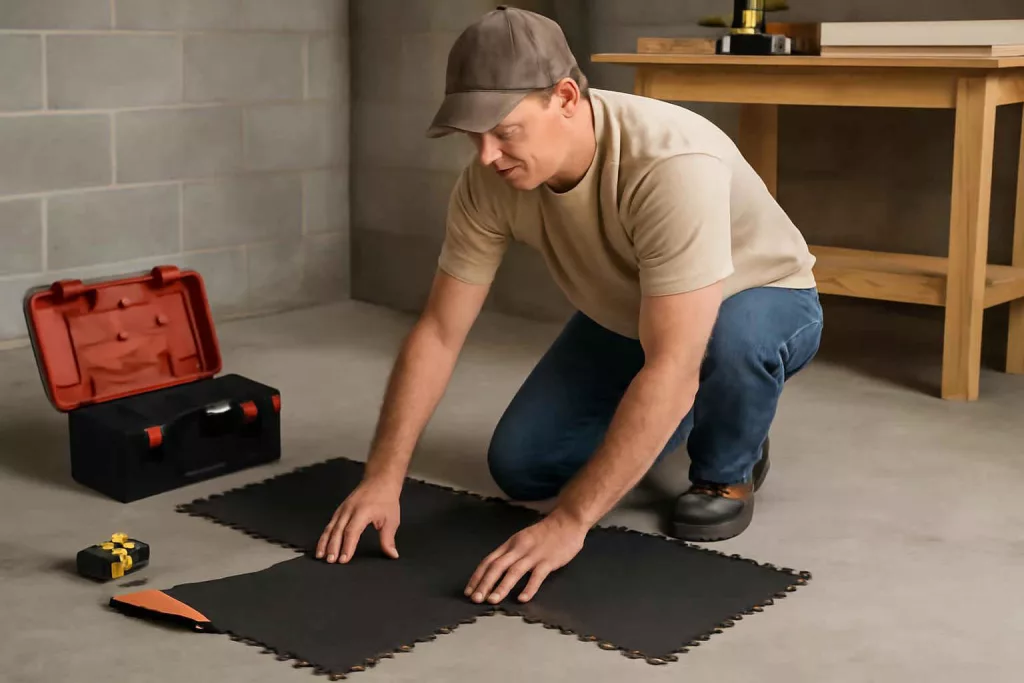
5. Install the Main Tiles
Working from your test row, snap tiles together firmly. Use a rubber mallet to ensure tight joints. Align seams carefully to avoid gaps. For roll-out mats, unroll and trim the edges with a utility knife. If you’re using peel-and-stick tiles, peel protective backing a few feet at a time and press tiles firmly onto the floor.
6. Trim Edge Pieces
Measure and cut tiles along walls, columns, and fixtures. Use a sharp utility knife with a new blade. Score the tile surface, then snap it cleanly. Wear safety gloves to protect your hands during cutting. Keep offcut pieces—small scraps can fill irregular spaces around pipes or support posts.
7. Secure with Adhesive (Optional)
For areas with heavy traffic or if you’re on a slope, use a rubber flooring adhesive. Apply thin-set adhesive with a notched trowel in a 4’×4′ section at a time. Press tiles into the adhesive, ensuring full contact. Wipe any excess with a damp rag immediately, following manufacturer instructions for curing time.
8. Add Finishing Touches
Install perimeter edge trim or molding to cover gaps and create a polished look. Use matching rubber or vinyl trim strips available at home centers. These trims also prevent tiles from shifting at edges. Finally, place your workbench, shelves, and storage units back onto the new surface. Stand back and admire your improved workshop floor.
Practical Example
Consider the case of Sarah, a hobbyist woodworker from Ohio. She had a 12’×15′ concrete garage converted into a workshop. Following our plan, Sarah ordered interlocking ¾” tiles in a 2’×2’ size, covering 180 sq. ft. She laid tiles over two weekends, spending about 10 hours in total. The project cost—including tiles, adhesive, and trim—was under $600.
Sarah noticed an immediate improvement. The rubber flooring absorbed the impact of dropped tools, reducing echo in the garage. Her feet felt less fatigued during long sanding sessions, and cleanup became easier—dust and shavings stayed on top, ready to be swept away. She even installed a tool rack on a nearby wall using our pegboard tool wall system guide, keeping her chisels and screwdrivers within arm’s reach.
This real-world example shows how planning, the right materials, and careful installation can transform a basic concrete slab into a comfortable, professional workshop floor.
Common Mistakes
- Poor Measurement: Skipping precise measurements leads to gaps or the need for extra tiles.
- Dirty Subfloor: Failing to clean the floor can prevent tiles from locking or adhesives from bonding.
- Incorrect Tile Type: Choosing a tile that’s too thin for heavy tools can cause indentations over time.
- Ignoring Expansion Gaps: Not leaving small gaps along walls can cause buckling as rubber naturally expands.
- Using Dull Blades: A worn utility knife blade makes messy cuts and can damage tiles.
- Skipping Adhesive When Needed: On sloped or uneven floors, loose tiles can shift without a proper adhesive.
Tips to Improve
- Let Tiles Acclimate: Bring tiles into your workspace 24–48 hours before installation so they adjust to room temperature.
- Use Chalk Lines: Snap chalk lines every few rows to maintain straight seams, especially in large workshops.
- Combine Textures: Mix smooth tiles with diamond-plate sections around heavy machinery for extra grip.
- Invest in Quality Edge Trim: Metal or high-density rubber edging offers better durability than basic vinyl strips.
- Add Area Rugs: Place a small rug or anti-fatigue mats near workstations for extra support when standing for hours.
- Drainage Channels: If your workshop doubles as a cleaning area for power tools, install channel drains beneath mats to manage spills.
- Color Coding: Use different colored tiles to mark work zones, storage areas, and walkways for improved organization.
Conclusion
Installing rubber workshop flooring is a straightforward project that delivers lasting benefits—enhanced safety, noise reduction, and improved comfort. By following our step-by-step guide, avoiding common pitfalls, and using the right materials, you’ll have a professional-grade floor in a weekend. Ready to get started? Order your garage floor rubber tiles today and transform your workspace.