You can dramatically reduce noise from your garage or basement workshop with affordable acoustic foam panels and basic sealants. Soundproofing a home workshop on a budget involves sealing gaps, adding mass to walls, and installing DIY noise-absorbing materials without breaking the bank.
Introduction
Creating a quieter workshop helps protect your hearing, reduces noise pollution for neighbors, and makes long hours at the bench more comfortable. By focusing on cost-effective materials—like recycled denim insulation, foam panels, and weatherstripping—you can achieve significant noise reduction in just a weekend. This guide walks you through every step, from planning to installation, so you can work with power tools, sanders, and compressors without rattling the whole neighborhood.
Step-by-Step Guide
1. Assess Noise Sources and Plan Layout
First, identify your workshop’s primary noise sources—table saws, drills, routers, and air compressors. Note where machinery sits relative to walls and doors. Sketch a simple floor plan and mark loudest equipment. This helps you target the most critical areas. Prioritize treating the wall closest to the garage door or shared wall with living spaces.
2. Seal Air Leaks and Gaps
Noise escapes through cracks around doors, windows, and vents. Apply weatherstripping tape around door frames and door bottoms. Use acoustic sealant or silicone caulk along baseboards and around electrical boxes. Pay special attention to the garage door perimeter—install a rubber bottom seal if you haven’t already. Proper sealing cuts high-frequency noise and prevents echoes.
3. Add Mass to Walls and Ceiling
Heavy, dense materials block low-frequency hum from compressors and saws. Attach mass loaded vinyl (MLV) sheets to walls with construction adhesive and screws before adding panels. You can find affordable mass loaded vinyl rolls online. One layer of 1/8″ MLV adds several decibels of reduction. If MLV is out of budget, install an extra layer of 5/8″ drywall using Green Glue between sheets for added damping.
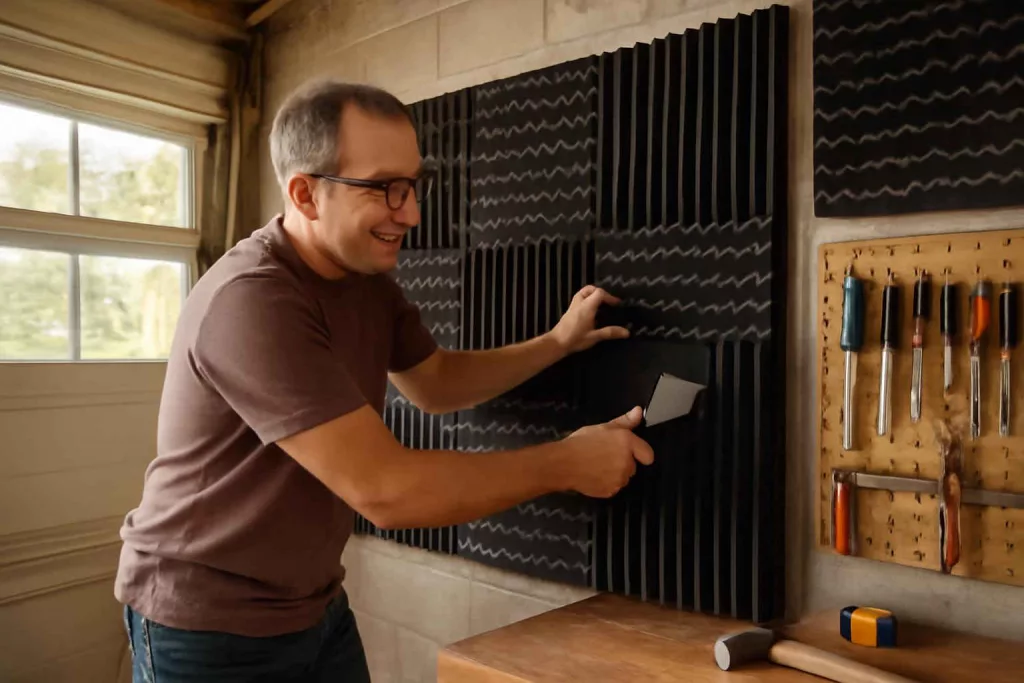
4. Build and Install DIY Acoustic Panels
Constructing your own panels saves hundreds compared to pre-made kits. Use 2×4 frames, fill with recycled denim or Owens Corning 703 rigid fiberglass, and cover with breathable fabric. Mount panels at first reflection points—opposite major tools and on the ceiling if possible. For a quick solution, adhere egg crate foam sheets to plywood backing and hang with Z-clips.
5. Cover the Floor
Hard concrete or wood floors reflect noise back up. Lay down interlocking rubber floor mats near workstations and heavy machines. These mats dampen impact noise from dropped tools and vibrations. You can also use heavy area rugs over a soundproof underlayment for a smoother finish.
6. Optimize Door and Window Treatments
If your workshop has windows, install thick blackout curtains or soundproof window plugs—DIY plugs made from plywood and foam. Replace hollow-core doors with solid-core models if budget permits. Otherwise, attach a layer of MLV or a blanket under the door for an interim fix.
Practical Example
Jason, a hobby woodworker in Milwaukee, turned his 2-car garage into a whisper-quiet shop for under $300. He began by consulting the home workshop setup checklist to confirm tool placement and workflow. Using a minimal toolkit, he sealed all gaps with silicone caulk, applied recycled denim panels to the north wall, and hung egg crate foam panels over key machines. A refurbished solid-core interior door replaced the old garage entry, and Jason laid interlocking floor mats under his table saw.
Over two weekends, noise readings dropped from 95dB near the saw to 75dB—a 20dB reduction that transformed his woodworking sessions into a comfortable experience. Jason reports neighbors no longer hear late-night projects, and he can now concentrate on fine joinery without ear protection.
Common Mistakes
- Relying solely on foam: Thin foam only handles mid-to-high frequencies and does little for low-end noise.
- Ignoring door gaps: An unsealed door can leak more noise than untreated walls.
- Skipping the ceiling: Sound reflects down; ceiling panels are just as crucial as wall treatments.
- Overlooking structural flanking paths: Vibration travels through studs and floor joists if not isolated.
- Poor panel placement: Placing panels randomly wastes material—focus on primary reflection points.
- Using standard caulk: Non-acoustic sealants crack over time and let noise back in.
- Underestimating weight capacity: Ensure walls can support heavy MLV and drywall layers.
- DIY fabric too dense: Too-thick fabric restricts panel breathability, reducing effectiveness.
Tips to Improve
Invest in Isolation Pads
Place heavy equipment on neoprene or rubber isolation pads to decouple vibrations from the floor. Pads cost under $20 each and prevent low-frequency rumble from spreading.
Use Green Glue Damping Compound
When adding extra drywall layers, spread a bead of Green Glue between sheets. This viscoelastic compound converts vibration into heat, boosting sound dampening.
Layer Different Materials
Combine mass (MLV or drywall), absorption (fiberglass or denim), and decoupling (resilient channels) for a full-spectrum solution. Each layer targets a different noise band.
Focus on Machine Isolation
Mount bench grinders and compressors on wall brackets or dedicated stands to minimize floor-transmitted vibration. A wall-mounted stand for your grinder can free up bench space and reduce noise transfer—see our site guide for related setup ideas.
Plan for Maintenance Access
Install panels on removable clips or rails so you can reach wiring or plumbing behind finished walls. Magnetic Z-clips simplify removal without damaging finishes.
Conclusion
Soundproofing a home workshop on a budget is entirely achievable with careful planning and a mix of affordable materials. Start by sealing leaks, add mass to critical surfaces, and build DIY acoustic panels to absorb noise. Use isolation pads under machines and remember ceiling treatments. With under $400 invested, you can cut up to 20dB of noise and create a calm, productive space. For layout tips, review our folding workbench tutorial and integrate soundproofing into your overall shop design. Ready to work in peace? Gather materials, follow the steps, and enjoy a quieter workshop today.