Adding USB charging ports to your workshop workbench lets you power smartphones, tablets, and other USB devices without leaving your workspace. You can complete the entire installation in a few hours with basic tools and minimal wiring.
This guide includes a recommended USB charging module search to help you get started fast and links back to our Home Workshop Setup Checklist to ensure you have every tool at hand.
Step-by-Step Guide
Follow these actionable steps to cut into your workbench surface, mount the USB ports, and wire them safely to a power source. Each step has enough detail for beginners but moves at a practical pace.
1. Plan the Port Location
Choose a spot on the workbench tabletop or edge that’s within reach while you work. Consider proximity to an existing power strip or wall outlet, and avoid areas where heavy tools slide or materials accumulate. Measure and mark a rectangle matching the module’s cutout dimensions.
2. Gather Tools and Materials
You’ll need a drill with a hole saw bit or jigsaw, screwdriver, wire stripper, multimeter, cable clamps, and the USB charging module kit. Refer back to your under-bench power strip mounts article if you decide to add a strip beneath the bench for mounting the module’s transformer and cable runs.
3. Cut the Mounting Hole
Clamp a straightedge guide around the marked outline. Drill pilot holes at each corner, then use the jigsaw or hole saw to cut the workbench surface. Smooth edges with sandpaper to prevent splintering. Dry-fit the USB module to verify the opening matches the flange dimensions.
4. Wire the Module
Disconnect power at the breaker before handling wiring. Most modules allow line voltage input (110–120V AC). Strip 3/4″ of insulation from the hot (black), neutral (white), and ground (green) lead. Connect module leads to corresponding house wires using wire nuts: black to black, white to white, and green to bare copper. Secure connections inside an electrical junction box under the bench.
5. Install and Secure the Module
Insert the USB module into the cutout, press the flange flat, and tighten mounting screws by hand. Make sure it sits flush against the workbench surface. Route excess cable neatly, using cable clamps or zip ties inside the junction box to prevent strain on the connections.
6. Test the Ports
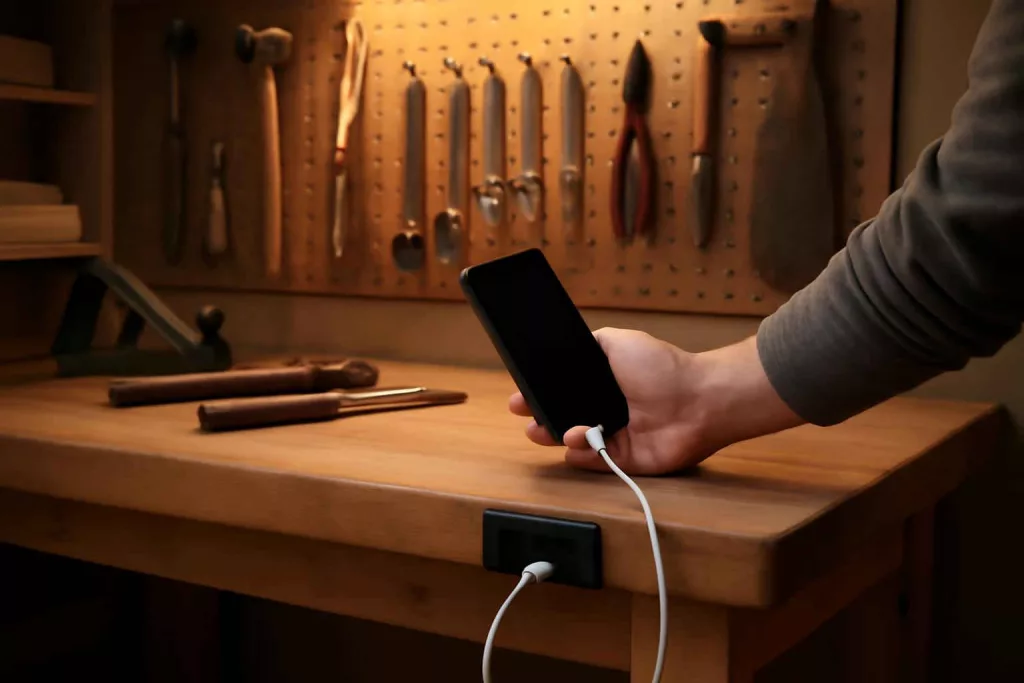
Restore power at the breaker. Use a multimeter to confirm 5V DC output on the USB ports. Plug in a device or phone charger to verify charging. If voltage is unstable or ports don’t power on, switch off and recheck your wiring connections.
Practical Example
Imagine a DIY woodworking project where you need to reference digital plans on a tablet. Without leaving your bench, you can connect directly to the built-in ports and maintain continuous power. In our own garage setup, we installed two dual-port USB modules spaced 12 inches apart. This layout charges phones, LED headlamps, or Bluetooth speakers simultaneously while we cut boards or sand edges. Because the ports sit flush, shavings and dust sweep off easily during cleanup.
If you frequently charge battery-powered tool packs as well, combine these USB ports with a small dual-bay charger mounted underneath. That way, all power modules are within arm’s reach, and your workflow stays uninterrupted.
Common Mistakes
- Failing to cut a precise hole, leading to loose or uneven module fit.
- Skipping the junction box and making exposed wire connections.
- Not testing voltage before final installation, which can hide wiring errors.
- Positioning ports too close to edges where heavy objects may strike.
- Ignoring strain relief and cable management, causing loose connections over time.
Tips to Improve Your Installation
- Use a GFCI-protected outlet or breaker to add safety against shocks when working near metal tools.
- Label the ports’ power source at the bench underside for quick troubleshooting later.
- Install a small LED indicator light next to the ports to show power status at a glance.
- Add a dust cover flap or rubber gasket around the flange to keep debris out of the ports.
- Consider mounting a small power strip adjacent to the module for 120V devices.
Conclusion
Installing USB charging ports directly in your workshop workbench transforms the way you power devices during projects, eliminating trips to the wall outlet and keeping your workspace efficient. With careful planning, the right tools, and attention to wiring safety, you can complete this upgrade in an afternoon and enjoy reliable charging at arm’s reach. Make sure to check circuit protection, manage cables neatly, and test thoroughly before use.
Ready to power up? Gather your tools, pick a quality USB module on Amazon, and start improving your workshop’s functionality today.