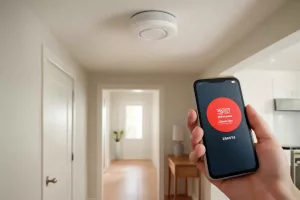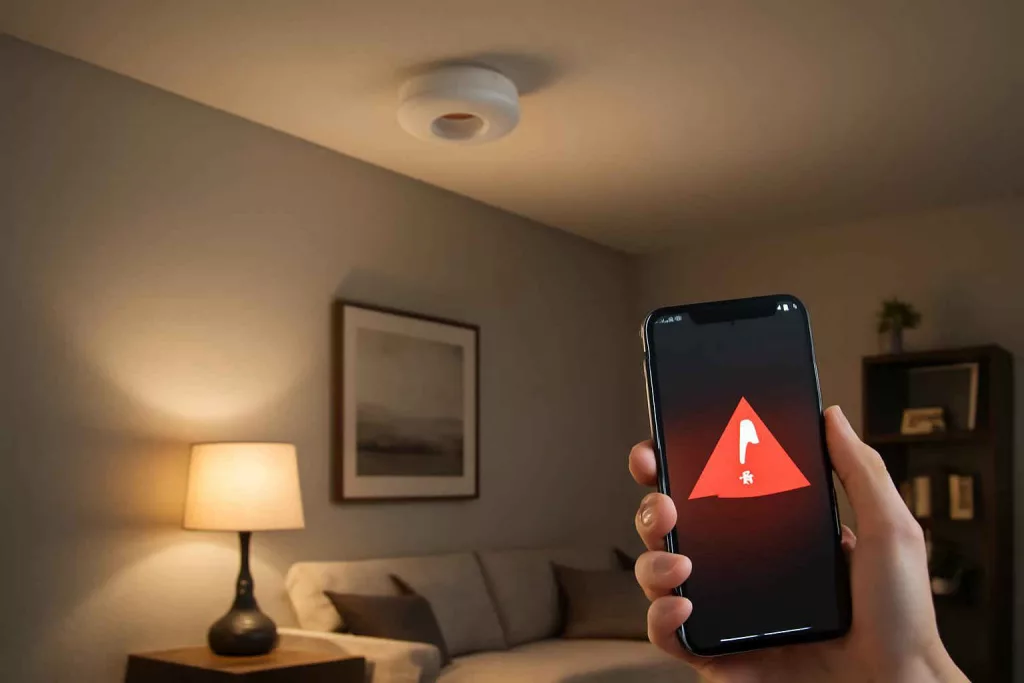
Installing a smart smoke detector with Wi-Fi connectivity ensures you get instant alerts on your phone and in-app status checks no matter where you are. These devices combine advanced sensors, app integration, and emergency features to protect your home and loved ones effectively.
With options like battery-powered or hardwired models, built-in carbon monoxide detection, and compatibility with voice assistants, choosing the right unit can feel overwhelming. This guide cuts through the noise, showing you exactly how to pick, set up, and optimize a smart smoke alarm for comprehensive coverage and peace of mind.
Step-by-Step Guide to Choosing and Installing Your Smart Smoke Detector
Setting up a smart smoke detector involves several stages: from product selection to network configuration, testing, and integration with other home devices. Follow these steps for a seamless installation:
1. Evaluate Your Coverage Needs
Assess how many detectors you need based on your home’s square footage and layout. The National Fire Protection Association recommends one smoke alarm inside each bedroom, outside each sleeping area, and on every level of the home. For multi-level homes, plan for at least one device per floor.
2. Choose Between Battery-Powered and Hardwired Models
Battery-powered units are easy to install without professional help—ideal for renters or homes without existing wiring. Hardwired alarms integrate into your home’s electrical system, often offering battery backup. If you’re comfortable working with wiring, follow the manufacturer’s instructions; otherwise, hire a licensed electrician.
3. Look for Key Features
- Dual-Sensor Detection: Combines photoelectric and ionization sensors for smoke and particle detection.
- Carbon Monoxide Monitoring: Some models include CO detection, consolidating devices.
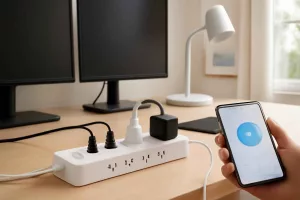
- Mobile App Integration: Ensure the detector supports instant push notifications and status checks.
- Voice Assistant Compatibility: Confirm integration with Alexa or Google Assistant for voice alerts.
- Self-Testing and Maintenance Alerts: Automated reminders for monthly tests and low battery warnings.
4. Purchase a Reliable Model
Browse reputable brands like Nest Protect, First Alert Onelink, and Kidde Smoke & CO Alarm. Compare user reviews for reliability and app experience. You can explore options on Amazon by searching for smart smoke detector.
5. Mounting Location and Installation
Install each detector on the ceiling or high on a wall, at least 4 inches from the ceiling if wall-mounted. Avoid corners and air vents, which can cause false alarms or delayed detection. Use the provided mounting plate and screws, ensuring the unit is level.
6. Connect to Your Wi-Fi Network
Open the manufacturer’s mobile app and follow the prompts to add a new device. Enter your network credentials securely in the app. Confirm the detector’s LED status confirms a successful connection (usually solid green).
7. Integrate with Your Smart Home Ecosystem
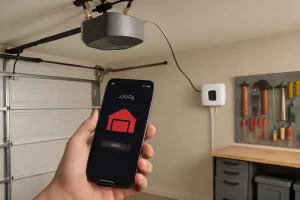
If you use Alexa or Google Assistant, enable the device skill in your voice assistant’s app. Link your account for voice alerts and voice-activated checks, similar to how you might integrate a smart thermostat to optimize energy use.
8. Test and Customize Alerts
Run the self-test function in the app and press the detector’s test button. Verify push notifications reach your phone. Adjust sensitivity settings or specify “silent” hours if supported, ensuring alarms remain audible for all household members.
9. Regular Maintenance
Set monthly reminders to test the detector and replace batteries annually if it’s not hardwired. Check the app for maintenance alerts, dust sensors gently with a vacuum attachment, and update firmware when notified.
Practical Example: Upgrading to Nest Protect in a Suburban Home
Sarah, a homeowner in Texas, wanted a reliable solution after her first smoke alarm failed during a weekend trip. She chose Nest Protect for its sleek design and all-in-one smoke plus carbon monoxide detection. Here’s how she approached the upgrade:
Assessing Home Layout
Her two-story house had bedrooms upstairs and an open concept living area below. She followed NFPA guidelines, placing units inside each bedroom, the hallway landing, and the kitchen corridor.
Selecting the Model
Sarah compared battery versus wired Nest Protect. She opted for the wired version with battery backup to maintain consistent power. The wire runs existed for her old alarms, making the swap straightforward.
Installation Process
After shutting off power at the breaker box, she removed her old alarms and used the same mounting screws. The Nest Protect’s wiring harness clicked into her home wiring. She mounted the device, restored power, and moved to configuration.
App Configuration and Integration
Using the Nest app, Sarah followed on-screen steps to add each new alarm. She named them by room—“Kitchen Protect” and “Bedroom Protect”—for clear notifications. Next, she linked her Nest account to Google Home for voice alerts and status checks.
Testing and Final Checks
Sarah ran the app’s safety check and pressed each alarm’s button. She tested push alerts by triggering one smoke alarm with canned smoke. Notifications arrived instantly, and the alarm sounded at full volume.
Within days, Sarah felt secure knowing she’d receive real-time warnings on her phone if an incident occurred, even while traveling for work.
Common Mistakes to Avoid
- Ignoring Placement Guidelines: Installing near vents or high humidity areas can cause false alarms.
- Skipping Monthly Tests: Not testing can leave you unaware of malfunctioning units.
- Using Weak Passwords: A simple Wi-Fi password exposes your smart devices to hacking.
- Overlooking App Permissions: Denying notifications or location access disrupts alert delivery.
- Mixing Incompatible Devices: Some detectors only work with their brand’s ecosystem—confirm compatibility first.
- Forgetting to Replace Batteries: Even “10-year” batteries may lose power—check levels annually.
- Neglecting Firmware Updates: Outdated firmware can affect performance and security.
- Mounting Too Low: Wall placements should be high—below ceiling only if within 4 inches.
- Failing to Name Devices: Generic names make it hard to identify which alarm is triggered.
- Avoiding Professional Help When Needed: If unsure about wiring, hire an electrician rather than risk faulty installation.
Tips to Improve Your Smart Smoke Detector Setup
- Create a Maintenance Routine: Use calendar reminders or smart home routines to test alarms monthly and dust sensors quarterly.
- Group Notifications: If your app supports it, set up notification filters to group low-priority alerts, such as battery warnings, separately from smoke alerts.
- Leverage Voice Commands: Ask your voice assistant to check detector status or mute alarms during cooking without ladders.
- Combine with Home Automation: Link triggers—when an alarm goes off, turn on all lights via your smart light switches and unlock smart locks for safe escape.
- Monitor Carbon Monoxide: Choose dual-sensor units to cover both smoke and CO, especially near bedrooms.
- Optimize Wi-Fi Coverage: Install a mesh network or Wi-Fi extender to ensure stable connectivity in all detector locations.
- Keep Firmware Current: Enable automatic updates when available to maintain security and features.
- Document Installation Locations: Create a simple floor plan with detector positions—useful for maintenance and emergency services.
- Test with Realistic Scenarios: Use canned smoke tests or CO test kits to verify sensor accuracy annually.
- Consider Backup Power: For hardwired systems, ensure battery backup is fresh and replaceable; for battery-only units, stock extra batteries.
Conclusion
Upgrading to a smart smoke detector with Wi-Fi connectivity delivers round-the-clock monitoring and instant mobile alerts, significantly enhancing home safety. By evaluating coverage needs, selecting the right features, and following a structured installation process, you’ll ensure reliable performance. Remember to test monthly, update firmware, and integrate your alarms with other smart home devices for a truly connected safety solution. Ready to choose your ideal unit? Browse top models like Nest Protect or First Alert Onelink on Amazon to start protecting your home today. Shop smart smoke alarms.